
As I stood in my kitchen, the inviting aroma of baked taquitos started to fill the air, instantly transporting me to a vibrant Mexican market. These Crispy Chicken Taquitos are not just a treat for the taste buds, but they also make for a quick weeknight dinner solution or a show-stopping appetizer for gatherings. With their delightful crunch and creamy, spiced filling, they’re incredibly customizable—think flour or corn tortillas, and even gluten-free options if that’s your jam! Whether you’re cooking for yourself or a crowd, these taquitos will win hearts and stomachs, promising both satisfaction and smiles. Ready to dive into a homemade fiesta? Let’s bring a taste of Mexico into your kitchen!
Why Are Crispy Chicken Taquitos So Irresistible?
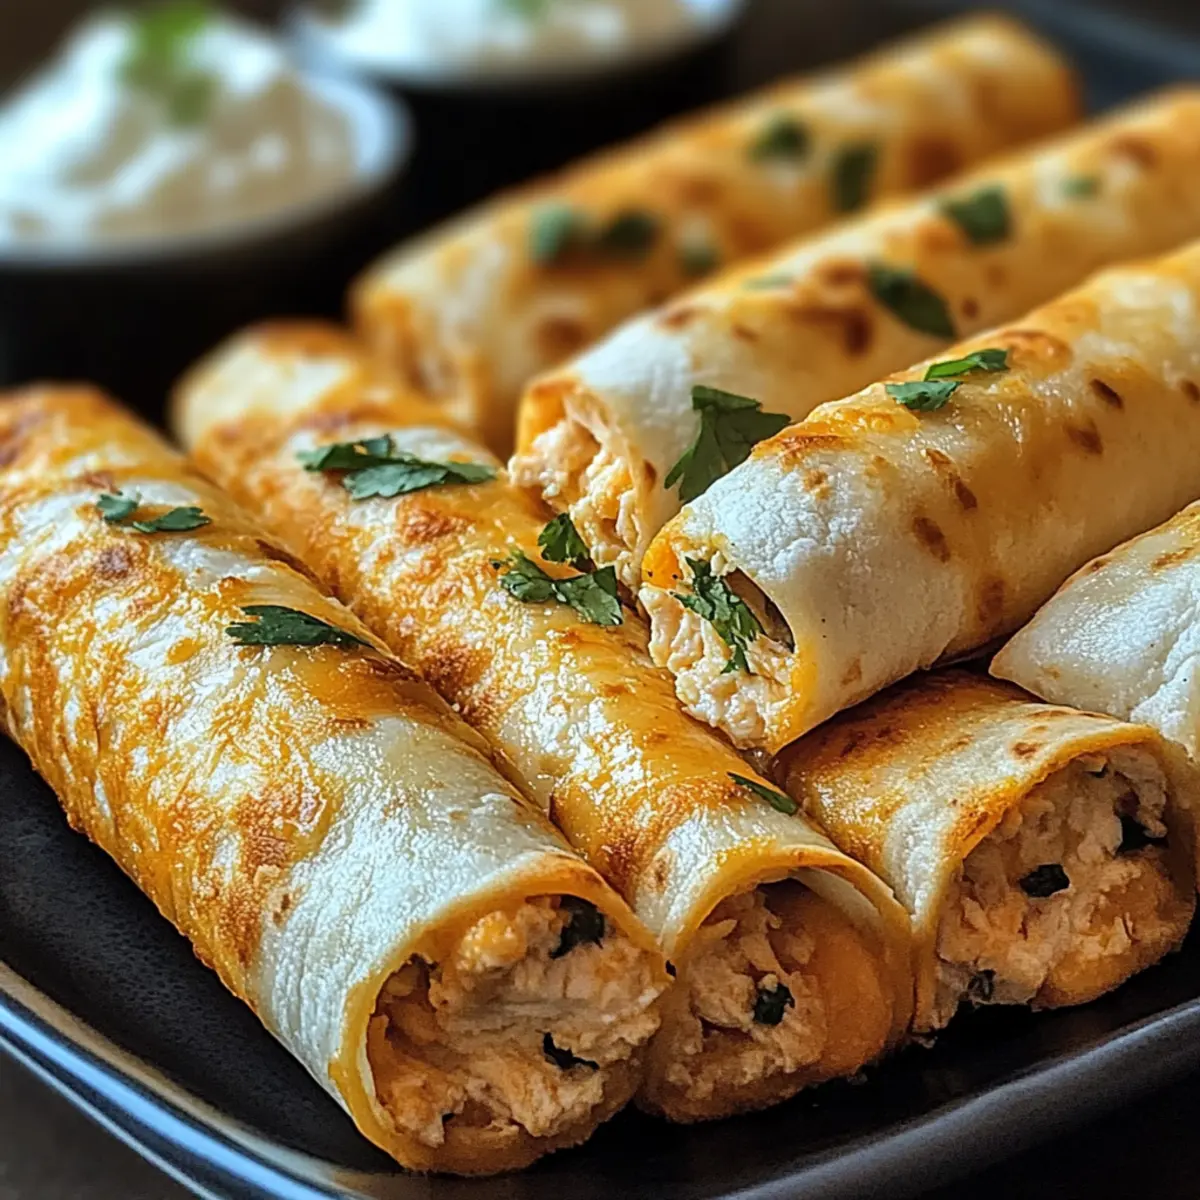
Crispy Texture: Each bite offers a satisfying crunch that beautifully contrasts with the creamy filling, making these taquitos hard to resist.
Quick and Easy: This recipe comes together in no time, perfect for busy weeknights or last-minute gatherings.
Customized for Everyone: Whether you prefer corn or flour tortillas, you can easily adapt these taquitos to meet dietary preferences, including gluten-free options.
Crowd-Pleasing Delight: Serve them as appetizers at your next party, and watch as they disappear before your eyes!
Flavorful Filling: The combination of spiced chicken and creamy cheese results in a mouthwatering taste that keeps everyone coming back for more.
Pair these with your favorite salsa, or consider serving alongside delicious options like Garlic Parmesan Chicken for a feast that truly impresses!
Crispy Chicken Taquitos Ingredients
• Note: Gather these ingredients to create your own batch of delicious, customizable Crispy Chicken Taquitos!
For the Filling
• Cooked Shredded Chicken – Provides protein and heartiness to the filling; use rotisserie chicken for added flavor and convenience.
• Cream Cheese – Adds a creamy, rich texture; make sure it’s softened for easy mixing.
• Shredded Cheese (Cheddar or Mexican Blend) – Contributes cheesy flavor and texture; feel free to swap with lower-fat cheese if desired.
• Salsa – Imparts moisture and flavor; choose mild or spicy based on your taste.
• Garlic Powder – Enhances the overall flavor; can be replaced with one clove of fresh minced garlic.
• Chili Powder – Adds warmth and a pop of color; adjust the amount for your preferred spice level.
• Cumin – Offers an earthy, aromatic note; optional for a richer flavor profile.
• Salt and Black Pepper – Essential seasonings; adjust them to taste.
For the Wrap
• Tortillas (Flour or Corn) – The essential wrapping for the filling; opt for corn tortillas for a gluten-free option. Warm them slightly to ensure they don’t crack.
• Cooking Spray or Oil – Helps achieve a crispy finish; can substitute with vegetable oil for brushing.
Step‑by‑Step Instructions for Crispy Chicken Taquitos
Step 1: Preheat Your Oven
Begin by preheating your oven to 425°F (220°C). While the oven heats up, prepare a baking sheet by lining it with parchment paper or lightly greasing it to ensure your taquitos come out perfectly crisp. This initial step sets the foundation for achieving that desired golden-brown finish on your Crispy Chicken Taquitos.
Step 2: Mix the Filling
In a large mixing bowl, combine the cooked shredded chicken, softened cream cheese, shredded cheese, and salsa. Add the garlic powder, chili powder, cumin, salt, and black pepper to taste. Use a fork or spatula to thoroughly mix these ingredients until well combined and creamy. This filling will provide the luscious heart of your Crispy Chicken Taquitos.
Step 3: Prepare the Tortillas
Warm the tortillas in the microwave for about 20 seconds to enhance their pliability, which prevents cracking while rolling. Keeping the tortillas soft is crucial for wrapping them around the flavorful filling. Choose either flour or corn tortillas based on your preference or dietary needs, making this recipe truly customizable.
Step 4: Fill the Tortillas
Spoon 2–3 tablespoons of the chicken filling onto one end of each warmed tortilla. Roll them tightly, folding in the sides as you go to create a neat taquito. As you roll, make sure to keep the filling snug inside to prevent spills. This step transforms simple ingredients into enticing Crispy Chicken Taquitos ready for baking.
Step 5: Arrange on Baking Sheet
Place the rolled taquitos seam-side down on the prepared baking sheet, ensuring they’re spaced apart to allow for even cooking. This arrangement helps them crisp up nicely without sticking together. Each crispy roll should be visible and ready to transform in the oven, promising that satisfying crunch you crave.
Step 6: Prepare for Baking
Lightly brush the tops of the taquitos with cooking spray or a drizzle of oil, enhancing their crispiness during baking. This step is crucial for achieving that perfect golden color and texture. The aroma of the Crispy Chicken Taquitos will start to fill your kitchen as they bake, building anticipation for the delicious bites ahead.
Step 7: Bake to Perfection
Bake the taquitos in your preheated oven for 15–20 minutes, or until they turn golden brown and crispy. Keep an eye on them as they bake, and if you desire an extra layer of crispiness, switch to broil for 1–2 minutes at the end. The transformation from soft rolls to crispy delights is truly satisfying.
Step 8: Serve and Enjoy
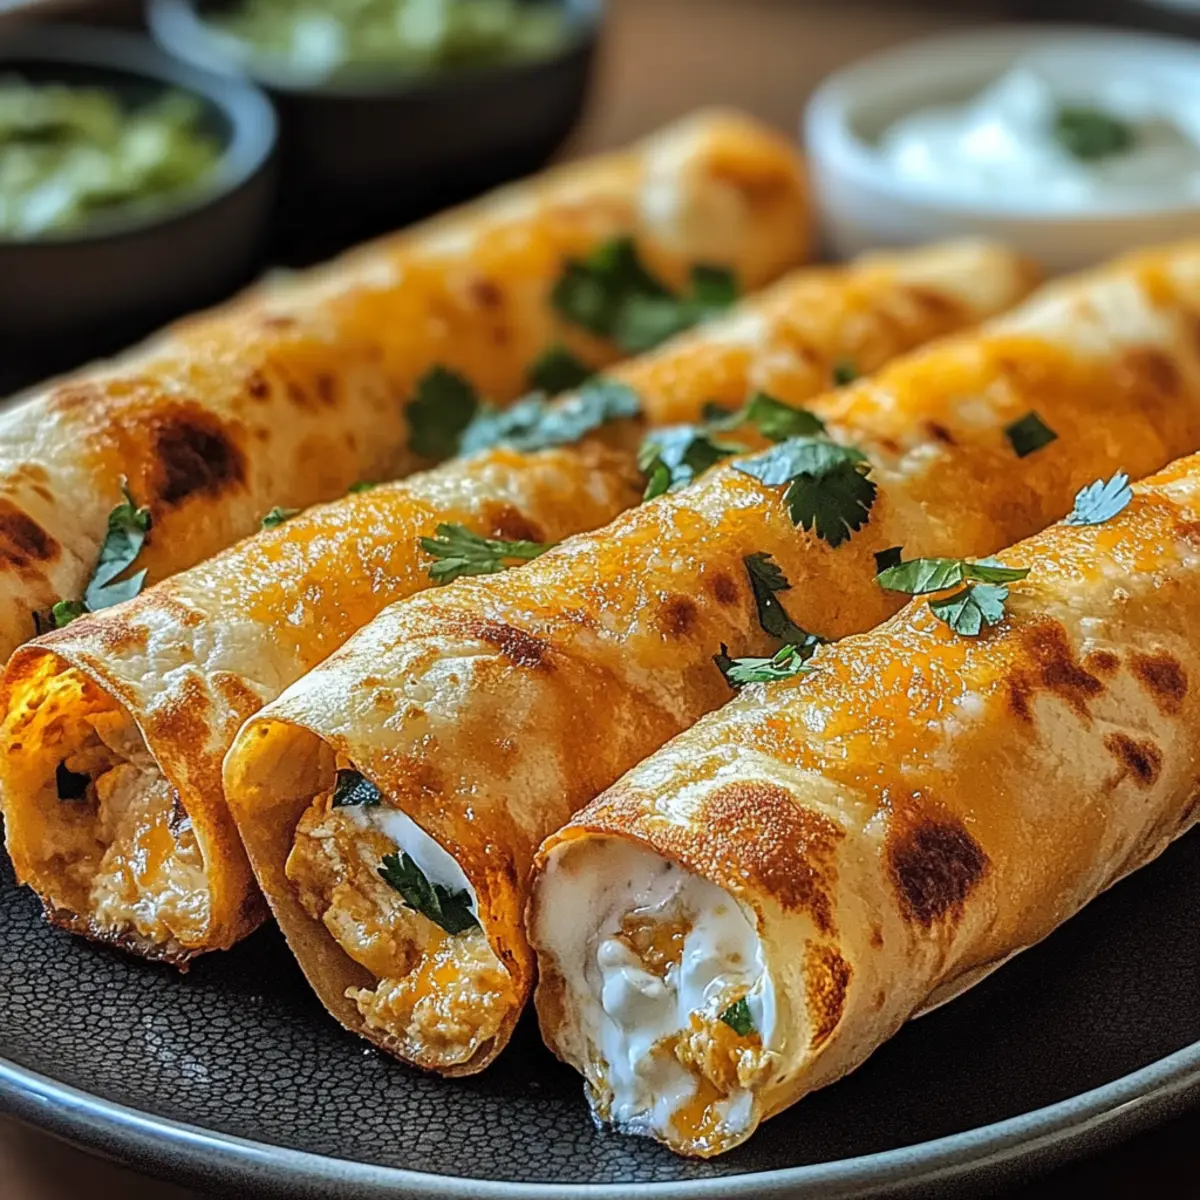
Once baked, remove the Crispy Chicken Taquitos from the oven and let them cool slightly before serving. Pair them with your favorite toppings, such as sour cream, guacamole, or extra cheese. This step elevates your taquito experience, making it a delightful appetizer or snack that brings warmth and joy to your table.
Crispy Chicken Taquitos Variations & Substitutions
Feel free to make these Crispy Chicken Taquitos your own with these exciting twists and substitutes that will tantalize your taste buds!
- Spicy Kick: Add diced jalapeños to the filling for that extra kick of heat.
- Protein Swap: Use shredded beef, beans, or even diced zucchini for a vegetarian twist.
- Herb Infusion: Toss in fresh cilantro or green onions to enhance the flavor profile.
- Cheese Variety: Experiment with different cheeses, such as pepper jack for a spicy touch or a blend for depth.
- Salsa Selection: Switch up the salsa for varied flavors—try pineapple salsa for a sweet contrast!
- Crispy Finish: If you love crunch, consider air frying at 400°F for 8-10 minutes, flipping halfway, for a lighter option.
- Dipping Sauces: Customize your experience by pairing with chipotle mayo or spiced yogurt for delightful dipping.
- Tortilla Type: Feel free to substitute flour tortillas with corn for a gluten-free version, keeping things inclusive!
Have fun with these variations! Not only will they personalize your taquitos, but you can also enjoy them with other delightful recipes like Sticky Garlic Chicken or French Onion Chicken for a unique meal experience!
Expert Tips for Crispy Chicken Taquitos
-
Warm Tortillas: Before filling, warm your tortillas in the microwave to prevent cracking. This simple step makes rolling much easier and ensures perfect crispy chicken taquitos.
-
Tight Rolls: Roll your taquitos tightly, tucking in the sides as you go. This aids in keeping the filling intact during baking, achieving a delightful crunch in every bite.
-
Try Different Fillings: Feel free to experiment with variations! Switch out the chicken for shredded beef, beans, or even a veggie medley. This makes your crispy chicken taquitos adaptable and fun.
-
Check for Crispiness: Bake until golden brown, and for an extra crispy finish, consider broiling for the last couple of minutes. Keep an eye on them to avoid burning!
-
Make-Ahead Option: Prepare your taquitos a day in advance by assembling and refrigerating them. You can bake straight from the fridge, just add a few extra minutes to ensure they’re heated through.
-
Choosing Cheese: Experiment with different types of cheese in your filling. While cheddar is classic, a spicy pepper jack adds a delightful kick to your crispy chicken taquitos!
What to Serve with Crispy Chicken Taquitos
Pair your Crispy Chicken Taquitos with delightful sides that enhance their flavors and create a complete meal experience.
-
Creamy Guacamole: The fresh, buttery taste of avocados brings richness and a fresh contrast that complements every crunchy taquito.
-
Zesty Mexican Rice: This flavorful side dish adds a warm, hearty element to your meal, providing perfect balance alongside the taquitos.
-
Black Bean Salad: A vibrant mix of black beans, corn, and peppers brings a crisp and refreshing texture to round out your taquito feast.
-
Sour Cream Drizzle: A dollop of tangy sour cream introduces a creamy element that cuts through the richness while enhancing each bite.
-
Fresh Pico de Gallo: This zesty salsa of diced tomatoes, onions, and cilantro adds a bright, fresh burst of flavor that elevates the whole dish.
-
Crispy Tortilla Chips: Serve with your favorite salsa for a satisfying crunch that pairs deliciously with the creamy interior of the taquitos.
-
Chilled Agua Fresca: A refreshing drink option, such as agua de jamaica, provides a cool contrast to the crispy warmth and spice of your taquitos.
How to Store and Freeze Crispy Chicken Taquitos
Fridge: Store baked taquitos in an airtight container for up to 3 days. Reheat in the oven at 350°F (175°C) for about 10 minutes until warm and crispy.
Freezer: For longer storage, freeze unbaked taquitos on a baking sheet until firm, then transfer to a freezer bag for up to 3 months. Bake from frozen, adding approximately 5-10 minutes to the total baking time.
Reheating: To maintain crispiness, reheat cooked taquitos in the oven instead of the microwave. This keeps their delightful crunch intact, ensuring that every bite of your crispy chicken taquitos remains satisfying.
Make-Ahead: You can prepare the taquitos a day ahead and refrigerate them unbaked. Just pop them in the oven when you’re ready to enjoy, making for a hassle-free meal anytime!
Make Ahead Options
These Crispy Chicken Taquitos are perfect for meal prep enthusiasts! You can assemble the taquitos and refrigerate them for up to 24 hours before baking, ensuring they’re ready to pop in the oven when hunger strikes. To maintain their delicious crunch, be sure to seal them well in an airtight container. If you want to prep even further in advance, you can freeze them for up to 3 months; just ensure they’re well-wrapped in plastic wrap and aluminum foil. When you’re ready to enjoy, bake them straight from the freezer, adding an extra few minutes to the cooking time. With this make-ahead option, you’ll have a tasty homemade snack or meal at your fingertips!
Crispy Chicken Taquitos Recipe FAQs
What type of chicken should I use for the filling?
I recommend using cooked shredded chicken for the filling, and rotisserie chicken is a fantastic choice due to its flavor and convenience. If you prefer to cook your chicken, poach or bake it in seasoned water or broth until fully cooked, then shred it.
How should I store leftover Crispy Chicken Taquitos?
Store any leftover baked taquitos in an airtight container in the fridge for up to 3 days. I suggest reheating them in the oven at 350°F (175°C) for about 10 minutes. This method helps maintain their delicious crispiness!
Can I freeze taquitos for later use?
Absolutely! To freeze, arrange the unbaked taquitos on a baking sheet and freeze them until firm. Transfer the frozen taquitos to a freezer bag for up to 3 months. When ready to enjoy, bake them directly from frozen, adding 5-10 extra minutes to the baking time.
What should I do if my tortillas keep cracking?
To prevent cracking, ensure you warm the tortillas in the microwave for about 20 seconds before filling. This makes them more pliable and easier to roll. If you have thicker tortillas and they still crack, try adding a small amount of water to the bottom of the microwave when warming them to create steam, which softens them further.
Are there any allergy considerations with this recipe?
Yes! If you’re serving these Crispy Chicken Taquitos to guests with dietary restrictions, remember that both cream cheese and shredded cheese may contain dairy allergens. Consider using dairy-free alternatives for both ingredients to accommodate those with lactose intolerance or dairy allergies. Additionally, if using corn tortillas, ensure they are labeled gluten-free for those with gluten sensitivities.
Can I customize the filling for a vegetarian option?
Certainly! To make a vegetarian version, simply swap the chicken for a mix of sautéed vegetables like zucchini, mushrooms, or black beans. You can also add corn for sweetness and a bit of diced jalapeños for heat. Just make sure to adjust seasoning accordingly!
Crispy Chicken Taquitos: Effortless Flavor in Every Bite
Ingredients
Equipment
Method
- Preheat your oven to 425°F (220°C) and prepare a baking sheet with parchment paper or oil.
- In a large bowl, mix the shredded chicken, cream cheese, shredded cheese, and salsa. Add garlic powder, chili powder, cumin, salt, and pepper. Mix until creamy.
- Warm tortillas in the microwave for about 20 seconds to enhance pliability.
- Spoon 2–3 tablespoons of chicken filling onto one end of each tortilla. Roll tightly and fold in sides.
- Place the rolled taquitos seam-side down on the baking sheet, spaced apart.
- Brush the tops of the taquitos with cooking spray or oil.
- Bake for 15–20 minutes or until golden brown and crispy. Optionally, broil for 1-2 minutes for extra crispiness.
- Let cool slightly before serving with toppings like sour cream or guacamole.
Leave a Reply