
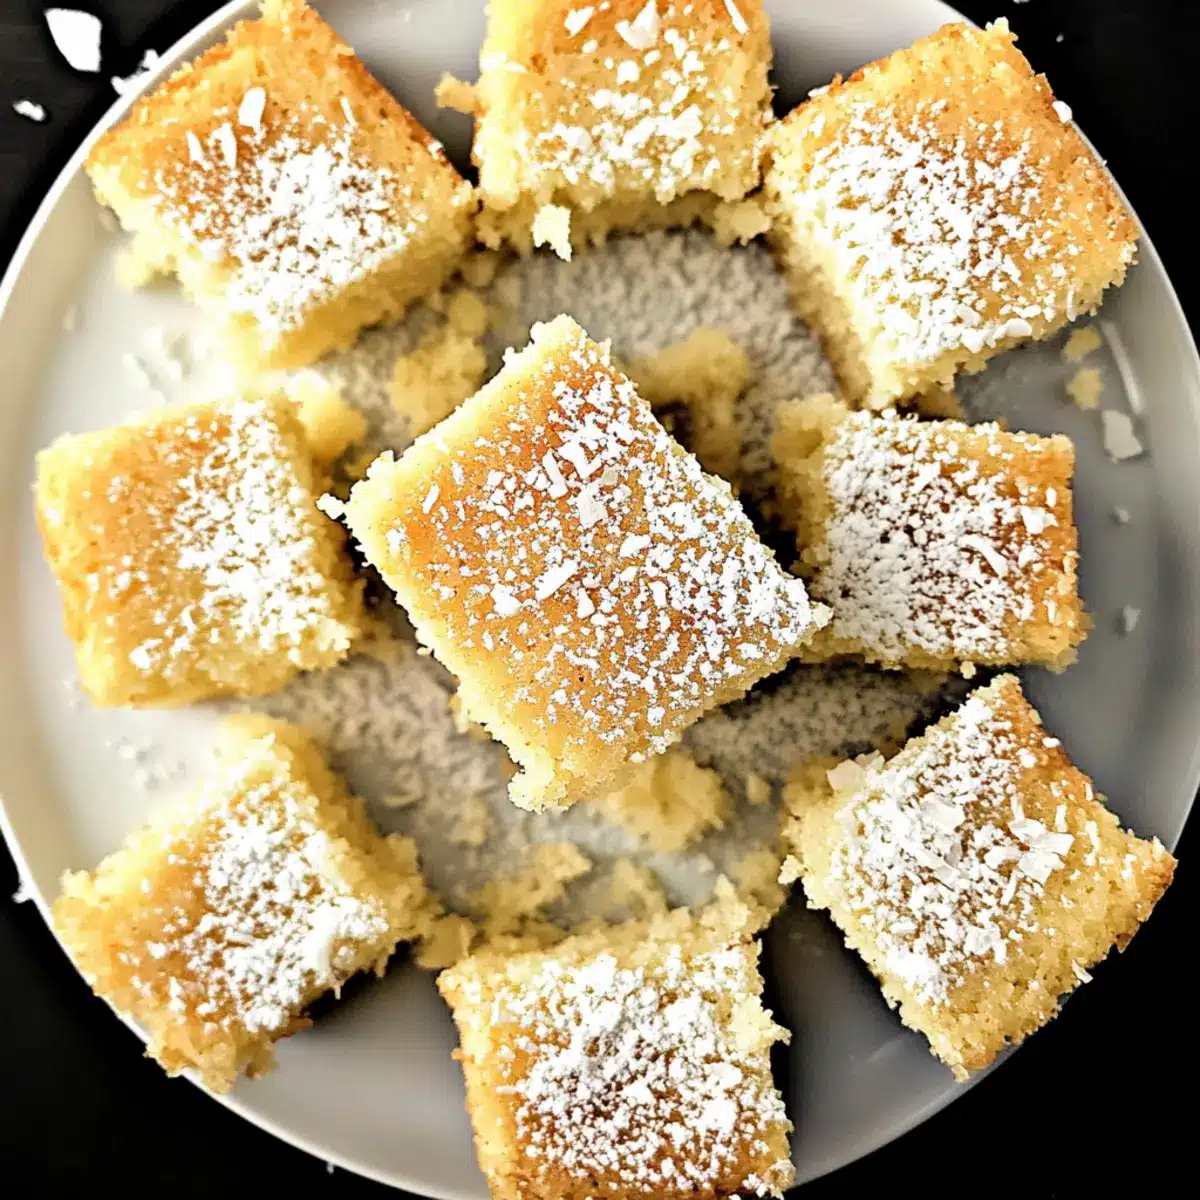
As I wandered through the bustling farmer’s market last weekend, the sweet aroma of fresh coconut caught my attention. It beckoned me to try my hand at creating something delightful. Enter the Coconut Milk Snack Cake, a quick and easy dessert that transports your taste buds to a tropical paradise. This tender cake, with its soft golden crust and mild coconut flavor, is perfect for those moments when you crave something light and satisfying. Plus, it requires no mixer—making cleanup a breeze! Ideal for after-school snacks, coffee breaks, or even care packages, this cake is a versatile must-have in your recipe collection. Curious about how to whip up this simple yet delicious treat? Let’s dive into the recipe!
Why is Coconut Milk Snack Cake a must-try?
Simplicity: This recipe requires minimal ingredients and no mixer, making it quick and hassle-free.
Tropical Delight: Enjoy a light, coconut-flavored treat that brings warm beach vibes right to your kitchen.
Versatile: Perfect for snacks, coffee breaks, or even care packages, this cake fits any occasion seamlessly.
Light Yet Satisfying: Its fluffy texture and subtle sweetness create an enticing dessert that won’t weigh you down.
Creative Possibilities: Feel free to add variations such as pineapple or gluten-free options to suit your taste! Check out this Moist Carrot Cake for more delicious ideas.
Coconut Milk Snack Cake Ingredients
For the Batter
• Unsweetened coconut milk, canned – 1 cup for moisture and delightful coconut flavor; ensure it’s well-mixed for the best texture.
• Coconut oil, melted – ¼ cup adds richness and moisture; can substitute with melted butter if needed.
• Large eggs – 2 bind the ingredients together and assist in leavening; no vegan substitutes provided.
• Granulated sugar – 1 cup sweetens the cake and provides structural support; coconut sugar is a healthier alternative.
• Vanilla extract – ½ tablespoon enhances flavors and adds a lovely aroma; pure vanilla will give you the best results.
• All-purpose flour – 1 ¼ cups forms the cake’s structure; consider gluten-free flour but expect varied results.
• Unsweetened shredded coconut – ½ cup adds texture and extra coconut flavor; avoid large flakes for even consistency.
• Baking powder – ¾ teaspoon is essential for the cake’s rise; check for freshness to avoid a dense cake.
For the Finishing Touch
• Confectioners’ sugar (optional) – 2 tablespoons for a sweet dusting and decorative finish; completely up to your taste preference!
Experience the sumptuous vibe of a Coconut Milk Snack Cake as you prepare to delight friends and family with this easy recipe!
Step‑by‑Step Instructions for Coconut Milk Snack Cake
Step 1: Preheat and Prepare
Begin by preheating your oven to 375°F (190°C). While it warms up, grab an 8×8 inch baking pan and grease it generously with coconut oil or cooking spray. If you’re planning to send this Coconut Milk Snack Cake to a friend, consider using a disposable foil pan for ease of shipping.
Step 2: Mix the Wet Ingredients
In a medium bowl, thoroughly combine 1 cup of canned unsweetened coconut milk with ¼ cup of melted coconut oil. To achieve the right texture, whisk these ingredients until the mixture is smooth and well-blended. Next, add in the 2 large eggs and 1 cup of granulated sugar, along with ½ tablespoon of vanilla extract, ensuring everything is seamlessly integrated.
Step 3: Combine the Dry Ingredients
In a separate large bowl, whisk together 1 ¼ cups of all-purpose flour, ½ cup of unsweetened shredded coconut, and ¾ teaspoon of baking powder. This combination will provide the structure your Coconut Milk Snack Cake needs. Make sure to mix these dry ingredients well to allow for even distribution of the baking powder.
Step 4: Incorporate Wet and Dry Mixtures
Pour the dry mixture into the bowl with the wet ingredients and gently stir until just combined. Be careful not to overmix, as this can lead to a dense cake. Your batter should look thick yet pourable, with a few small lumps remaining—this is just perfect for a tender Coconut Milk Snack Cake.
Step 5: Bake the Cake
Once your batter is ready, pour it into the prepared baking pan and use a spatula to even out the top. Slide it into your preheated oven and bake for 30-40 minutes. Watch for a golden brown top, and insert a toothpick into the center; it should come out clean when the cake is fully baked.
Step 6: Cool and Serve
After baking, remove the Coconut Milk Snack Cake from the oven and allow it to cool in the pan on a wire rack for about 15-20 minutes. Once cooled completely, slice the cake into squares. For an extra touch, you can dust the top with 2 tablespoons of confectioners’ sugar before serving, if desired.
What to Serve with Coconut Milk Snack Cake
Imagine a delightful table spread that enchants your senses, bringing together flavors and textures that elevate your coconut cake experience.
- Fresh Tropical Fruit: A vibrant mix of mango, pineapple, and berries adds fresh, bright notes that perfectly complement the coconut flavors.
- Creamy Yogurt: A dollop of coconut or vanilla yogurt creates a rich, velvety contrast to the tender cake, enhancing each bite’s indulgence.
- Chai or Mint Tea: Sip on fragrant chai or refreshing mint tea to explore the warm spices or coolness that balance the cake’s sweetness beautifully.
- Chocolate Drizzle: For those craving a little more decadence, a light drizzle of dark chocolate adds a luscious element, turning the cake into a special dessert.
- Lemon Sorbet: The bright acidity of lemon sorbet refreshes your palate, making each slice of cake a delightful treat after a warm day.
- Pineapple Salsa: A zesty pineapple salsa brightens the rich cake experience, with a hint of spice that brings it all to life.
These delightful pairings not only enhance the flavors of the Coconut Milk Snack Cake but also create a feast for the senses!
Tips for the Best Coconut Milk Snack Cake
-
Blend Coconut Milk: Thoroughly blend or whisk the coconut milk before use to ensure a smooth batter; improperly blended milk can lead to a dense cake.
-
Use Full-Fat Coconut Milk: Opt for full-fat coconut milk for the best moisture level; low-fat versions may result in a drier cake.
-
Don’t Overmix: When combining wet and dry ingredients, stir until just combined. Overmixing can cause the cake to become tough instead of tender.
-
Watch Baking Time: Keep an eye on the cake while it bakes; ovens can vary, and testing with a toothpick will ensure it’s perfectly cooked without being dry.
-
Cool Completely: Allow the Coconut Milk Snack Cake to cool completely in the pan before slicing to improve texture and flavor while making cutting easier.
-
Storing Tips: If you’re packing it for care packages, place the uncut cake in a disposable pan and wrap securely to maintain freshness.
Coconut Milk Snack Cake Variations
Feel free to get creative with your Coconut Milk Snack Cake and make it uniquely yours!
- Enhanced Flavor: Add 1 teaspoon coconut extract for an even richer coconut flavor that transports you to the tropics.
- Fruitier Twist: Fold in 1 cup diced pineapple or your favorite fruit to the batter; the sweetness complements the coconut beautifully.
- Gluten-Free Version: Swap in 1 ¼ cups gluten-free flour; this may change the texture but will keep it deliciously moist.
- Nutty Crunch: Mix in ½ cup chopped walnuts or pecans for a delightful crunch that contrasts with the tender cake.
- Chocolate Delight: Stir in ½ cup chocolate chips for a fun and indulgent twist, elevating your cake to dessert status.
- Zesty Surprise: Add zest of one lemon or lime to brighten the flavor and add a lovely citrus note that pairs nicely with coconut.
- Spicy Kick: Introduce ¼ teaspoon cayenne pepper or ground ginger for a surprising touch of warmth that dances on your palate.
- Frosting Alternative: Top with a light dusting of toasted shredded coconut or a drizzle of warm chocolate sauce instead of traditional frosting.
Feel inspired? While you’re at it, check out my Baked Cod Coconut for a savory twist on coconut, or indulge in a slice of Butter Pecan Cake that’s sure to please!
Make Ahead Options
These Coconut Milk Snack Cakes are perfect for meal prep enthusiasts, saving you time on busy days! You can mix the wet ingredients (coconut milk, coconut oil, eggs, sugar, and vanilla) and store them in the refrigerator for up to 24 hours. Additionally, whisk the dry ingredients (flour, shredded coconut, and baking powder) and keep them in an airtight container to maintain freshness for up to 3 days. When you’re ready to bake, simply combine both mixtures and bake as instructed. To ensure the best texture and flavor, remember to allow the cake to cool completely before storing, keeping it in a tightly sealed container. You’ll have a delightful treat ready to enjoy with minimal effort!
Storage Tips for Coconut Milk Snack Cake
Room Temperature: Store the cake covered at room temperature for up to 3 days to maintain its soft texture.
Fridge: If you’re in a warm environment, place it in an airtight container in the fridge for up to 5 days, keeping it moist and delicious.
Freezer: For longer storage, you can freeze the Coconut Milk Snack Cake wrapped tightly in plastic wrap and aluminum foil for up to 3 months.
Reheating: To enjoy leftovers, simply microwave a slice for about 10-15 seconds or warm in the oven at 350°F (175°C) for a few minutes until heated through.
Coconut Milk Snack Cake Recipe FAQs
How do I choose the right coconut milk?
Absolutely! For the best results, opt for full-fat canned coconut milk that is well-mixed. This ensures a rich flavor and creamy texture, making your Coconut Milk Snack Cake moist and delightful. Avoid light or low-fat versions, as they can lead to a drier cake.
How should I store my Coconut Milk Snack Cake?
You can store the cake at room temperature covered for up to 3 days, which helps maintain its soft texture. If you’re in a warmer environment, transfer it to an airtight container and keep it in the fridge for up to 5 days. This way, it stays deliciously moist!
Can I freeze Coconut Milk Snack Cake, and how?
Very! To freeze, wrap the uncut Coconut Milk Snack Cake tightly in plastic wrap and then again in aluminum foil to prevent freezer burn. It will stay fresh for up to 3 months. When you’re ready to enjoy, let it thaw in the fridge overnight and reheat in the microwave or oven for a cozy treat!
What if my cake turns out dense or flat?
If your Coconut Milk Snack Cake is dense, check that you thoroughly blended the coconut milk before mixing; bits of unblended milk can lead to a heavier texture. For flatness, ensure your baking powder is fresh and that you didn’t overmix the batter, as this can hinder the cake’s rise.
Are there any dietary considerations for pets or allergies?
Absolutely! Since this recipe contains eggs and coconut, be cautious around pets, especially since coconut is safe but should be offered in moderation. If allergies are a concern, consider substituting with ingredients tailored to dietary needs, keeping in mind that this cake is not vegan due to the eggs. If you need a vegan option, please enjoy a different recipe!
Can I add any other flavors to this cake?
Definitely! For an exciting twist, you can add ½ to 1 teaspoon of coconut extract for a more pronounced coconut flavor. You may also experiment by incorporating fruits like pineapple or mango to introduce new layers of flavor—just balance the moisture with the shredded coconut to keep it from becoming too wet!
Coconut Milk Snack Cake: Your New Favorite Easy Treat
Ingredients
Equipment
Method
- Preheat your oven to 375°F (190°C) and grease an 8x8 inch baking pan generously with coconut oil or cooking spray.
- In a medium bowl, whisk together 1 cup of canned unsweetened coconut milk and 1/4 cup of melted coconut oil until smooth. Add 2 large eggs and 1 cup of granulated sugar along with 1/2 tablespoon of vanilla extract.
- In a separate large bowl, whisk 1 1/4 cups of all-purpose flour, 1/2 cup of unsweetened shredded coconut, and 3/4 teaspoon of baking powder.
- Pour the dry mixture into the bowl with the wet ingredients and stir gently until just combined, being careful not to overmix.
- Pour the batter into the prepared baking pan and bake for 30-40 minutes, or until a toothpick inserted comes out clean.
- Allow the cake to cool in the pan for about 15-20 minutes, then slice into squares and dust with confectioners' sugar if desired.
Leave a Reply