
As the warm, inviting scent of baked bread fills the kitchen, my heart lights up with nostalgia. There’s something magical about making Homemade Crescent Rolls that transports me back to family gatherings, where laughter mingled with the aroma of buttery goodness. These rolls are not just fluffy and soft; they become the centerpiece of every meal, transforming simple dinners into memorable feasts. With their easy-to-follow recipe, you can impress your loved ones without feeling overwhelmed. Whether it’s a holiday celebration or a cozy Sunday dinner, these rolls serve as a delightful reminder that the best meals are made from scratch. Plus, their versatility means you can experiment with shapes and fillings, adding your own creative flair. Are you ready to roll up your sleeves and create these delightful treats?
Why Are Homemade Crescent Rolls a Must?
Freshness at its Finest: There’s nothing quite like the aroma of homemade crescent rolls baking in your oven, transforming your kitchen into a hub of warmth and comfort.
Endless Versatility: Shape them as you like—traditional crescents or even round dinner rolls for variety.
Perfect for Any Occasion: These rolls are ideal for holiday feasts, casual dinners, or even breakfast paired with jam or honey.
A Total Showstopper: Impress your guests with these fluffy, buttery delights that complement any meal perfectly.
Quick and Easy: Minimal ingredients and simple steps mean you can whip these up without breaking a sweat.
For additional inspiration, you might enjoy exploring these Pie Crescent Rolls or consider a sweet breakfast option with Homemade Granola Bars!
Homemade Crescent Rolls Ingredients
For the Dough
- Warm Water – activates the yeast; ensure it’s about 110°F for the best bloom.
- Yeast – provides leavening; using instant dry yeast gives you a quicker rise.
- Unsalted Butter – brings richness; use it softened to ensure a smooth mixture.
- Granulated Sugar – sweetens the dough; feel free to adjust for taste.
- Large Eggs – adds moisture and structure; room temperature eggs mix better.
- Warm Milk – enhances tenderness; also aim for 110°F to nourish the yeast.
- Salt – elevates flavor; regulates yeast activity for a nice rise.
- All-Purpose Flour – the foundation for structure; about 5 to 5½ cups may be needed based on consistency.
For Finishing
- Melted Butter – brushing on top before serving adds flavor and keeps the rolls moist.
With these ingredients, you’re on your way to creating incredible Homemade Crescent Rolls that will undoubtedly steal the show at any meal!
Step‑by‑Step Instructions for Homemade Crescent Rolls
Step 1: Activate Yeast
Begin by stirring 2 teaspoons of yeast into 1/4 cup of warm water (110°F). Let it bloom for about 5 minutes, or until frothy and bubbly, indicating that your yeast is lively and ready to work its magic in your homemade crescent rolls.
Step 2: Prepare Dough
In a large mixing bowl, cream together 1/2 cup of softened unsalted butter and 1/4 cup of granulated sugar until smooth. Next, add 2 room-temperature eggs, 1 cup of warm milk (also around 110°F), and 1 teaspoon of salt, then mix in the bloomed yeast. Gradually incorporate around 4 cups of all-purpose flour until the mixture starts pulling away from the sides.
Step 3: Knead Dough
Transfer your dough to a floured surface or use a stand mixer with a dough hook on medium speed. Knead for about 5 minutes, adding additional flour as needed, until you achieve a soft, sticky consistency that is elastic and smooth, giving your homemade crescent rolls the ideal texture.
Step 4: First Rise
Once kneaded, place your dough into a greased bowl and cover it with a clean cloth. Allow it to rise in a warm environment for 30 to 45 minutes, or until it has doubled in size, puffing up beautifully—a sign that your dough is ready for the next step.
Step 5: Shape Rolls
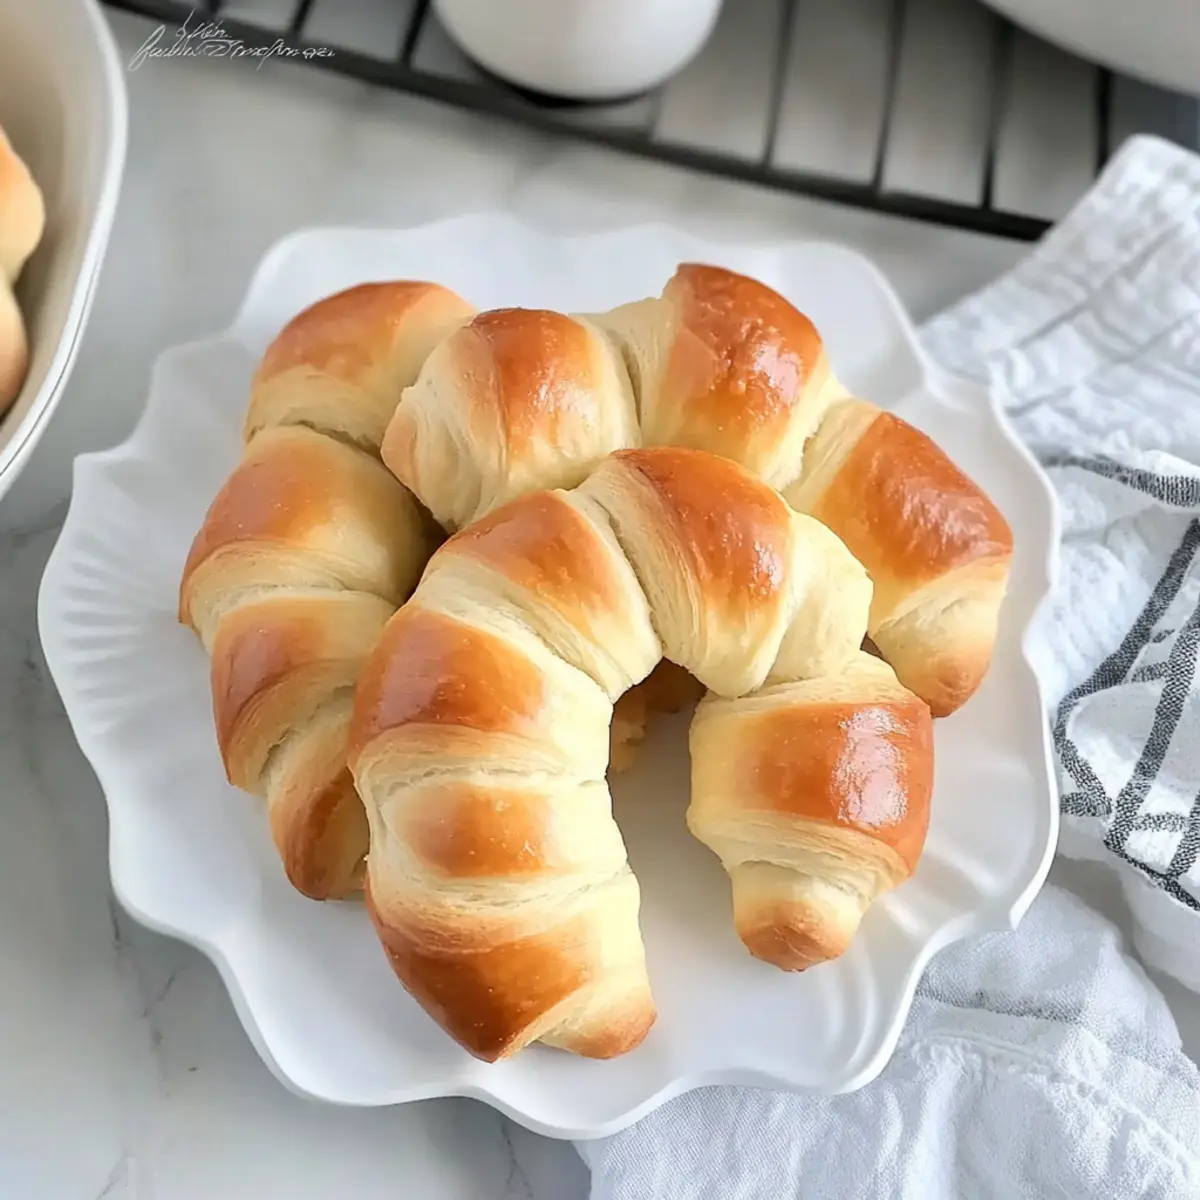
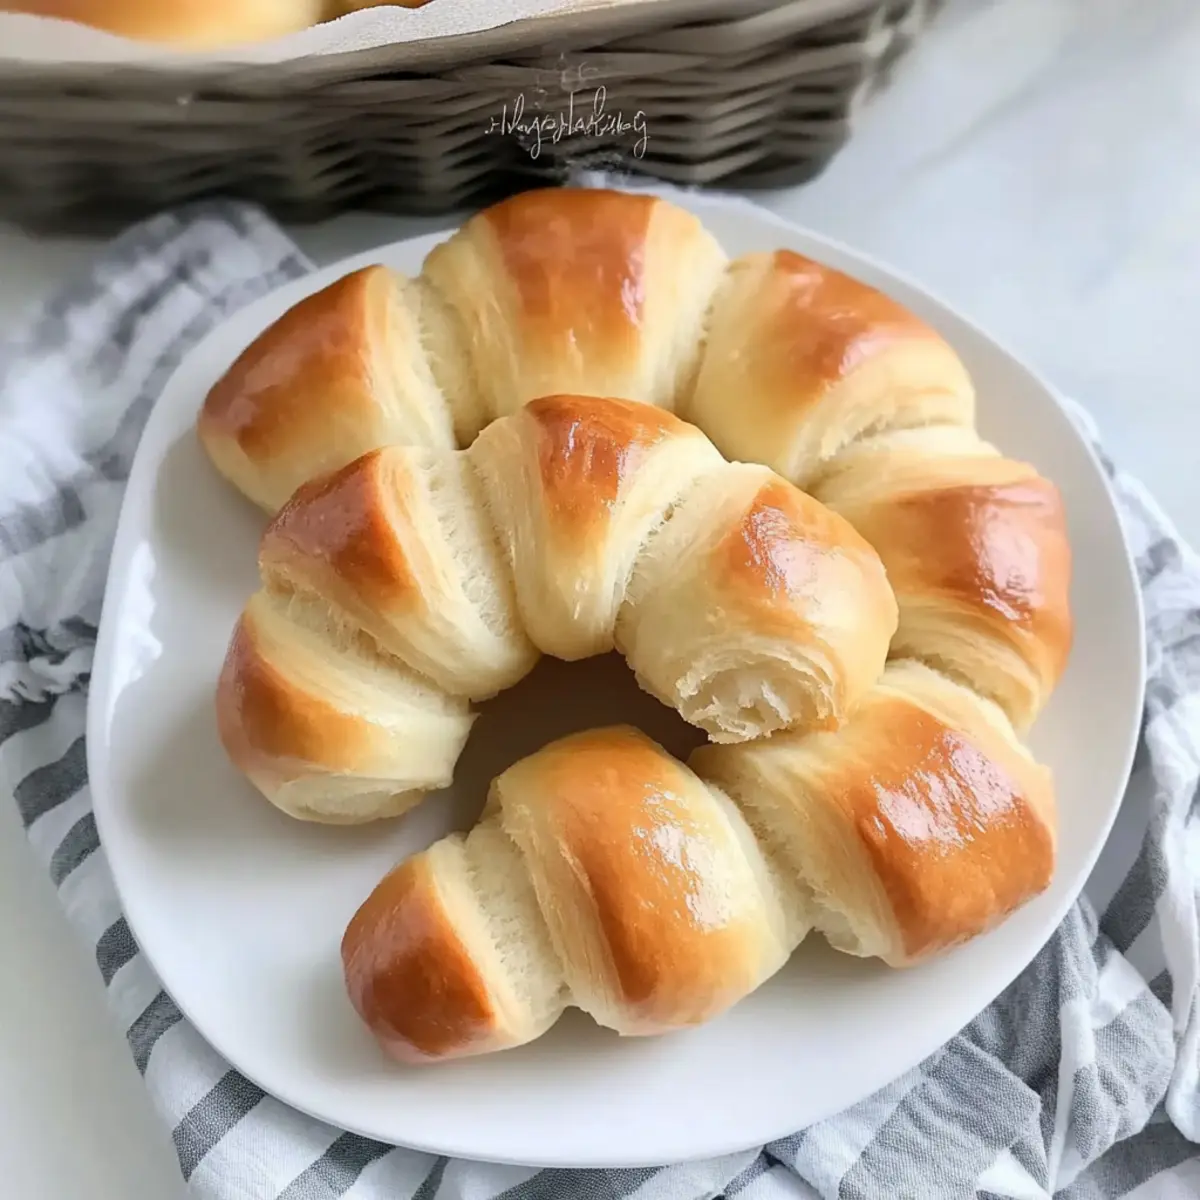
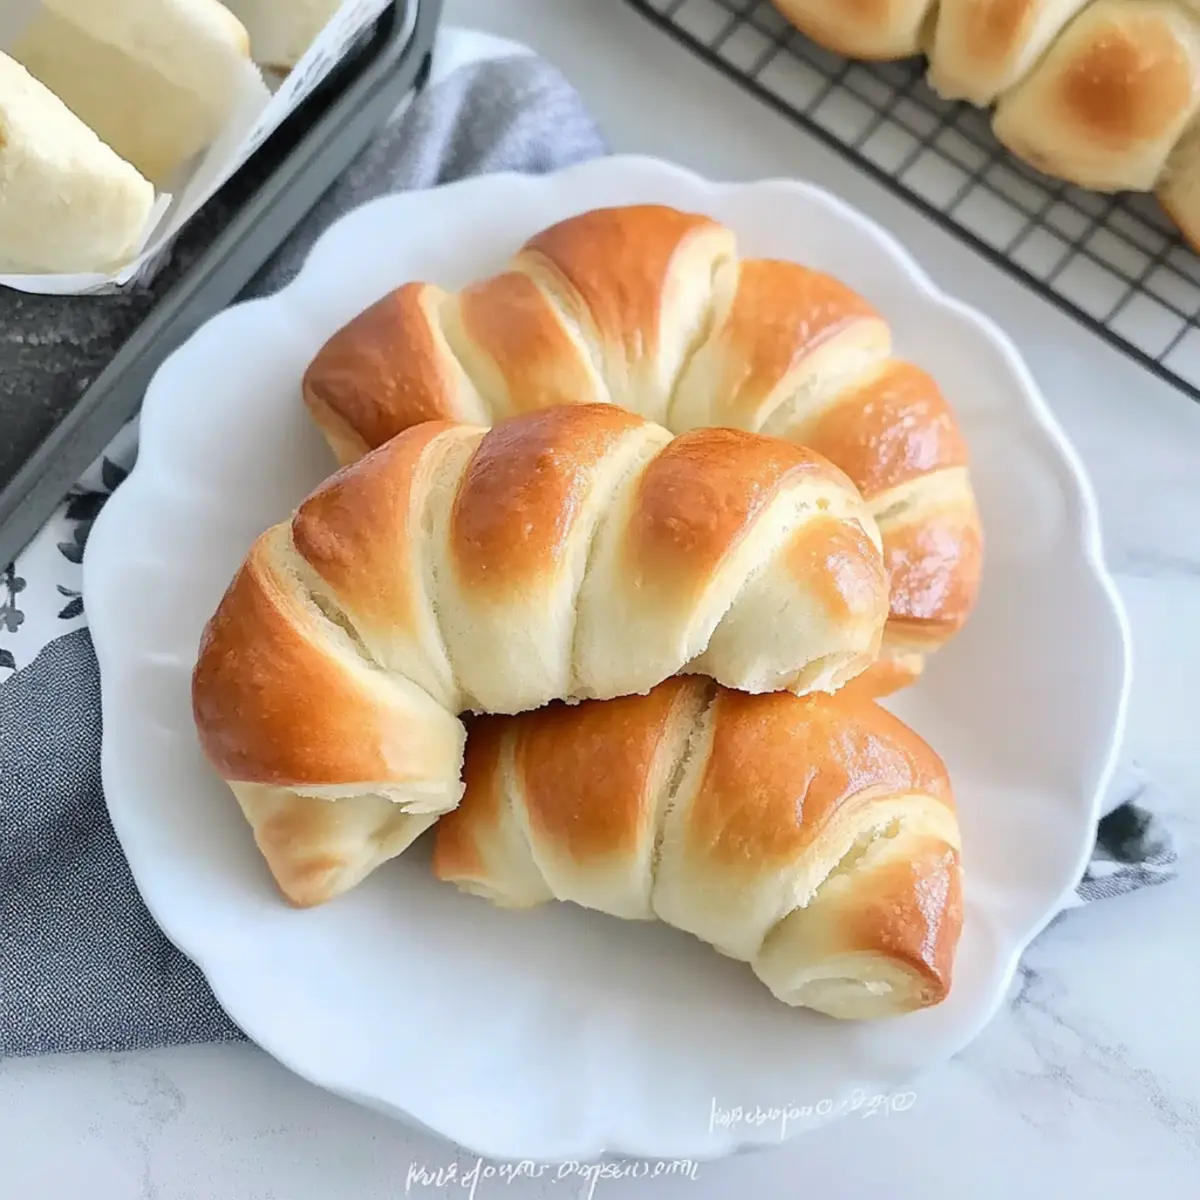
After the first rise, punch down the dough gently to release excess air, then roll it out into a large circle about 1/4 inch thick. Use a sharp knife or pizza cutter to slice the circle into 8 wedges. Starting from the wide end, roll each wedge up towards the tip, forming a crescent shape that will make your homemade crescent rolls enchanting.
Step 6: Second Rise
Place your shaped rolls onto a greased baking tray, spacing them generously apart. Cover the rolls with a cloth and let them rise again for about 30 to 45 minutes, until they have doubled in size again—this ensures those lovely, fluffy homemade crescent rolls.
Step 7: Bake
Preheat your oven to 350°F (175°C). Bake the risen rolls in the preheated oven for 15 to 20 minutes, or until they turn golden brown and reach an internal temperature of 190-200°F, confirming that your homemade crescent rolls are perfectly baked.
Step 8: Finish
As soon as you take your rolls out of the oven, brush them generously with melted butter for added flavor and moisture. Let them cool slightly before serving, reveling in the delightful aroma that fills your kitchen, courtesy of your homemade crescent rolls!
Make Ahead Options
These Homemade Crescent Rolls are perfect for meal prep and can save you time on busy days! You can make the dough up to 24 hours in advance and store it in the refrigerator. Simply prepare the dough as directed, shape it into a ball, and place it in a greased bowl covered with plastic wrap. When you’re ready to bake, let it come to room temperature (about 30 minutes), then proceed with the first rise and shaping. You can also shape the rolls and refrigerate them overnight; just allow them to rise for an additional 45 minutes before baking. To keep them fresh and delicious, ensure they are well-covered to prevent drying out. With these make-ahead options, you’ll be able to enjoy fluffy, homemade crescent rolls with minimal effort!
Expert Tips for Homemade Crescent Rolls
-
Water Temperature Matters: Use a thermometer to ensure the warm water is between 100°F and 110°F to keep your yeast alive and blooming.
-
Don’t Rush the Rises: Allow the dough to rise until it doubles in size; this’ll give you light and fluffy homemade crescent rolls, so be patient!
-
Watch Your Baking Time: Overbaking can dry out your rolls. Check the internal temperature for doneness—aim for 190-200°F, not just color.
-
Knead for Texture: Whether using a mixer or your hands, knead the dough until it’s soft and elastic. This helps achieve that perfect, pillowy texture in your rolls.
-
Experiment with Fillings: Feel free to fill the rolls with cream cheese or herbs for a savory twist, making your homemade crescent rolls even more delightful!
Homemade Crescent Rolls Variations
Feel free to explore these variations to add a unique spin to your homemade crescent rolls!
-
Whole Wheat: Substitute half of the all-purpose flour with whole wheat flour for a heartier texture. You’ll enjoy a boost of fiber in your rolls!
-
Cheesy Delight: Add a spoonful of cream cheese or grated cheese into each roll before shaping for a deliciously rich surprise. This cheesy twist creates a delightful contrast to the buttery dough.
-
Herb-Infused: Mix in dried herbs such as rosemary or thyme into the dough for a savory aroma. These rolls are perfect for pairing with soups or roasted meats!
-
Sweet Cinnamon Rolls: Sprinkle brown sugar and cinnamon on your dough before rolling for a sweet breakfast treat. Once baked, drizzle with a light glaze for an added touch of sweetness.
-
Spicy Kick: Add a pinch of cayenne pepper to the dough for a subtle heat that complements the buttery flavor beautifully. Perfect for those who enjoy a bit of spice in their dishes!
-
Savory Spinach Rolls: Incorporate finely chopped spinach and feta cheese into the dough for a Mediterranean flair. These rolls make an excellent side dish at any dinner gathering.
-
Garlic Butter Glaze: Mix minced garlic into the melted butter before brushing it on top of the rolls after baking. This adds a delicious garlic aroma that will have everyone coming back for more!
-
Breakfast Bundles: Shape your rolls to encase cooked sausage or ham before the second rise. Bake as usual for flavorful breakfast bundles that are sure to be a hit!
For more creative ideas, why not try out these delightful Pie Crescent Rolls or whip up some yummy Homemade Granola Bars for breakfast? Let your culinary adventure begin!
Storage Tips for Homemade Crescent Rolls
Room Temperature: Store leftover rolls in a zip-top bag at room temperature for up to 3 days to maintain their soft texture and buttery flavor.
Refrigeration: If you want to keep them longer, place the rolls in an airtight container in the fridge for up to a week, but be aware that this may affect their fluffiness.
Freezer: For extended storage, freeze the baked rolls in a zip-top bag for up to 2 months. Thaw in the fridge overnight before reheating.
Reheating: To enjoy warm, fluffy rolls again, reheat in a 350°F oven for about 10 minutes or until heated through; this keeps your homemade crescent rolls delightful!
What to Serve with Homemade Crescent Rolls
Delight in the harmony of flavors and textures as you create a memorable meal with warm, buttery rolls by your side.
-
Creamy Potato Soup: The rich, smooth textures of a potato soup pair perfectly, providing a soothing contrast to the fluffy rolls. Dip and savor each bite for a comforting experience.
-
Garlic Herb Roast Chicken: This succulent chicken dish complements the rolls beautifully, as the savory, aromatic flavors of garlic and herbs enhance the overall dining experience.
-
Classic Caesar Salad: Crisp romaine lettuce with creamy dressing adds a refreshing crunch, balancing the softness of the crescent rolls. Each bite evokes a delightful mix of textures.
-
Savory Mini Quiches: These bite-sized delights filled with cheese and vegetables are perfect for brunch. Enjoy them alongside the rolls for a delightful breakfast spread that sings of homemade charm.
-
Honey-Butter Spread: Elevate your crescent rolls by combining honey with soft butter for a sweet finish. The drizzle of sweetness complements their warm, buttery goodness.
-
Peach Cobbler: For a sweet twist, serve these rolls with a warm peach cobbler for dessert. The combination of buttery crust and juicy fruit creates a dream pairing that everyone will love.
-
Sparkling Lemonade: A refreshing beverage like sparkling lemonade can cut through the richness of the rolls, making each bite feel light and uplifting. Cheers to balance!
-
Homemade Cranberry Sauce: The tartness of cranberry sauce provides a delightful contrast to the buttery rolls, especially during festive gatherings. A must-try for holiday meals!
-
Warm Chocolate Fondue: For a fun twist at dessert, dip chunks of crescent roll into warm chocolate fondue for a delightful interactive treat that melts hearts.
With these serving ideas, your homemade crescent rolls will truly shine, creating unforgettable mealtime memories!
Homemade Crescent Rolls Recipe FAQs
What type of yeast should I use?
Absolutely! You can use either active dry yeast or instant dry yeast for these homemade crescent rolls. Instant dry yeast is preferred for its quick rise, but if you use active dry yeast, just remember to let it bloom in warm water first for about 5-10 minutes until frothy.
How should I store leftover rolls?
To maintain their delightful softness, store leftover rolls in a zip-top bag at room temperature for up to 3 days. If you’d like to keep them longer, transferring them to an airtight container in the refrigerator can preserve them for a week, although they may lose some fluffiness.
Can I freeze the dough?
Yes, you can freeze the dough! After kneading, let it rise once, then shape the rolls. Instead of a second rise, wrap the rolls tightly in plastic wrap and place them in a zip-top freezer bag. They will stay good for up to 3 months. When you’re ready to bake, simply thaw them in the refrigerator overnight and let rise until doubled before baking.
What if my rolls don’t rise properly?
Very! Don’t worry if this happens; it’s a common issue. First, make sure the temperature of your water is between 100°F and 110°F. If your kitchen is too cold, find a warmer spot or try placing a pan of hot water in the oven and using the residual heat. If the yeast is old, it might not activate well, so always check the expiration date.
Are these rolls suitable for people with gluten allergies?
Unfortunately, these homemade crescent rolls contain all-purpose flour, which isn’t gluten-free. However, you can try substituting a gluten-free flour blend designed for baking. Just be sure to add a binding agent like xanthan gum to mimic the elasticity that gluten provides, ensuring you still get that soft and fluffy texture.
Can I add fillings to the rolls?
Absolutely! These rolls are a canvas, so feel free to get creative. You can add cream cheese, cooked ham, cheeses, or even herbs before rolling them up. Just make sure not to overfill, or they’ll be harder to seal and achieve that perfect crescent shape!

Buttery Homemade Crescent Rolls That Steal the Show
Ingredients
Equipment
Method
- Begin by stirring 2 teaspoons of yeast into 1/4 cup of warm water (110°F). Let it bloom for about 5 minutes, or until frothy and bubbly.
- In a large mixing bowl, cream together 1/2 cup of softened unsalted butter and 1/4 cup of granulated sugar until smooth. Next, add 2 room-temperature eggs, 1 cup of warm milk, and 1 teaspoon of salt, then mix in the bloomed yeast. Gradually incorporate around 4 cups of all-purpose flour until the mixture starts pulling away from the sides.
- Transfer your dough to a floured surface or use a stand mixer with a dough hook on medium speed. Knead for about 5 minutes, adding additional flour as needed, until you achieve a soft, sticky consistency that is elastic and smooth.
- Once kneaded, place your dough into a greased bowl and cover it with a clean cloth. Allow it to rise in a warm environment for 30 to 45 minutes, or until it has doubled in size.
- After the first rise, punch down the dough gently to release excess air, then roll it out into a large circle about 1/4 inch thick. Use a sharp knife or pizza cutter to slice the circle into 8 wedges. Starting from the wide end, roll each wedge up towards the tip, forming a crescent shape.
- Place your shaped rolls onto a greased baking tray, spacing them generously apart. Cover the rolls with a cloth and let them rise again for about 30 to 45 minutes, until they have doubled in size again.
- Preheat your oven to 350°F (175°C). Bake the risen rolls in the preheated oven for 15 to 20 minutes, or until they turn golden brown and reach an internal temperature of 190-200°F.
- As soon as you take your rolls out of the oven, brush them generously with melted butter. Let them cool slightly before serving.
Leave a Reply