
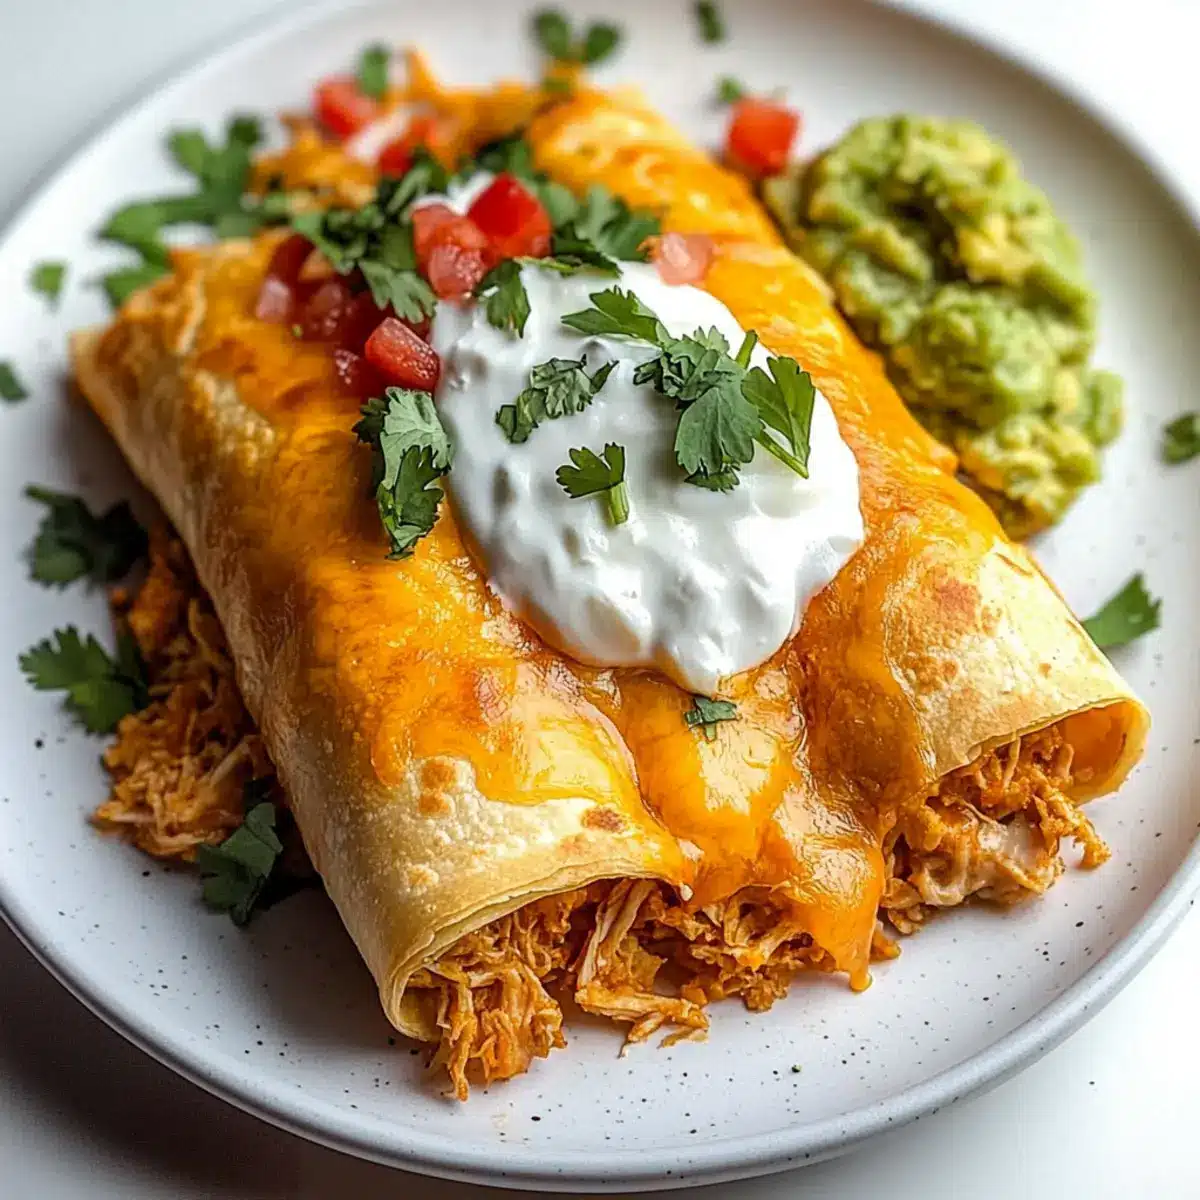
There’s something magical about that first crunch of a perfectly fried Chicken Chimichanga! As I bite into these golden treasures, I’m greeted by the satisfying crispiness, complemented by layers of creamy melted cheese and tender, comforting chicken. Thanks to using rotisserie chicken, this recipe keeps prep time to just 5 minutes, making it a breeze for weeknight dinners or gatherings with family and friends. And let’s not forget how customizable they are—whether you’re adding a spicy kick or keeping it classic, these chimichangas are sure to be a crowd-pleaser. Ready to discover how you can whip up this Tex-Mex delight in no time? Keep scrolling!

Why Are These Chimichangas So Irresistible?
Quick Prep: With only 5 minutes of prep time, you’ll be diving into this delicious Tex-Mex delight in no time!
Crispy and Golden: The outer layer achieves the perfect crunch, while the inside boasts gooey, melty cheese.
Customizable Filling: Whether you prefer a spicy twist with jalapeños or a vegetarian version, these chimichangas adapt to your taste!
Crowd-Pleasing Comfort: Perfect for game days or casual dinners, they never fail to impress family and friends.
Easy Cleanup: Using rotisserie chicken simplifies the process, making meal prep a breeze. Give these a try alongside Garlic Parmesan Chicken or Brie Stuffed Chicken for a full-on feast!
Chicken Chimichangas Ingredients
• Dive into a world of flavors with these Chicken Chimichangas!
For the Filling
- Shredded Chicken – Use rotisserie for easy preparation and delicious flavor.
- Sweet Onion – Adds a touch of sweetness and depth; yellow onion works too if needed.
- Avocado Oil – Ideal for sautéing to achieve a light, healthy finish; vegetable oil can substitute.
- Chili Powder – Bring warmth to the filling; adjust to your spice preference.
- Ground Cumin – Infuses an earthy flavor, perfect for that Mexican profile; omit for a milder taste.
- Paprika – Enhances color and flavor; consider smoked paprika for an extra kick.
- Salt and Pepper – Essential for seasoning; adjust to match your taste preferences.
- Salsa Verde – Provides moisture and tang; go for store-bought or homemade for convenience.
- Monterey Jack Cheese – Melts beautifully, lending creaminess; use mozzarella if you’re out.
- Oaxaca Cheese – Adds a stretchy texture and rich flavor; substitute with more Monterey Jack or mozzarella if needed.
- Fresh Lime Juice – Brightens the filling immensely; fresh is best, so skip the bottled for maximum zest.
For Assembling
- Large Flour Tortillas – Burrito-sized work best for a hearty chimichanga experience.
- Refried Beans – Acts as a creamy base, helping to bind the filling together.
For Serving
- Guacamole, Sour Cream, Salsa, Fresh Cilantro – These garnishes bring extra flavor and freshness, elevating your dish when serving.
Now that you have all the delicious ingredients ready, let’s get cooking!
Step‑by‑Step Instructions for Chicken Chimichangas
Step 1: Prepare the Filling
In a large skillet, heat 2 tablespoons of avocado oil over medium heat until shimmering. Add 1 diced sweet onion and sauté for about 3-4 minutes, stirring occasionally, until the onion becomes soft and translucent. Next, mix in 2 cups of shredded rotisserie chicken, 1 tablespoon of chili powder, 1 teaspoon of ground cumin, 1 teaspoon of paprika, and salt and pepper to taste. Cook for an additional 3-4 minutes, allowing the flavors to meld.
Step 2: Mix Ingredients
Remove the skillet from heat and transfer the chicken mixture to a mixing bowl. Stir in ½ cup of salsa verde, 1 cup of shredded Monterey Jack cheese, ½ cup of Oaxaca cheese, and the juice of 1 lime. Mix thoroughly until the cheeses have slightly melted and everything is well-combined, creating a gooey filling for your chicken chimichangas.
Step 3: Assemble Chimichangas
Place a large flour tortilla on a flat surface and spread a layer of refried beans in the center, about ¼ cup. Spoon approximately ½ cup of the chicken mixture on top of the beans. Carefully fold in the sides of the tortilla and roll it up tightly, making sure the filling is securely enclosed. Repeat this process with the remaining tortillas and filling.
Step 4: Fry Chimichangas
In a large frying pan, heat about ½ inch of avocado oil over medium heat until it reaches 350°F. Carefully place the chimichangas seam-side down into the hot oil, making sure not to overcrowd the pan. Fry for about 2-3 minutes on each side until golden brown and crispy. You may need to adjust the heat to maintain a consistent frying temperature throughout the process.
Step 5: Serve
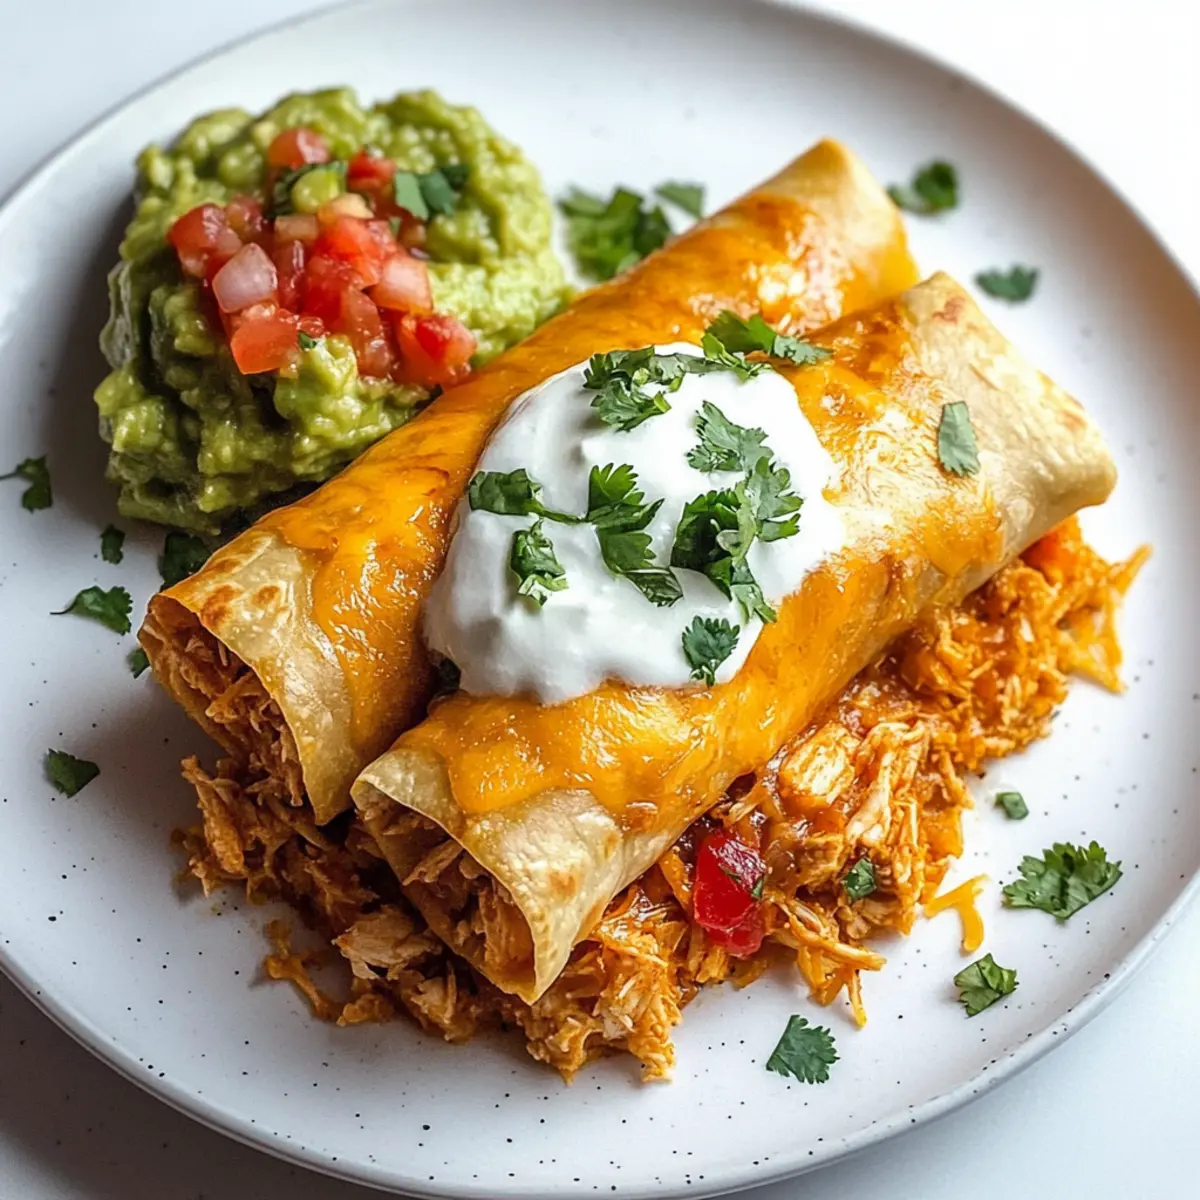
Once golden and crispy, remove the chimichangas from the frying pan and place them on a plate lined with paper towels to absorb excess oil. Serve hot with your favorite garnishes, such as guacamole, sour cream, salsa, and fresh cilantro for an extra burst of flavor. Enjoy your delightful homemade Chicken Chimichangas!
Expert Tips for Chicken Chimichangas
-
Hot Oil: Ensure your oil is properly heated before frying to get that irresistible crisp on your Chicken Chimichangas.
-
Don’t Overcrowd: Fry in batches if necessary; overcrowding the pan can drop the oil temperature and lead to soggy chimichangas.
-
Seal It Right: Place seam-side down when frying to keep the filling secure and prevent any leakage while cooking.
-
Layer Smartly: Spread refried beans thinly and evenly on the tortilla to ensure the filling doesn’t make your chimichangas soggy.
-
Try Air Frying: For a healthier twist, consider air frying your chicken chimichangas at 375°F for 8-10 minutes, flipping halfway for an evenly crispy texture.
Chicken Chimichangas: Variations & Substitutions
Feel free to make these Chicken Chimichangas your own with a few simple twists and turns!
-
Vegetarian Option: Use sautéed vegetables like bell peppers or zucchini in place of chicken for a delightful veggie-packed version. This adds an abundance of flavor while keeping things hearty and filling.
-
Spicy Kick: For those who crave heat, toss in some diced jalapeños or a few dashes of your favorite hot sauce to the filling. This will surely ignite your taste buds and bring an exciting zing to each bite!
-
Different Cheese: Swap the Monterey Jack for pepper jack cheese to introduce a spicy dimension, making it perfect for cheese lovers. The extra flavor will enhance your chimichanga experience wonderfully.
-
Smoky Flavor: Incorporate smoked paprika instead of regular paprika for a deeper, smoky taste. It’ll really elevate the overall profile of your chimichangas, making them unforgettable.
-
Protein Swap: For a twist, use shredded beef or pork instead of chicken. This variation gives a different texture and flavor, reminiscent of traditional Tex-Mex cuisine, perfect for those craving something unique.
-
Fresh Herbs: Add chopped fresh cilantro or green onions to the chicken mixture for a burst of freshness. It brightens up the filling, making every bite even more enjoyable, especially when served with toppings.
-
Quinoa Booster: Mix in some cooked quinoa to the chicken filling for extra protein and a nutritious boost. It’s an easy way to make these a little heartier while keeping them deliciously satisfying.
-
Crispier Finish: For an air-fried option, brush the chimichangas with a light coating of oil and air fry at 375°F for 8-10 minutes for a healthier yet crispy alternative. This method maintains that crave-worthy crunch!
Feel free to check out more delicious recipes like Sticky Garlic Chicken and explore how you can elevate your kitchen creations!
Storage Tips for Chicken Chimichangas
- Room Temperature: Ideally, enjoy your Chicken Chimichangas fresh out of the fryer. If left out, consume within 2 hours for optimal safety.
- Fridge: Store any leftovers in an airtight container in the refrigerator for up to 3 days. Reheat in the oven at 350°F for crispiness.
- Freezer: For longer storage, freeze uncooked chimichangas wrapped tightly in plastic wrap and then aluminum foil. They can last for up to 3 months. Thaw in the fridge before frying for best results.
- Reheating: For the crispiest experience, reheat cooked Chicken Chimichangas in the oven at 350°F for about 10-15 minutes. Enjoy them hot!
Make Ahead Options
These Chicken Chimichangas are fantastic for meal prep, allowing you to enjoy delicious homemade comfort food even on your busiest days! You can prepare the filling (shredded chicken, onion, spices, and cheese) up to 24 hours in advance; just store it in an airtight container in the refrigerator to maintain freshness. The assembled chimichangas can also be wrapped and frozen for up to 3 months—just be sure to label them well! When you’re ready to enjoy, simply thaw overnight in the fridge, then fry until golden and crispy for that delightful crunch. This method not only saves time, but ensures you have a satisfying meal at your fingertips, just waiting to be devoured!
What to Serve with Crispy Chicken Chimichangas
Elevate your meal with delightful sides that complement the crunchy, savory goodness of your chimichangas.
-
Mexican Rice: This fluffy and flavorful side dish adds a comforting starch and complements the Tex-Mex flavors perfectly. Pair it with fresh cilantro for an herbaceous touch.
-
Refreshed Green Salad: A crisp salad with mixed greens, avocado, and a zesty lime vinaigrette provides a refreshing contrast to the richness of the chimichangas. The lightness balances out the meal beautifully.
-
Guacamole: This smooth and creamy dip pairs wonderfully, especially when garnished with fresh lime juice and diced tomatoes. It enhances the flavors while adding a touch of freshness that’s hard to resist.
-
Pico de Gallo: Bright and tangy, this fresh salsa of diced tomatoes, onions, and cilantro brings a burst of flavor. Its freshness complements the crispy texture of the chimichangas perfectly.
-
Black Bean Soup: A warm and hearty soup adds depth to your meal, providing both flavor and protein. Its creamy texture creates a satisfying contrast to the crunch of the chimichangas.
-
Margaritas: Sip on a refreshing margarita to balance the richness of the chimichangas. Choose classic lime or experiment with fruity flavors to add a festive touch.
-
Churros: For a sweet finish, serve warm churros sprinkled with cinnamon sugar. The crispy exterior and fluffy interior make for an irresistible dessert after your delicious chimichangas.
These pairings promise to create a colorful and lively meal that will be remembered long after the last bite!

Crispy Chicken Chimichangas Recipe FAQs
What is the best way to select ripe ingredients for my Chicken Chimichangas?
Absolutely! The ripeness of your ingredients can enhance the overall taste of your chimichangas. For chicken, fresh rotisserie chicken should smell and look good—no dark spots or unpleasant odors. Choose sweet onions that are firm and have a glossy skin, and for avocados, look for ones that yield gently to pressure. Fresh lime should be vibrant green and feel heavy for its size.
How do I store leftover Chicken Chimichangas, and how long will they last?
I recommend storing any leftover chimichangas in an airtight container. They will stay fresh for about 3 days in the refrigerator. If you’d like to maintain that crispy texture, try reheating them in an oven set to 350°F for about 10-15 minutes. This way, you can enjoy them almost as good as when they were freshly made!
Can I freeze Chicken Chimichangas, and what’s the best method?
Yes! To freeze your chimichangas, wrap them tightly in plastic wrap to avoid freezer burn, then place them in a sealed freezer bag or container. They can last for up to 3 months in the freezer. When you’re ready to enjoy them, thaw overnight in the refrigerator before frying to ensure even cooking and crispness when you fry.
What should I do if my chimichangas are not crispy after frying?
Very! If your chimichangas end up soggy, it might be because the oil wasn’t hot enough or you overcrowded the pan. To fix this, make sure to heat the oil to about 350°F before adding the chimichangas, and fry them in batches. Additionally, it helps to place them seam-side down to secure the filling and create a nice golden crust.
Are there any dietary considerations I should keep in mind for Chicken Chimichangas?
Absolutely! If there are allergies or dietary preferences, consider the ingredients carefully. For gluten-free options, use corn tortillas instead of flour tortillas. Watch for cheese allergies, as Monterey Jack and Oaxaca cheese are common allergens. If preparing for pets, simply skip the garnishes and keep chimichangas out of their reach, as certain ingredients like onions can be harmful to them.
How can I ensure the best flavor balance in my Chicken Chimichangas?
To create a well-rounded flavor in your chimichangas, balance the seasoning thoughtfully. I suggest starting with 1 tablespoon of chili powder, but feel free to adjust based on your spice preference. Adding some lime juice not only brightens up your filling but also helps bring all those flavors together harmoniously. Remember, you can always taste and adjust as you go along!
Crispy Chicken Chimichangas: Your Quick Comfort Food Fix
Ingredients
Equipment
Method
- In a large skillet, heat avocado oil over medium heat. Add diced sweet onion and sauté until soft.
- Mix in shredded chicken, chili powder, ground cumin, paprika, salt, and pepper. Cook for an additional few minutes.
- Transfer the chicken mixture to a bowl. Stir in salsa verde, Monterey Jack cheese, Oaxaca cheese, and lime juice.
- Place a tortilla on a surface, spread refried beans, and add the chicken mixture. Fold and roll tightly.
- Heat oil in a pan. Fry chimichangas seam-side down until golden brown.
- Remove and serve hot with garnishes.
Leave a Reply