
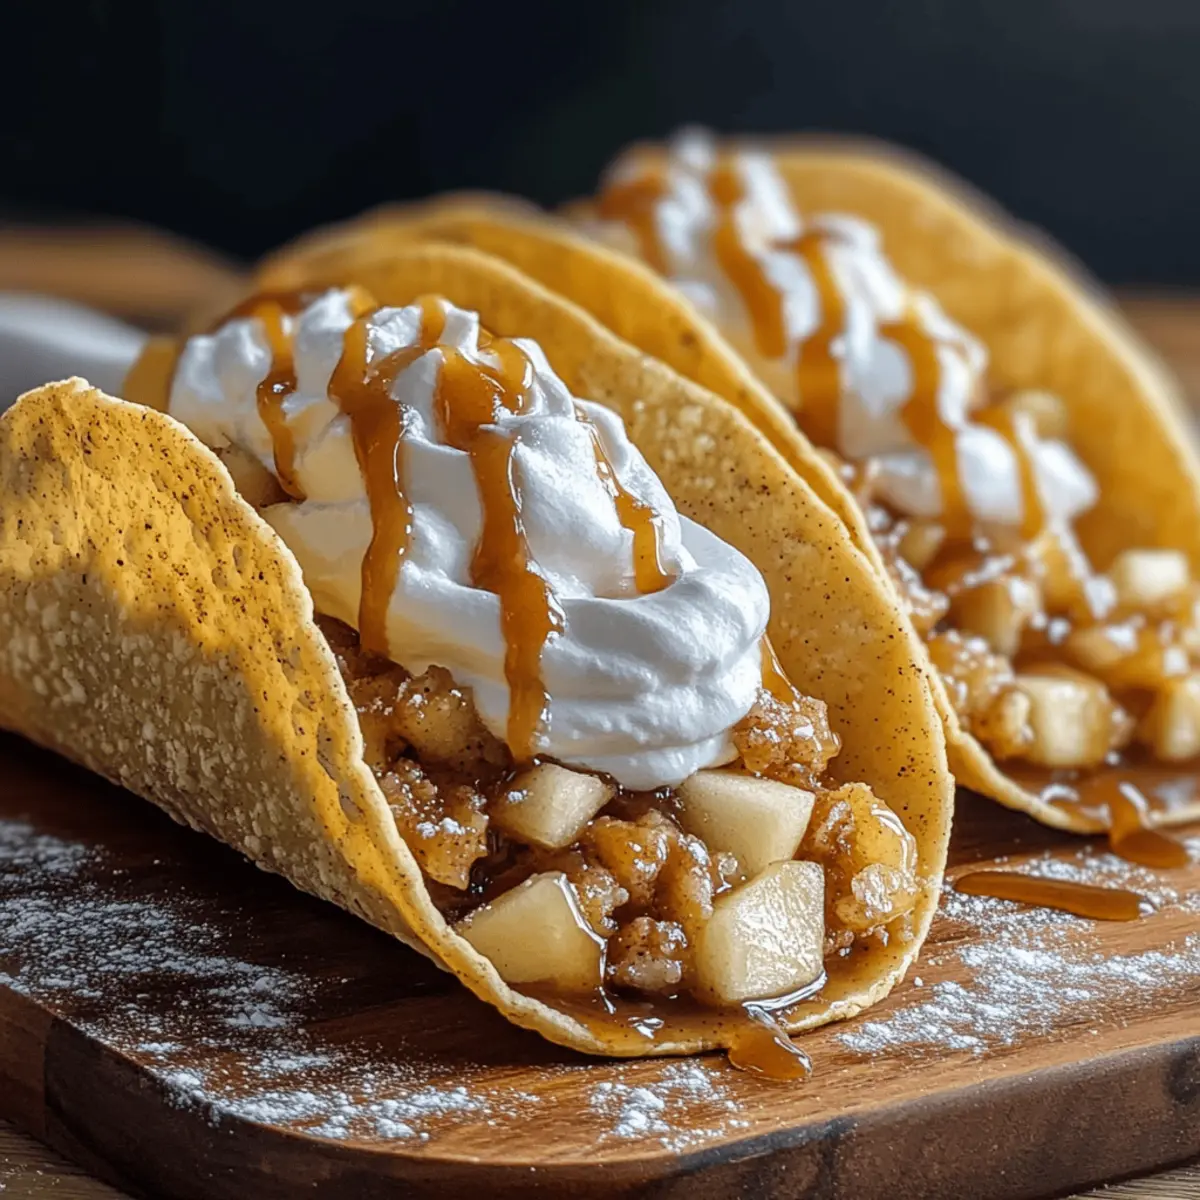
Have you ever thought about turning a classic dessert into something utterly fun and portable? That’s exactly what you get with these cozy Apple Pie Tacos! Imagine biting into a warm, crispy shell filled with cinnamon-kissed apples that remind you of grandma’s pie, but in a playful, handheld format. Perfect for weekend gatherings, these easy-to-make treats come together in just under 25 minutes, making them a fantastic option for both casual get-togethers and those lazy afternoons when you crave something sweet. Whether you stick to traditional apple filling or mix it up with some creative variations, these tacos are sure to become a cherished favorite. Ready to add this delightful recipe to your dessert repertoire? Let’s dive right in!
Why Try Apple Pie Tacos?
Unexpected Delight: These Apple Pie Tacos transform a classic dessert into a fun, handheld treat that everyone loves.
Quick to Make: With just 25 minutes from start to finish, they’re perfect for last-minute gatherings.
Creative Options: Feel free to switch up the filling! Try cherry or pumpkin for a fun twist.
Crowd-Pleaser: Whether at game nights or parties, these tacos are sure to elicit smiles and happy taste buds.
Perfect for Any Occasion: Serve them after dinner or at brunch for a delightful surprise that excites both kids and adults alike!
Looking for more fun dessert ideas? Check out my Easy Dessert Recipes for plenty of inspiration!
Apple Pie Tacos Ingredients
For the Taco Shells
• Small Flour Tortillas (6, 4.5-inch) – These act as the delightful taco shell base; if mini tortillas aren’t available, simply cut larger ones into quarters.
• Salted Butter (⅓ cup, melted) – Provides richness and enhances flavor; substitute with coconut oil for a vegan option.
• Finely Crushed Vanilla Wafer Crumbs (¾ cup) – Adds both crunch and sweetness to the taco shell; graham cracker crumbs can also be used for a twist.
• Ground Cinnamon (1 tsp) – Infuses the warm, aromatic flavor of a traditional apple pie; use apple pie spice for even more depth.
For the Filling
• Canned Apple Pie Filling (20 oz) – A convenient time-saving option, but fresh sautéed apples mixed with brown sugar and lemon juice can add a homemade touch.
• Heavy Cream (¼ cup) – Smoothens the apple filling into a creamy consistency; substitute with full-fat coconut milk for a dairy-free version.
For Toppings
• Whipped Cream (optional) – Adds a luxurious, fluffy finish to your Apple Pie Tacos.
• Caramel Sauce (optional) – Drizzle for an extra indulgent touch that elevates these tacos to a whole new level!
With all these delicious ingredients at your fingertips, you’re just moments away from creating delightful Apple Pie Tacos that everyone will adore!
Step‑by‑Step Instructions for Apple Pie Tacos
Step 1: Preheat the Oven
Begin by preheating your oven to 375°F (190°C), ensuring it reaches the right temperature for baking. This step is crucial for achieving perfectly crispy shells. While the oven warms up, gather your ingredients and prepare your workspace for a smooth cooking experience that will soon be filled with the delightful aroma of homemade Apple Pie Tacos.
Step 2: Prepare the Tortillas
Take the small flour tortillas and brush melted butter generously on both sides. This will make them crispy and flavorful once baked. If you’re using larger tortillas, feel free to cut them into quarters to create smaller taco shells. Once coated, lay the tortillas on a plate, ready to be infused with crunchy sweetness of the crushed vanilla wafer crumbs.
Step 3: Coat the Tortillas
In a shallow dish, combine finely crushed vanilla wafer crumbs and ground cinnamon. Dip each buttered tortilla into this mixture, ensuring they are well coated on both sides. This crunchy coating will provide a delightful texture and warm flavor to your Apple Pie Tacos. Let them rest for about 5 minutes on a wire rack to set the coating.
Step 4: Shape and Bake the Shells
Now, drape each coated tortilla over the bars of the oven rack or place them in a taco mold. This positioning helps them hold their taco shape as they bake. Bake for 8-10 minutes, watching closely until the shells are golden and crisp. The elevated positioning allows air circulation, ensuring even cooking for your delicious Apple Pie Tacos.
Step 5: Cool the Shells
Once baked, carefully remove the shells from the oven and allow them to cool for about 5 minutes. This cooling time helps maintain their crispiness and makes them easier to handle. As they cool, your kitchen will start to smell wonderfully inviting, hinting at the delicious filling that will soon bring these Apple Pie Tacos to life.
Step 6: Heat the Filling
In a saucepan over medium heat, combine the canned apple pie filling with heavy cream. Stir gently and allow the mixture to bubble and thicken for about 5 minutes. This will create a creamy and rich filling bursting with flavor. Optionally, consider adding a pinch of nutmeg for an extra layer of warmth and spice in your Apple Pie Tacos.
Step 7: Assemble the Tacos
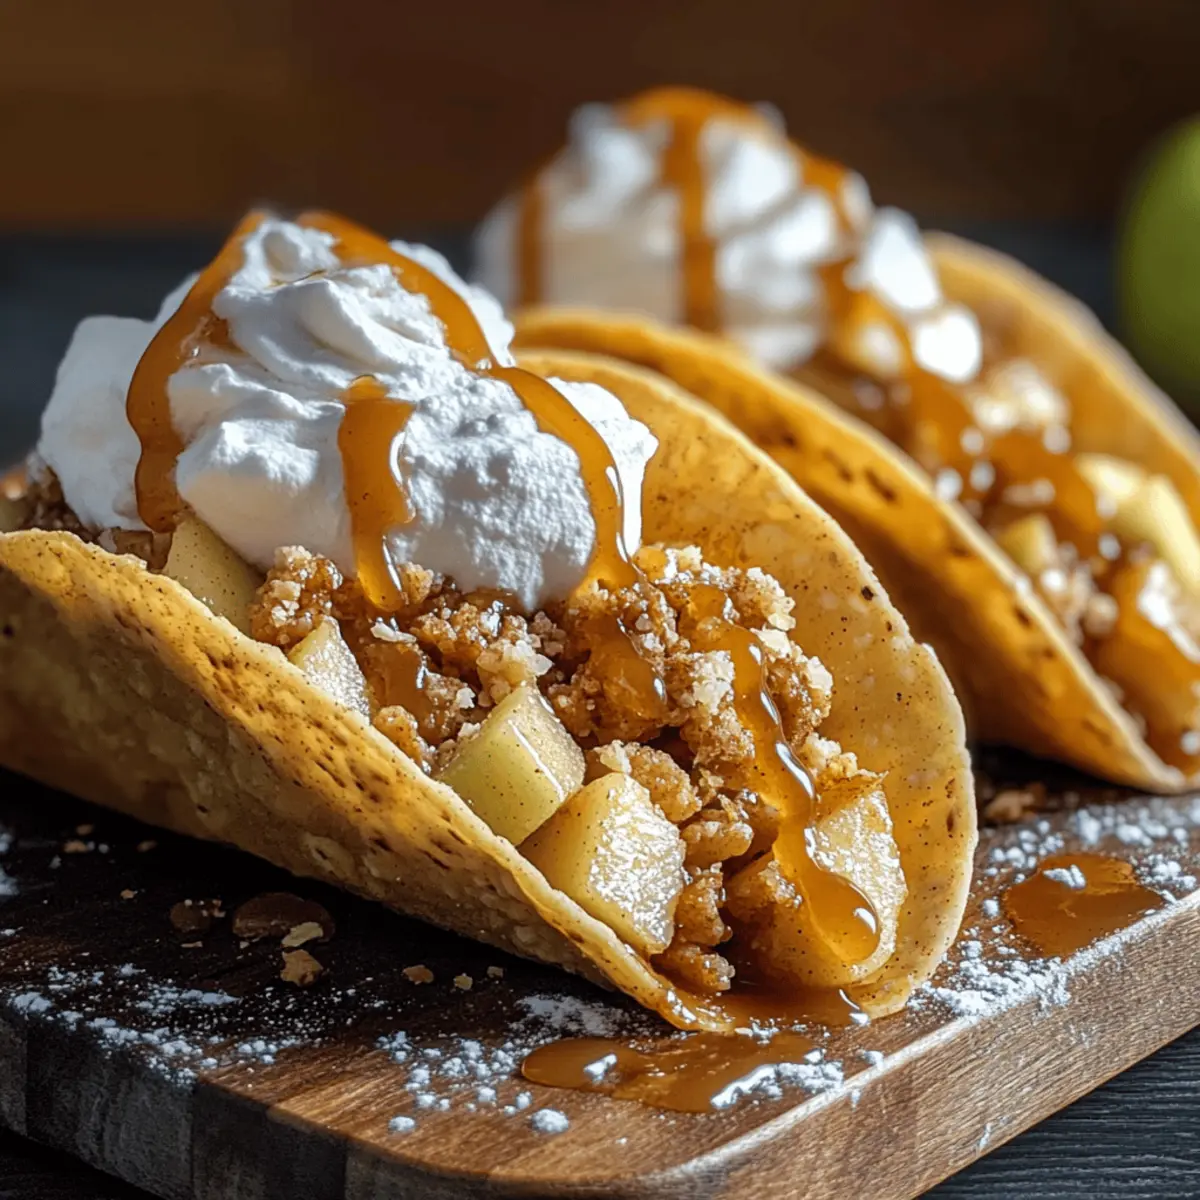
Once the filling is ready, spoon it generously into the cooled taco shells, allowing the warm apple filling to overflow slightly for that enticing presentation. The contrasting textures between the crispy shell and the gooey apple filling will immediately draw everyone in. Prepare for the delightful moment of enjoyment as you serve up these cozy Apple Pie Tacos.
Step 8: Add Final Touches
For an indulgent finishing touch, add a dollop of whipped cream to each taco. Drizzle caramel sauce over the top for that extra level of decadence. Making these Apple Pie Tacos visually appealing is key, as they not only taste fantastic but also look inviting and delicious—perfect for sharing!

Expert Tips for Apple Pie Tacos
-
Cool the Filling: Let the apple pie filling cool slightly before adding it to the shells to prevent sogginess and maintain crispiness.
-
Prepare Shells in Advance: Bake the taco shells up to 2 days ahead and store them in an airtight container. This saves time but keeps their delightful crunch.
-
Patch if Necessary: If tortillas tear while shaping, don’t fret! Simply patch them with a sprinkle of crumbs, which will help solidify during baking.
-
Use Fresh Ingredients: For a more vibrant flavor, consider using fresh apples sautéed with brown sugar and lemon juice instead of canned filling in your Apple Pie Tacos.
-
Variations Galore: Experiment with different fillings based on your favorites; pumpkin or mixed berry fillings provide delicious twists on this classic dessert.
How to Store and Freeze Apple Pie Tacos
Room Temperature: Store leftover Apple Pie Tacos in a cool, dry place for up to 1 day to maintain crispness; avoid stacking them to prevent sogginess.
Fridge: Place any remaining filled tacos in an airtight container and refrigerate for up to 3 days. Reheat in an oven for best texture, avoiding the microwave.
Freezer: Baked taco shells can be frozen for up to 3 months. Wrap them tightly in plastic wrap and place in a freezer-safe bag. Re-crisp in the oven at 350°F for 5 minutes before serving.
Reheating: For filled tacos, warm them in the oven until heated through, usually around 10-12 minutes. This keeps the shells crispy and delicious!
What to Serve with Apple Pie Tacos?
Transform your cozy dessert experience into a full meal with delightful sides and beverages that complement every bite.
-
Vanilla Ice Cream: A classic pairing that adds a creamy, cool element to your warm tacos, enhancing the rich flavors of the filling.
-
Hot Apple Cider: Infuse your gathering with a nostalgic aroma, perfect for sipping alongside these sweet treats during chilly evenings.
-
Spiced Coffee: Warm up with a cup of coffee kicked up a notch with cinnamon or nutmeg, beautifully enhancing the flavors in your tacos.
-
Caramel Dipping Sauce: Offer an extra drizzle for those who like to indulge. The sweetness of caramel pairs perfectly with the tart notes from the apples.
-
Mini Fruit Salad: A refreshing side with seasonal fruits provides a crisp contrast, reigning in the sweetness while adding a burst of color to the table.
-
Chocolate Drizzle: Take it up a notch by drizzling melted chocolate over your tacos. The combination of chocolate and apples creates a decadent delight.
-
Nutty Granola: For a crunchy textural addition, sprinkle some nutty granola on top. It will add a satisfying crunch and wholesome elements to each bite.
-
Whipped Cream Topping: Don’t forget the extra layer of whipped cream! Its lightness enhances the richness of the tacos and brings a delightful finish.
-
Warm Cinnamon Roll: For a brunch twist, serve alongside a warm cinnamon roll that echoes the comforting flavors of your dessert.
-
Zesty Lemonade: A chilled, zesty drink cuts through the sweetness, refreshing your palate and bringing balance to the food experience.
Apple Pie Tacos Variations & Substitutions
Get ready to tailor these delightful Apple Pie Tacos to your taste and whim! Let your creativity shine with these easy swaps and flavorful twists.
-
Vegan Delight: Use coconut oil in place of butter and full-fat coconut milk instead of heavy cream for a delightful vegan option.
-
Fresh Berries: Swap the apple filling for mixed berries or pie filling. Strawberries, blueberries, and raspberries create a vibrant, fruity explosion!
-
Nutty Crunch: Fold in chopped toasted pecans into your apple filling for an incredible nutty texture that adds a tasty surprise.
-
Pumpkin Twist: Bring out the fall flavors by substituting canned apple pie filling with pumpkin puree mixed with cream cheese and maple syrup.
-
Cinnamon Sugar Rush: Sprinkle a cinnamon-sugar mixture over the taco shells before baking for extra sweet and spicy flavors.
-
Savory Styles: For a more adventurous twist, consider using corn tortillas filled with savory options like pulled pork or a spicy black bean mixture.
-
Chocolate Drizzle: Elevate your dessert by drizzling melted dark chocolate over the top instead of caramel sauce—a perfect match with fruit!
-
Fruity Whipped Cream: Top your tacos with a dollop of whipped cream blended with lemon zest for a refreshing citrus kick.
These variations will not only enhance your Apple Pie Tacos but also excite your family and friends at your next gathering! Looking for more inspiration? Don’t miss checking out my delicious Easy Dessert Recipes for even more fun ideas.
Make Ahead Options
These Apple Pie Tacos are a fantastic choice for busy cooks looking to save time! You can prepare the taco shells up to 2 days in advance; simply bake them, then store in an airtight container to keep them crispy. For the filling, heat the canned apple pie filling with cream as directed, and you can refrigerate this for up to 3 days. To prevent any sogginess, allow the filling to cool slightly before spooning it into the shells. When you’re ready to serve, just reheat the apple filling briefly in a saucepan or microwave, fill the tacos, and add your whipped cream and caramel sauce for a delightful finish. This way, you’ll enjoy fresh, delicious Apple Pie Tacos with minimal effort!
Apple Pie Tacos Recipe FAQs
How do I choose the best apples for Apple Pie Tacos?
Absolutely! Select apples that are firm and tart, like Granny Smith or Honeycrisp, as they hold their shape during cooking and provide a delicious contrast to the sweetness. If using fresh apples, they should be crisp and free from dark spots or blemishes.
What’s the best way to store leftover Apple Pie Tacos?
For leftover filled tacos, place them in an airtight container and refrigerate for up to 3 days. If you want to keep them crisp, it’s best to store the shells and filling separately. The taco shells can sit at room temperature for 1 day but should not be stacked!
Can I freeze Apple Pie Tacos?
Definitely! Baked taco shells can be frozen for up to 3 months. Wrap each shell tightly in plastic wrap and place them in a freezer-safe bag. When you’re ready to enjoy them, re-crisp the shells in a preheated oven at 350°F for about 5 minutes before adding your filling.
How do I prevent my taco shells from getting soggy?
To keep your shells crispy, allow the apple pie filling to cool slightly before spooning it into the shells. You can also bake the taco shells in advance and store them in an airtight container until you’re ready to assemble.
Are there any allergy considerations I should be aware of?
Yes, if you’re catering for allergies, be cautious of ingredients like gluten in the flour tortillas and dairy in the butter and heavy cream. To make a gluten-free version, use corn tortillas and substitute dairy with coconut oil and full-fat coconut milk. Always double-check labels for allergens if necessary!
Can I use homemade apple filling instead of canned?
For sure! If you prefer to make your own filling, simply sauté diced apples with a bit of brown sugar, cinnamon, and lemon juice until tender—about 5-7 minutes. This homemade touch will add a personal flair and a fresh taste to your Apple Pie Tacos.

Deliciously Fun Apple Pie Tacos for Easy Dessert Joy
Ingredients
Equipment
Method
- Preheat your oven to 375°F (190°C).
- Take small flour tortillas and brush melted butter on both sides.
- In a shallow dish, combine finely crushed vanilla wafer crumbs and ground cinnamon. Dip each buttered tortilla into the mixture.
- Drape each coated tortilla over the bars of the oven rack or place them in a taco mold. Bake for 8-10 minutes.
- Once baked, allow the shells to cool for about 5 minutes.
- In a saucepan over medium heat, combine the apple pie filling with heavy cream and stir for about 5 minutes until thickened.
- Spoon the filling into the cooled taco shells.
- Add a dollop of whipped cream and drizzle caramel sauce over the tacos.
Leave a Reply