
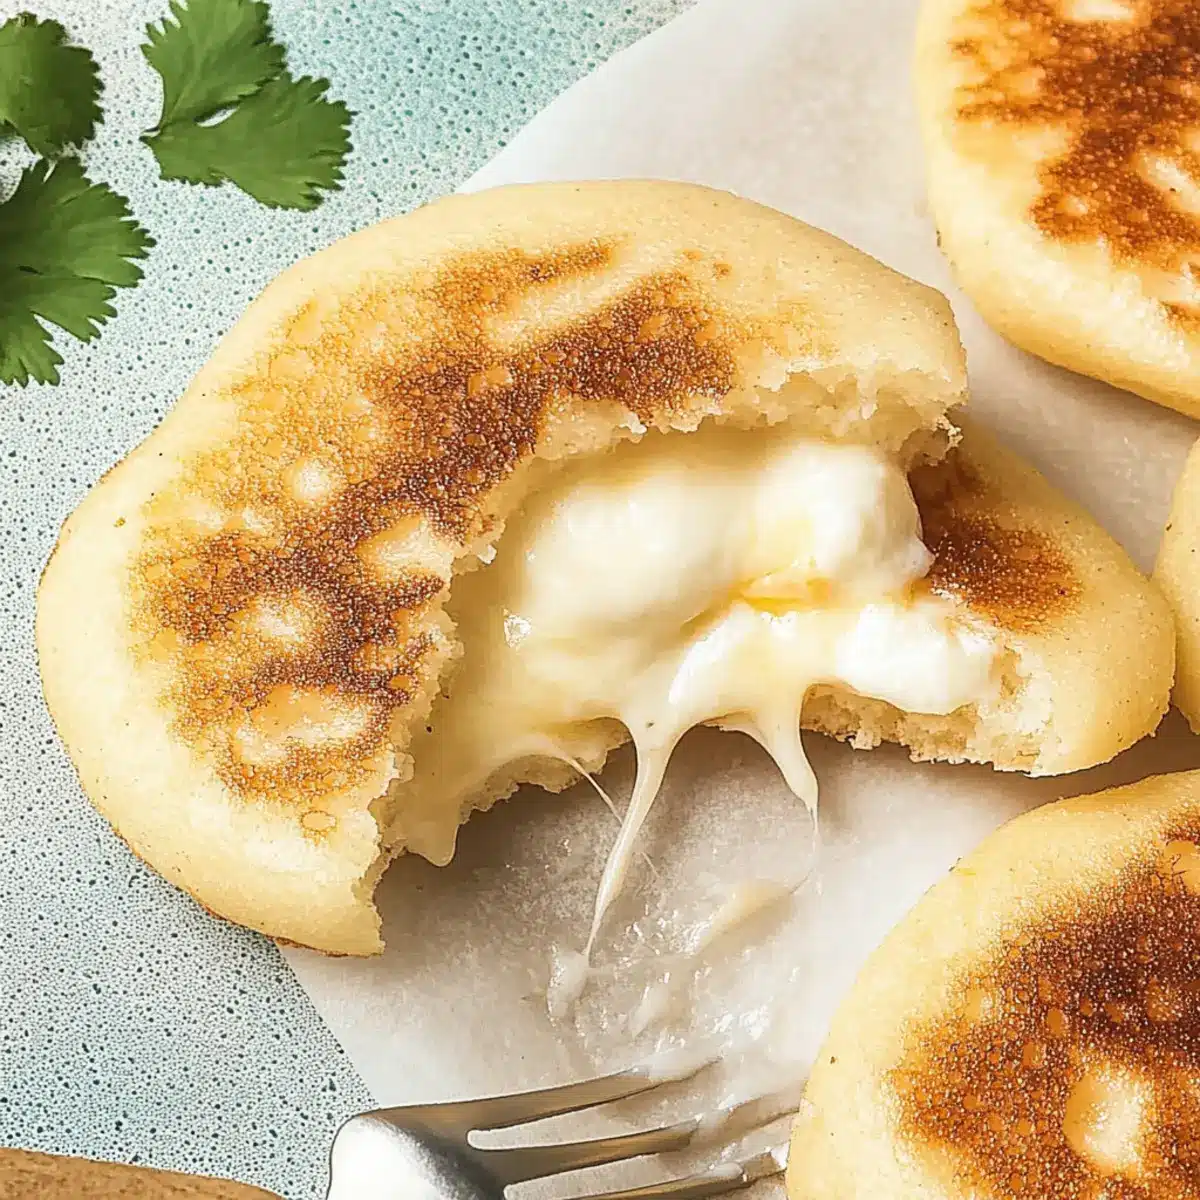
Stirring the mixture of masarepa and warm water, I could already feel the excitement bubbling up for a flavorful journey into Colombian cuisine. Arepas con Queso, those delightful cheese-stuffed corn cakes, are a treasure I can’t wait to share with you. These golden delights are not only a nostalgic bite but also an incredibly family-friendly recipe that’s naturally gluten-free when using masarepa. In just a few swift steps, you’ll create a snack or meal that brings everyone together—perfect for breakfast, lunch, or dinner! Imagine that crispy exterior giving way to melty cheese; it’s a comforting embrace you won’t want to miss. Curious about how to make them at home? Let’s dive in!

Why Arepas con Queso Are Irresistible?
Indulgent and satisfying, these cheese-stuffed corn cakes are perfect for any meal or snack time! Quick to prepare, you can whip them up in under 30 minutes—ideal for busy families. Versatile in flavors, try filling them with your favorite cheeses or add proteins like shredded chicken or sausage. Gluten-free when using masarepa, making them a great option for all diets. For a delightful twist, pair with avocado or salsa. They truly are comfort food that fosters togetherness at the table!
Arepas con Queso Ingredients
Discover the delightful ingredients that make up these cheesy wonders!
For the Dough
- Masarepa – This pre-cooked white cornmeal is essential for achieving the perfect texture; don’t substitute with regular cornmeal.
- Sea Salt or Kosher Salt – A pinch enhances the flavor beautifully; adjust to your taste.
- Cotija Cheese – Provides a salty, crumbly texture; feta works well as a substitute if needed.
- Butter – Adds richness and promotes browning; margarine can replace it for a dairy-free option.
- Warm Water – Hydrates the masarepa; adjust quantity for desired dough consistency.
For the Filling
- Shredded Mozzarella Cheese – The star filling that melts perfectly; cheddar can offer a bolder flavor.
For Cooking
- Oil or Butter for Cooking – Helps the arepas achieve a beautiful golden brown without sticking; opt for high-smoke point oils like canola for best results.
This carefully selected combination of ingredients ensures your Arepas con Queso are not only delicious but a family favorite for every occasion!
Step‑by‑Step Instructions for Arepas con Queso
Step 1: Prepare the Dough
In a mixing bowl, combine the masarepa, sea salt, Cotija cheese, melted butter, and warm water. Stir until a dough forms, then knead for 2-3 minutes until smooth and pliable. Once ready, cover the bowl with a kitchen towel and let the dough rest for 10 minutes to allow the flavors to meld and the texture to become more workable.
Step 2: Check Dough Consistency
After resting, take a small piece of dough and flatten it into a disc. If the edges crack, add warm water one tablespoon at a time, kneading gently after each addition until the dough is smooth and holds its shape without crumbling. This consistency will ensure your Arepas con Queso are perfectly tender when cooked.
Step 3: Shape the Arepas
Divide the dough into eight equal pieces and roll them into balls. Flatten each ball into a 5-inch circle, placing a generous portion of shredded mozzarella cheese in the center of half of the discs. Cover with the other half, sealing the edges carefully and smoothing them out to form a ½-inch thick disk, ensuring the cheesy filling is enclosed securely.
Step 4: Cook the Arepas
Heat a skillet or griddle over medium-low heat and add a little oil or butter. Once hot, carefully place the arepas in the pan, cooking for 4-5 minutes on each side until they are golden brown and crispy. If using an electric griddle, preheat it to 325°F and follow the same timing, checking for a beautiful golden crust.
Step 5: Serve Warm
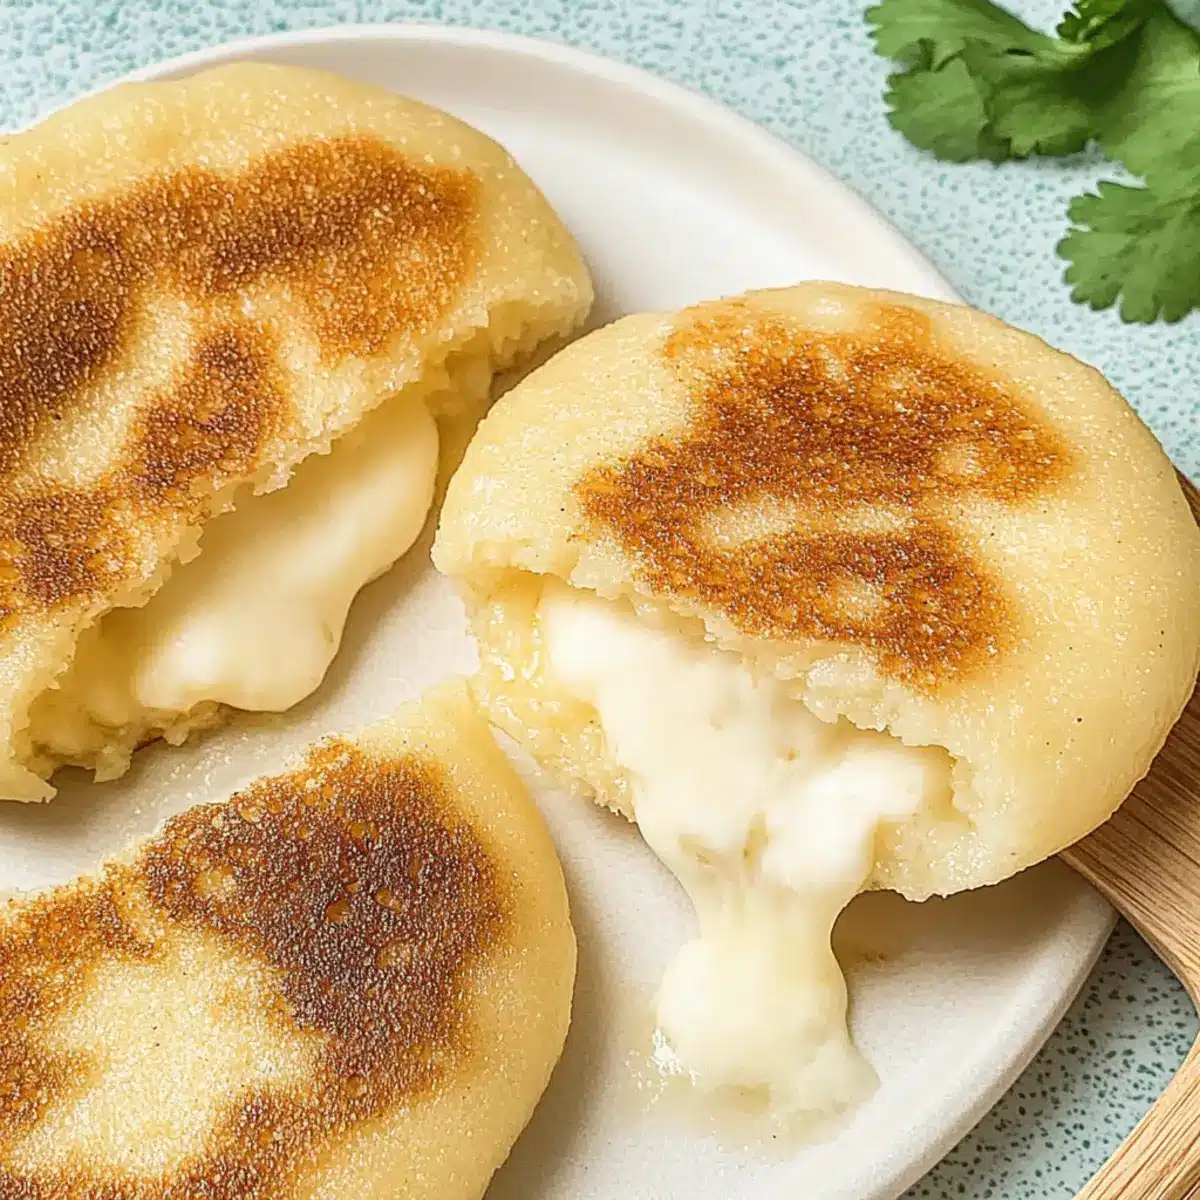
Once cooked, transfer the Arepas con Queso to a paper towel-lined plate to absorb excess oil. Enjoy them warm, optionally spreading a little butter on top for added richness. These delightful cheese-stuffed corn cakes are perfect as a snack, or served alongside your favorite dipping sauces for a delicious family meal.
Arepas con Queso Variations & Substitutions
Feel free to unleash your creativity and customize your Arepas con Queso for delightful new flavors and textures.
-
Cheese Swap: Use pepper jack for a spicy kick, or a blend of gouda and mozzarella for a richer taste. The different cheeses will melt beautifully within the arepas!
-
Dairy-Free: Replace butter with margarine or coconut oil for a delicious dairy-free version that everyone can enjoy. The coconut oil adds a subtle tropical essence to the flavor.
-
Protein-Packed: Incorporate shredded chicken or cooked chorizo into the filling for a heartier meal. Adding protein will not only enhance the flavor but also make these arepas more satisfying.
-
Vegetarian Delight: Fill with sautéed mushrooms and spinach for a delicious vegetarian option. The earthy flavors pair wonderfully with the cheesy goodness, making it both nutritious and tasty.
-
Herb Infusion: Mix in chopped cilantro or parsley into the dough to add a fresh flavor twist. This little touch brightens the overall taste and makes each bite extra special.
-
Spice It Up: Add a pinch of cayenne pepper or smoked paprika to the dough for a subtle heat that elevates the arepas. These spices will warm up your taste buds without overwhelming the dish.
-
Sweet Twist: For a fun dessert version, fill the arepas with sweetened cream cheese and a sprinkle of cinnamon. Serve with fresh fruit for a delightful twist that the kids will love!
These delightful options can transform your Arepas con Queso experience! And if you’re craving another comforting meal, try whipping up some delicious Chicken Bacon Ranch Quesadillas for a tasty alternative. You can also discover more flavors with the Baked Cod in Coconut Lemon Cream for a unique seafood twist. Let’s make snacking an exciting adventure together!
Storage Tips for Arepas con Queso
-
Fridge: Store leftover Arepas con Queso in an airtight container for up to 3 days to maintain their delicious flavor and texture.
-
Freezer: You can freeze cooked arepas for up to 2 months. Place them in a single layer on a baking sheet until frozen, then transfer to a freezer bag to prevent sticking.
-
Reheating: To reheat, place the arepas in a toaster oven at 350°F for about 10 minutes to revive their crispy exterior. Avoid microwaving, as it can make them soggy.
-
Make-Ahead: Prepare the dough ahead of time, wrap it tightly in plastic wrap, and store in the fridge for up to 2 days. Shape and cook when you’re ready to enjoy those cheesy corn cakes!
What to Serve with Arepas con Queso?
Dreaming of the perfect accompaniments to elevate your cheese-stuffed corn cakes into a complete meal experience?
-
Avocado Slices: Creamy avocado adds richness and complements the cheesy interior beautifully. It’s like a hug for your arepas!
-
Fresh Salsa: A tangy, vibrant salsa brings a burst of flavor that contrasts perfectly with the warm, cheesy arepas. Think of it as a refreshing dip that enhances every bite.
-
Colombian Aji: This spicy condiment adds a kick that pairs wonderfully with the mild flavor of the arepas. Its zesty heat is an exciting addition!
-
Grilled Vegetables: Smoky, charred veggies introduce a gorgeous textural contrast and brighten up the meal with their fresh flavors.
-
Crispy Fried Egg: Topped with a runny yolk, this addition creates a rich sauce that melts into the warm arepas, making each bite indulgently satisfying.
-
Corn Salad: A light corn salad with fresh herbs and lime juice adds a refreshing, crunchy element to your plate, balancing the richness of the arepas beautifully.
-
Berry Smoothie: For a sweet finish, a berry smoothie provides a fruity contrast that complements the savory elements of your dish, making it a delightful meal.
-
Coffee or Tea: A warm beverage like Colombian coffee or a spiced chai can round out your meal, enhancing the comforting atmospheres of home-cooked delights.
Enjoy mixing and matching these delightful pairings to create your own Extraordinary Arepas con Queso experience!
Expert Tips for Arepas con Queso
-
Use Masarepa Only: Ensure you’re using masarepa, not masa harina, to achieve that perfect texture in your Arepas con Queso.
-
Moisten Your Hands: To prevent the dough from sticking while shaping, wet your hands lightly; this small trick can make a big difference.
-
Adjust Water Gradually: If the dough feels too dry or cracks when flattened, add warm water gradually until it becomes smooth and pliable.
-
Create a Crispy Exterior: For a nice golden brown finish, make sure your oil or butter is hot enough before placing the arepas in the pan.
-
Keep Warm and Fresh: After cooking, wrap the arepas in a kitchen towel to keep them warm and fluffy until it’s time to serve. Enjoy your delicious Arepas con Queso!
Make Ahead Options
These Arepas con Queso are perfect for meal prep enthusiasts! You can prepare the dough up to 24 hours in advance and store it wrapped in plastic wrap in the refrigerator to keep it from drying out. If you’re short on time during the week, shape your arepas and place them on a parchment-lined baking sheet, then refrigerate for up to 3 days. When ready to cook, simply heat up your skillet and cook them as directed until they’re golden brown and crispy. This not only saves time but also ensures that every bite remains just as delicious as when freshly made!
Arepas con Queso Recipe FAQs
What type of masarepa should I use?
Absolutely! Make sure to use masarepa, which is pre-cooked white cornmeal specifically designed for making arepas. Regular cornmeal will not give you the same fluffy texture, as it hasn’t been pre-cooked. If you can’t find masarepa, look in international markets or the gluten-free aisle in your grocery store to ensure the best results for your Arepas con Queso.
How should I store leftover Arepas con Queso?
Very! To keep your arepas fresh, store any leftovers in an airtight container in the refrigerator for up to 3 days. Make sure they are completely cooled before sealing them to prevent moisture buildup that could impact their texture.
Can I freeze Arepas con Queso?
Absolutely! To freeze cooked arepas, first, let them cool completely. Then, arrange them in a single layer on a baking sheet and freeze until solid. After freezing, transfer them to a freezer bag, removing as much air as possible to prevent freezer burn. They can last up to 2 months in the freezer. When ready to enjoy, reheat them in a toaster oven at 350°F for about 10 minutes to restore their crispy exterior.
What should I do if the arepas crack while cooking?
Very! If you notice cracks appearing while cooking, it usually means the dough is too dry. To fix this, simply add more warm water to the dough, one tablespoon at a time, kneading gently until it becomes smooth and pliable. This adjustment is key to ensuring your Arepas con Queso turn out soft and delicious.
Are Arepas con Queso suitable for a gluten-free diet?
Absolutely! When made with masarepa, these arepas are naturally gluten-free, making them a fantastic option for anyone avoiding gluten. However, double-check other ingredients like the butter to ensure they’re suitable for your dietary needs, especially if you have severe allergies or sensitivities.
How can I add variety to my Arepas con Queso?
Very! Feel free to get creative! You can mix different cheeses into the filling, such as pepper jack or gouda for a spicy twist. Including cooked meat like shredded chicken or ground beef can make them heartier. Additionally, incorporating fresh herbs or spices into the dough, like cilantro or cumin, can elevate the flavor profile. The more, the merrier!
Delicious Arepas con Queso: Your New Family Favorite Snack
Ingredients
Equipment
Method
- In a mixing bowl, combine the masarepa, sea salt, Cotija cheese, melted butter, and warm water. Stir until a dough forms, then knead for 2-3 minutes until smooth and pliable. Cover the bowl with a kitchen towel and let the dough rest for 10 minutes.
- After resting, take a small piece of dough and flatten it into a disc. If the edges crack, add warm water one tablespoon at a time, kneading gently after each addition until smooth.
- Divide the dough into eight equal pieces and roll each into a ball. Flatten each into a 5-inch circle, placing a generous portion of mozzarella cheese in the center of half of the discs. Cover with the other half, sealing the edges.
- Heat a skillet over medium-low heat and add oil or butter. Cook the arepas for 4-5 minutes on each side until golden brown and crispy.
- Transfer the Arepas con Queso to a paper towel-lined plate to absorb excess oil. Serve warm and enjoy!
Leave a Reply