
Did you ever wonder how a simple cookie could brighten your day and bring a smile to everyone’s face? Well, I have just the recipe for that! These Cookie Monster Cookies are not only irresistibly cute with their vibrant blue hue, but they also boast a delightfully chewy texture that will have you reaching for seconds. Loaded with whole Oreos and chocolate chips, this fun cookie recipe is perfect for parties, kids’ events, or simply indulging your sweet tooth. Plus, they’re a breeze to make, allowing you to spend less time in the kitchen and more time enjoying the magic of homemade treats. Intrigued? Let’s dive into this deliciously playful cookie adventure together!
Why Are These Cookies So Fun?
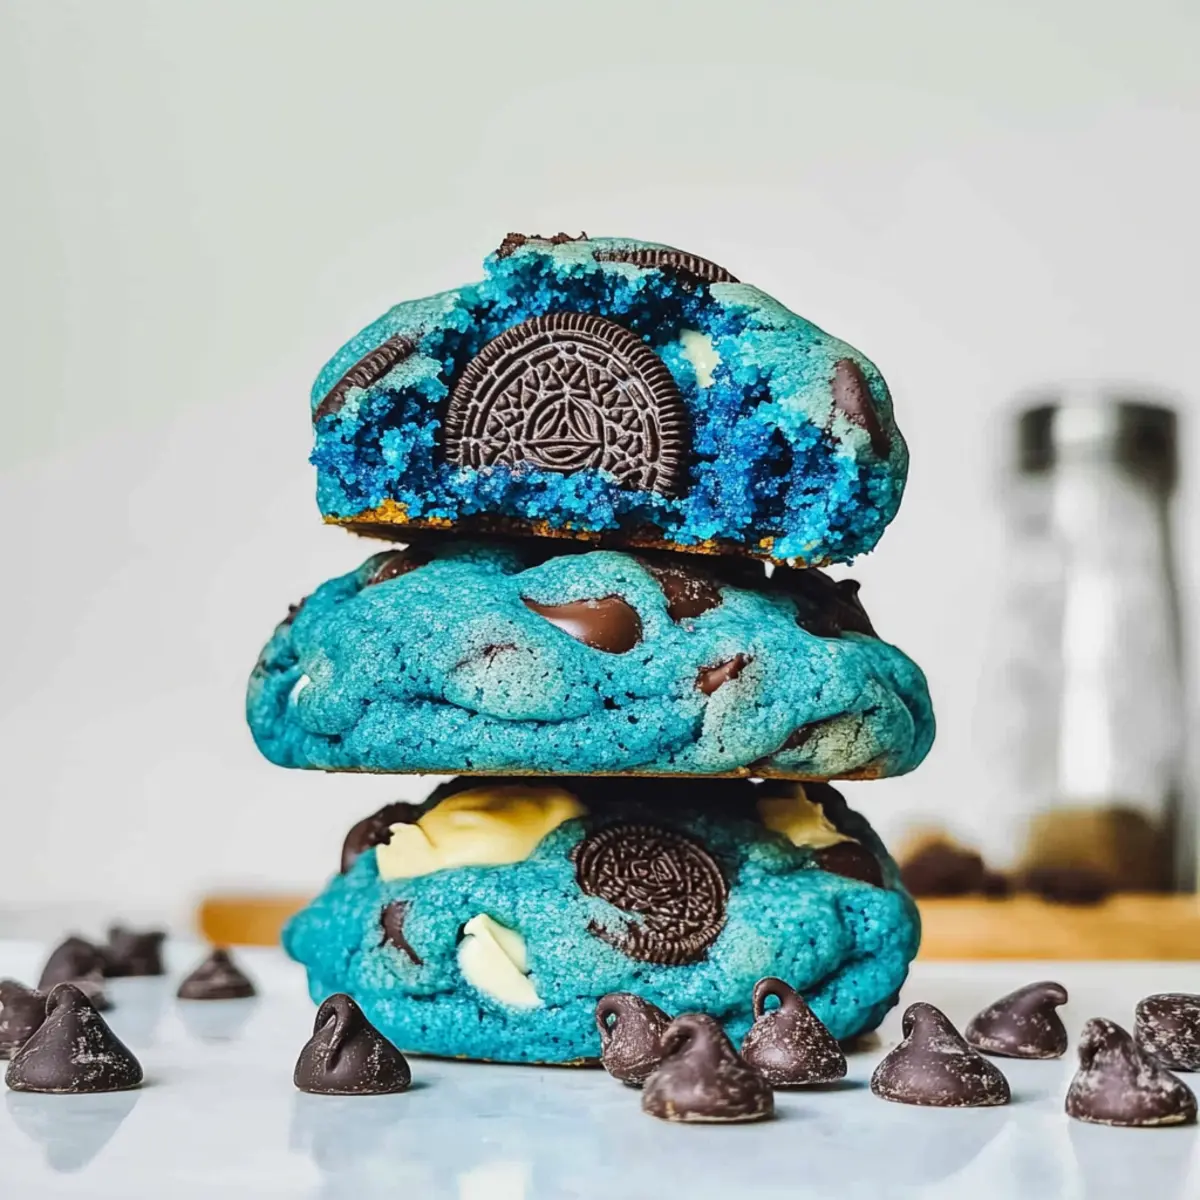
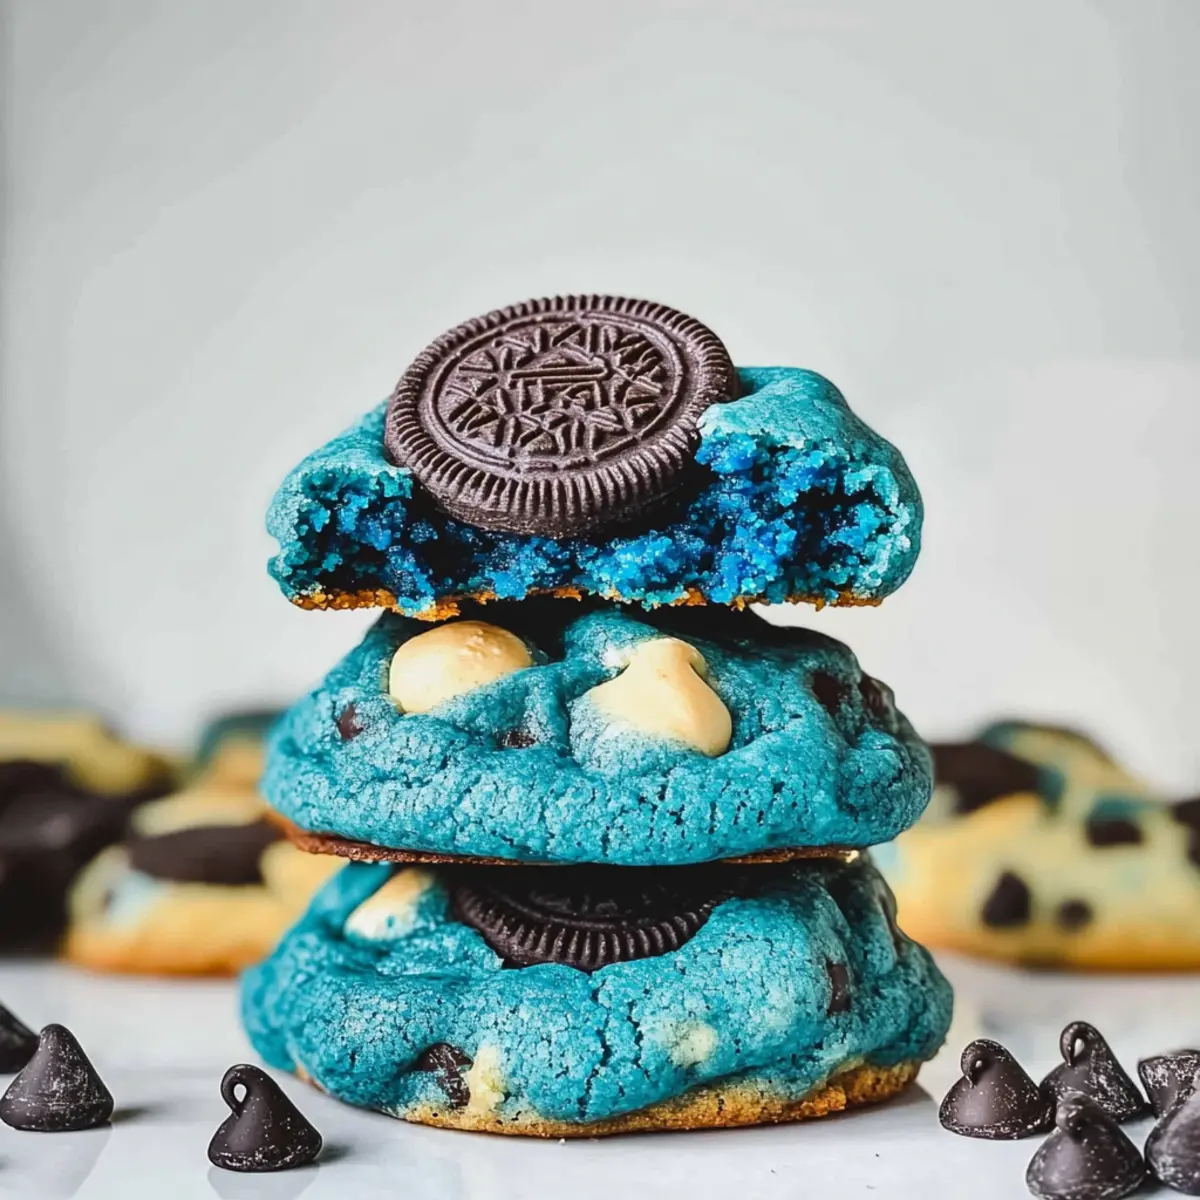
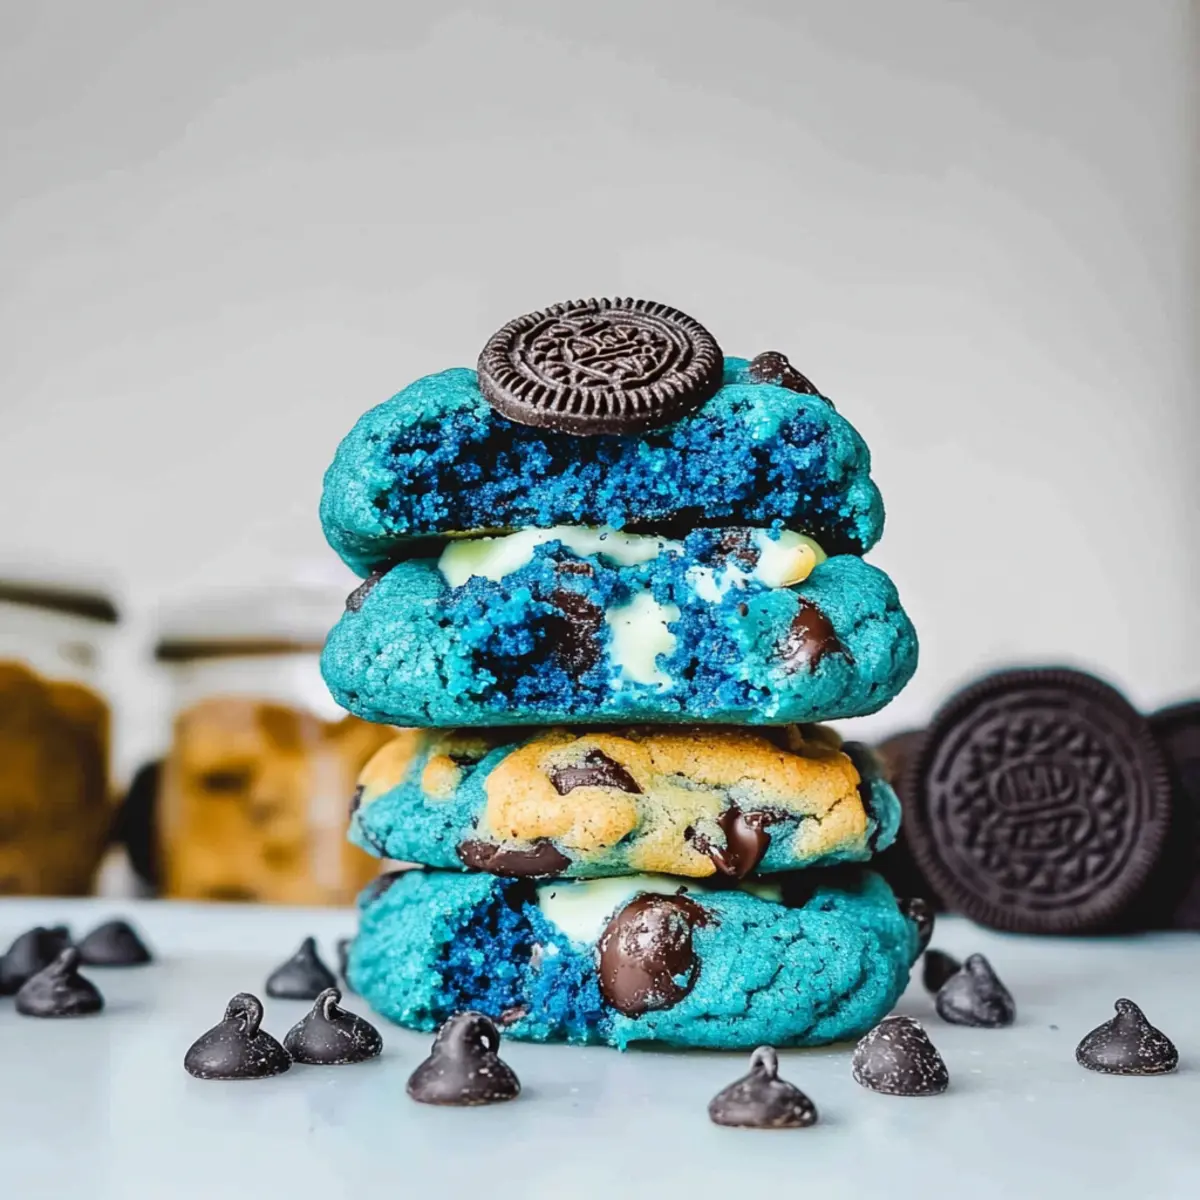
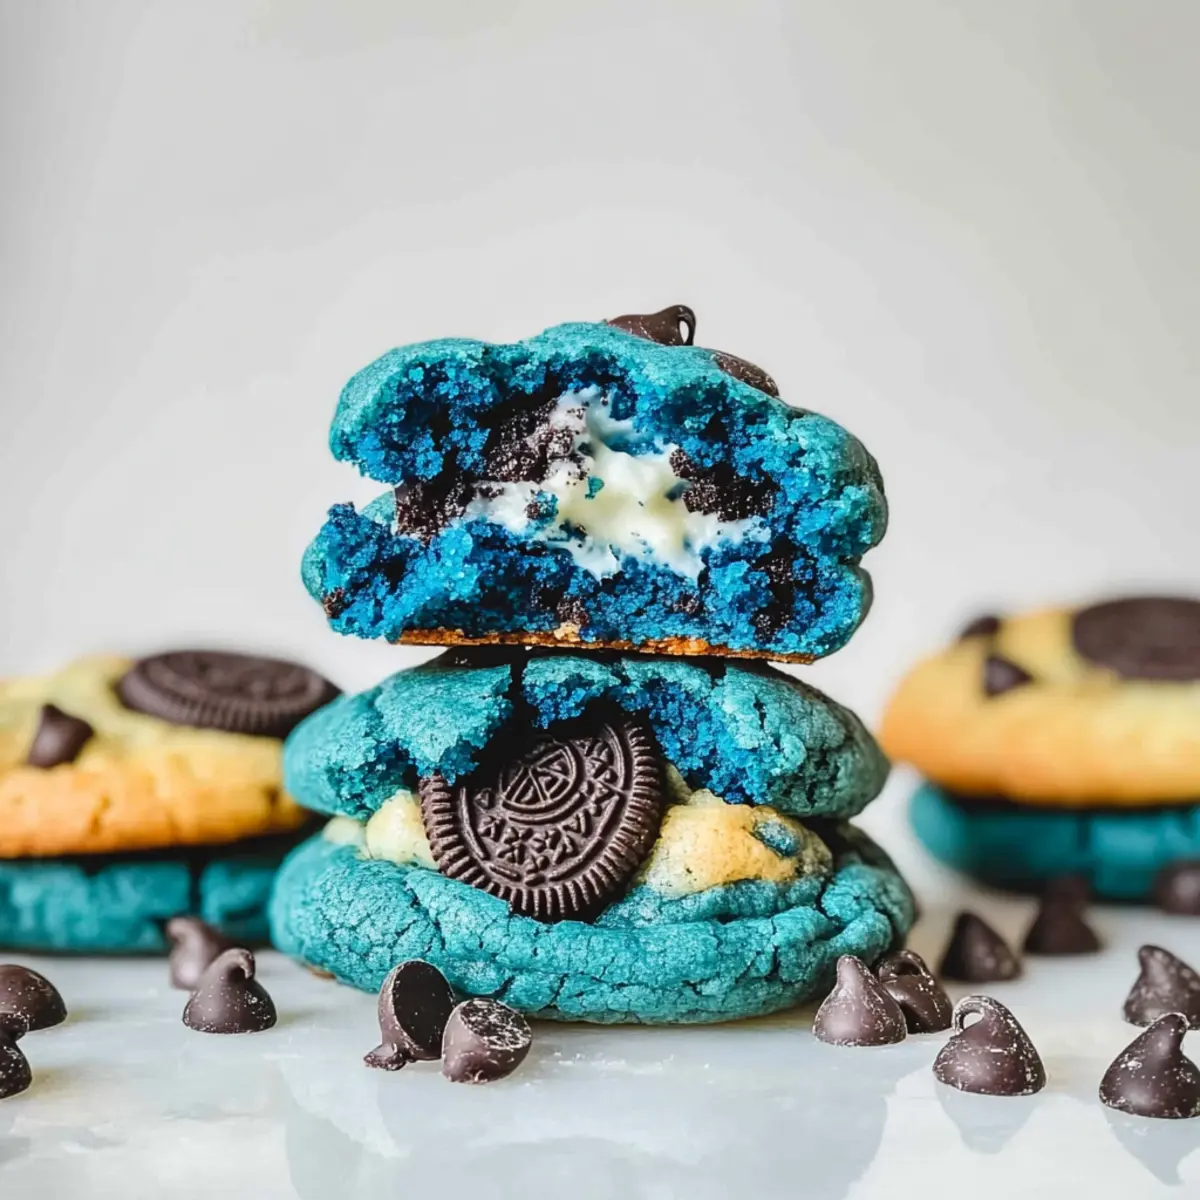
Vibrant Appearance: Each Cookie Monster cookie showcases a stunning blue color that instantly captures attention, making them the perfect party treat!
Delightfully Chewy: Expect a thick texture that combines a soft center with crunchy Oreo pieces, creating a cookie experience like no other.
Customizable Fun: Change the colors or fillings easily! From Valentine’s Day hearts to rainbow sprinkles, these cookies fit any theme or occasion.
Quick to Make: With straightforward steps, you’ll whip up these joyous cookies faster than you can order takeout—perfect for a last-minute gathering!
Crowd-Pleasing Delight: Adults and kids alike will rave about these cookies, ensuring seconds are a must! For even more fun cookie ideas, check out my Pumpkin Pie Cookies or unique Sugar Cookie Shots.
Cookie Monster Cookies Ingredients
-
For the Cookie Dough
-
Butter (100 g, ½ cup) – Provides richness and moisture; let it reach room temperature for easy creaming.
-
Brown Sugar (230 g, 1 ¾ cups) – Adds sweetness and flavor depth; swap it with coconut sugar for a unique twist.
-
Granulated Sugar (40 g, ¼ cup) – Increases sweetness; feel free to reduce if you prefer less sugary cookies.
-
Egg (1) – Binds the ingredients and adds moisture; for a vegan version, use a flax egg instead.
-
Vanilla Extract (1 tsp) – Enhances flavor; opt for pure vanilla for the best taste in these Cookie Monster cookies.
-
Blue Gel Food Coloring (30 g, ¼ cup) – Infuses the cookies with that fun blue hue; experiment with other colors for custom creations.
-
All-Purpose Flour (230 g, 1 ¾ cups) – Provides structure, so weigh it for accuracy.
-
Baking Powder (1 tsp) – Helps the cookies rise beautifully.
-
Baking Soda (½ tsp) – Provides leavening to ensure a delightful softness.
-
Salt (¼ tsp) – Balances sweetness and is essential for flavor depth.
-
For the Mix-ins
-
Chocolate Chips (40 g, ¼ cup) – Adds texture and richness; substitute with white chocolate or your favorite nuts for variety.
-
Mini Cookies/Cookie Chunks (30 g, ¼ cup) – Elevates the cookie texture; use different types for a fun twist.
-
Whole Oreos (3 for stuffing) – The signature ingredient that makes these Cookie Monster cookies so unique; using other cookies will alter their character.
Enjoy gathering these delightful ingredients and get ready to create a batch of Cookie Monster Cookies that will surely steal the show at any gathering!
Step‑by‑Step Instructions for Cookie Monster Cookies
Step 1: Cream Butter and Sugars
In a large mixing bowl, combine the softened butter, brown sugar, and granulated sugar. Using an electric mixer, beat the mixture on medium speed for 1–2 minutes until it turns light and fluffy, ensuring all ingredients are well-blended. You should see a smooth and creamy texture, perfect for your Cookie Monster cookies.
Step 2: Add Wet Ingredients
Once your butter and sugars are well combined, add in the egg, vanilla extract, and blue gel food coloring. Mix the ingredients on low speed until everything is thoroughly incorporated and you have a vibrant blue dough. The color should be uniform, giving your cookies that iconic Cookie Monster look.
Step 3: Combine Dry Ingredients
In a separate bowl, sift together the all-purpose flour, baking powder, baking soda, and salt. Gradually add this dry mixture to your wet ingredients while gently folding with a spatula. Continue to mix until just combined; be careful not to overwork the dough to keep your cookies soft and chewy.
Step 4: Incorporate Add-Ins
Now it’s time to make your Cookie Monster cookies even more delightful! Gently fold in the chocolate chips and mini cookies or chunks into the blue dough until they’re evenly distributed. This step adds a wonderful texture and flavor to your cookies, making each bite a joyful surprise.
Step 5: Shape Cookies
Take a generous scoop of the dough and flatten it in your palm. Place a whole Oreo in the center and carefully encase it with more dough, forming a ball. Ensure the Oreo is completely covered; this will create the delicious surprise hidden inside each Cookie Monster cookie!
Step 6: Chill Dough
For the best results, refrigerate the formed cookie dough balls for at least 30 minutes. If you’re short on time, you can pop them in the freezer for 15–20 minutes. Chilling the dough helps prevent the cookies from spreading too much while baking, ensuring thick, chewy treats.
Step 7: Bake Cookies
Preheat your oven to 180°C (350°F) and line a baking sheet with parchment paper. Once the dough has chilled, place the cookie dough balls on the baking sheet, leaving enough space between them. Bake for 12–15 minutes, or until the edges turn golden brown but the centers still appear soft—this will give you those perfect Cookie Monster cookies!
Step 8: Cool
After baking, remove the cookies from the oven and let them cool on the tray for about 5 minutes. This allows them to set before transferring to a wire rack. Once on the rack, let them cool completely, or enjoy them warm for a fresh-out-of-the-oven experience!
Make Ahead Options
These Cookie Monster Cookies are perfect for meal prep enthusiasts! You can prepare the cookie dough up to 24 hours in advance by mixing all ingredients and shaping them into balls, then refrigerate them. If you’re looking to save even more time, freeze the formed dough balls for up to 3 months—just remember to thaw them in the refrigerator overnight before baking. To maintain quality, always store the dough in an airtight container to prevent dryness. When you’re ready to bake, simply follow the baking instructions, and you’ll have freshly baked, chewy, and colorful Cookie Monster Cookies that are just as delightful as if they were made on the spot!
What to Serve with Cookie Monster Cookies?
Imagine a whimsical gathering where vibrant cookies steal the show, bringing joy to every guest without missing a beat.
-
Milkshake Magic: A creamy vanilla milkshake complements the cookies’ sweetness and richness, doubling the fun of this dessert experience. Dip a cookie into the shake for a delightful treat!
-
Fresh Fruit Salad: Bright, juicy fruit adds a refreshing contrast to the cookies’ chewy texture, balancing sweetness with pops of tartness that will please any palate.
-
Chilled Lemonade: A zesty lemonade cuts through the richness of the cookies, providing a refreshing sip that rejuvenates and pairs beautifully with their indulgent flavors.
-
Chocolate Dipped Strawberries: The combination of smooth chocolate and juicy strawberries adds elegance and a touch of romance to this playful cookie offering.
-
Ice Cream Sundae: Build an indulgent treat by pairing a Cookie Monster cookie with a scoop of chocolate or cookies and cream ice cream. Add whipped cream and sprinkles for an unforgettable dessert.
-
Coffee or Espresso: A rich coffee or espresso highlights the sweet, chocolaty flavors of the cookies while offering a delightful contrast that will satisfy any sweet tooth.
-
Colorful Spritz Cookies: Serve alongside rainbow spritz cookies for a fun, colorful cookie platter that dazzles the eyes and delights the taste buds. Add variety to your dessert table with these cheerful treats!
How to Store and Freeze Cookie Monster Cookies
-
Room Temperature: Store cookie monster cookies in an airtight container for up to 1 week to keep them chewy and fresh.
-
Fridge: Placing them in the fridge can extend their shelf life for up to 2 weeks, but may slightly alter their texture.
-
Freezer: For longer storage, freeze cookie monster cookie dough balls for up to 3 months. Simply thaw before baking for a quick treat.
-
Reheating: Warm cookies in the microwave for 10-15 seconds to regain that delightful softness before indulging!
Expert Tips for Cookie Monster Cookies
-
Chill the Dough: Ensure your cookie dough is well-chilled to prevent flat cookies. Warm dough spreads too much during baking, losing that chewy texture.
-
Accurate Measurements: Use a kitchen scale for precise ingredient measuring, particularly for flour. This avoids dry or overly dense cookies.
-
Color Customization: Feel free to swap the blue gel food coloring with other hues; just remember it won’t affect the flavor—great for themed celebrations!
-
Mix-Ins Matter: Incorporating different types of chocolate chips or mini cookies can enhance texture and flavor. Avoid over-mixing to keep the Cookie Monster cookies chewy.
-
Watch the Baking Time: Check your cookies as they bake; removing them while the centers are still soft ensures a delicious, gooey center that everyone will love.
Cookie Monster Cookies Variations & Substitutions
Ready to have fun customizing your Cookie Monster cookies? Let’s dive into some delightful twists that will elevate your baking game!
- Dairy-Free: Substitute butter with coconut oil or dairy-free margarine for a delicious vegan version that’s just as chewy.
- Sugar-Free: Try using sugar alternatives like Stevia or erythritol in equal amounts to keep the sweetness without the calories.
- Gluten-Free: Swap all-purpose flour with a gluten-free flour blend for cookies everyone can enjoy, perfect when baking for diverse diets.
- Flavor Boost: Add 1 tsp of almond extract for a nutty twist. Its warm notes can elevate the flavor profile beautifully.
- Color Variations: Use gel food coloring in different shades, like pink for birthdays or green for St. Patrick’s Day, to match any celebration!
- Add Sprinkles: Fold in your favorite sprinkles to the dough for a fun texture. They’ll add a little crunch and whimsy to every bite.
- Nutty Crunch: Mix in chopped nuts like walnuts or pecans to add a delightful crunch, pairing perfectly with the softness of the cookies.
- Cookie Variation: Experiment by swapping Oreos for other stuffed cookies such as stuffed Biscoff or chocolate-covered caramel cookies for a new twist on flavor.
With these ideas, you’re equipped to make your Cookie Monster Cookies even more extraordinary! And for more creative cookie inspirations, don’t forget to check out my scrumptious Pumpkin Pie Cookies or delightful Winter Wonderland Cookies. Happy baking!
Cookie Monster Cookies Recipe FAQs
How do I choose ripe ingredients for Cookie Monster Cookies?
Absolutely! For the best results, make sure your butter is at room temperature to achieve that perfect creaminess when mixing. The brown sugar should be soft and clump-free; if it’s hard, you can soften it in the microwave for a few seconds. Fresh eggs are key too—look for ones with clean shells and an expiration date that’s well ahead.
What’s the best way to store Cookie Monster Cookies?
Very! Store your Cookie Monster cookies in an airtight container at room temperature for up to 1 week, and they will stay delightfully chewy. If you want to prolong their freshness, you can refrigerate them for up to 2 weeks; just be aware that chilling might make them a bit firmer.
Can I freeze Cookie Monster Cookie dough?
Definitely! To freeze the dough, scoop it into balls and place them on a baking sheet in a single layer. Freeze for about 1-2 hours until they are solid, then transfer the dough balls to a freezer-safe bag or container. They will keep well for up to 3 months! When you’re ready to bake, just thaw the dough in the fridge overnight and bake as usual.
What should I do if my Cookie Monster Cookies come out flat?
Oh no! If your cookies spread too much, it might be due to warm dough or not enough flour. Ensure you chill your dough for at least 30 minutes before baking, and consider measuring your flour accurately—using a kitchen scale helps. If you notice that your cookies still spread unexpectedly, adding 1-2 extra tablespoons of flour can help achieve that thick, chewy texture you’re aiming for.
Are there any dietary considerations for Cookie Monster Cookies?
For sure! If you have allergies, be cautious with chocolate chips and Oreos, as both can contain gluten and dairy. Additionally, for a vegan option, simply substitute the egg with a flax egg (1 tablespoon of ground flaxseed mixed with 2.5 tablespoons of water) and use non-dairy butter and vegan chocolate chips. These small changes make the cookies enjoyable for everyone without compromising on fun!
How long can I keep Cookie Monster Cookies in the freezer?
Very! When stored correctly in an airtight container or freezer bag, you can keep your Cookie Monster cookies in the freezer for up to 3 months. To enjoy them, just let them sit at room temperature for a while or heat them up in the microwave for 10-15 seconds for that fresh-out-of-the-oven taste.
Cookie Monster Cookies: Irresistibly Chewy & Colorful Treats
Ingredients
Equipment
Method
- In a large mixing bowl, combine the softened butter, brown sugar, and granulated sugar. Using an electric mixer, beat the mixture on medium speed for 1–2 minutes until it turns light and fluffy.
- Once your butter and sugars are well combined, add in the egg, vanilla extract, and blue gel food coloring. Mix on low speed until everything is thoroughly incorporated.
- In a separate bowl, sift together the all-purpose flour, baking powder, baking soda, and salt. Gradually add this dry mixture to your wet ingredients while gently folding with a spatula.
- Gently fold in the chocolate chips and mini cookies into the blue dough until they're evenly distributed.
- Take a scoop of the dough, flatten it, place an Oreo in the center, encase it with more dough, forming a ball.
- Refrigerate the formed cookie dough balls for at least 30 minutes or pop them in the freezer for 15–20 minutes.
- Preheat your oven to 180°C (350°F), line a baking sheet with parchment paper, and bake for 12–15 minutes.
- Let the cookies cool on the tray for about 5 minutes before transferring them to a wire rack to cool completely.
Leave a Reply