
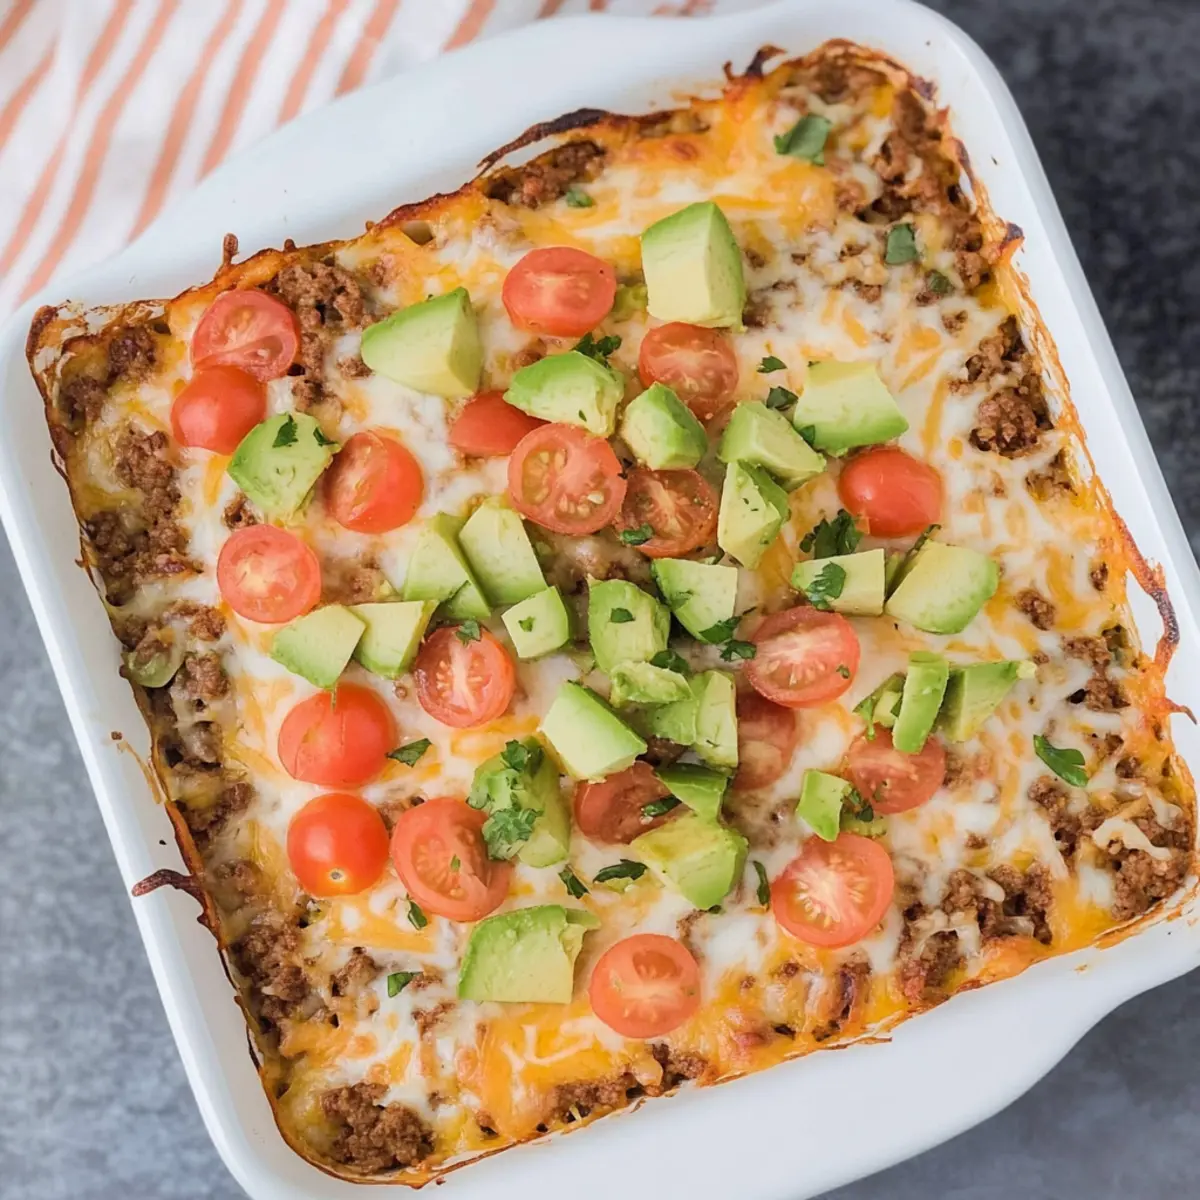
As I dipped my chip into that bubbling, cheesy masterpiece, it hit me: who needs takeout when I can whip up a sensational Easy Taco Dip in my own kitchen? This dish combines comfort and health seamlessly, featuring savory ground beef and creamy Greek yogurt to create a hearty dip that’s gluten-free and packed with protein. Whether you’re hosting a party or just craving something cozy for a movie night, this taco dip is not only a crowd-pleaser but also a guilt-free indulgence. Its irresistible combination of flavors and textures promises to impress your guests—or even just yourself! Are you ready to dive into the mouthwatering world of homemade dips?
Why is This Taco Dip a Must-Try?
Healthier Alternative: This Easy Taco Dip is made with Greek yogurt, cutting out cream cheese while keeping the rich, creamy goodness you crave.
Quick and Simple: With just a few steps, you can have a bubbling dip ready to serve in no time—perfect for last-minute gatherings!
Crowd Favorite: Its savory combo of ground beef, cheese, and spices makes this dish a guaranteed hit at any party.
Versatile Toppings: Customize your dip with fresh toppings like avocado or cilantro, making each bite refreshing and unique. Pair it with crackers or tortilla chips for the ultimate snacking experience! If you’re exploring other fabulous dips, check out my Ground Beef Tostadas or the delightful Potato Taco Bowl for more inspiration.
Easy Taco Dip Ingredients
• Get ready for a flavor-packed treat!
For the Meat Base
• Ground Beef – Provides hearty protein and savory flavors; swap for ground turkey for a leaner option.
• Onions – Adds aromatic sweetness; finely chop for even distribution throughout the dip.
• Taco Seasoning – Infuses the dip with vibrant spices; homemade mixes can lower sodium levels.
For the Creamy Base
• Nonfat Greek Yogurt – Replaces cream cheese for a creamy texture packed with protein; ensures guilt-free indulgence.
• Low Fat Cottage Cheese – Adds extra creaminess without overpowering flavors; perfectly complements the dip base.
For the Flavor Boost
• Salsa – Introduces moisture and extra flavor; choose based on your heat preference, whether mild or spicy.
• Cheddar Cheese – Brings melty, cheesy goodness; grate fresh cheese for the best melt.
For Additional Texture
• Black Beans (optional) – Offers a hearty texture and protein boost; ensure to rinse and drain if using canned.
For Garnishing
• Toppings – Diced tomatoes, olives, or avocado add freshness; personalize each serving for a delightful crunch. Don’t forget to include colorful cilantro or spicy jalapeños for an extra kick!
This Easy Taco Dip will transform your gatherings with enticing flavors and a creamy texture that everyone will love!
Step‑by‑Step Instructions for Easy Taco Dip
Step 1: Preheat the Oven
Begin by preheating your oven to 350°F (175°C). This ensures that it reaches the perfect temperature for baking your Easy Taco Dip, resulting in a bubbling, golden finish. While the oven warms up, gather your ingredients to streamline the cooking process and keep things organized.
Step 2: Cook the Meat
In a large skillet over medium heat, add the ground beef and finely chopped onions. Cook for about 10 minutes, breaking the beef into fine pieces as it browns. Stirring occasionally, ensure the meat is fully cooked and no longer pink. The onions should soften and become fragrant, adding a delightful aroma to your kitchen.
Step 3: Add Seasoning
Once the beef and onions are cooked through, stir in the taco seasoning. Mix thoroughly for about 1-2 minutes until the seasoning is evenly distributed. You’ll notice the meat absorbing the flavorful spices, creating a delicious base for your Easy Taco Dip. Remove the skillet from heat and set it aside.
Step 4: Combine the Creamy Mix
In a large mixing bowl, combine the cooked beef mixture, Greek yogurt, cottage cheese, salsa, and ¾ cup of cheddar cheese. Stir until the ingredients are well blended and creamy. The Greek yogurt replaces traditional cream cheese, ensuring your taco dip is healthier without sacrificing the rich taste everyone loves.
Step 5: Prep the Baking Dish
Pour the creamy mixture into an 8×8 baking dish, spreading it evenly with a spatula. Make sure the surface is smooth for even baking. Sprinkle the remaining cheddar cheese on top, creating a deliciously cheesy layer that will melt beautifully in the oven, enhancing the overall texture of your Easy Taco Dip.
Step 6: Bake the Dip
Carefully place the baking dish in the preheated oven and bake for 20-25 minutes, or until the dip is bubbly and the cheese is melted and slightly golden. Keep an eye on it towards the end to ensure it doesn’t overcook. The tantalizing aroma will fill your kitchen, promising a treat worth the wait.
Step 7: Serve and Enjoy
Once the Easy Taco Dip is ready, remove it from the oven and let it cool slightly before serving. Top with your favorite garnishes such as diced tomatoes, olives, or avocado for a fresh touch. Pair it with tortilla chips or veggie sticks for dipping, and enjoy this crowd-pleasing appetizer warm and comforting.
Easy Taco Dip Variations & Substitutions
Embrace the adventure of personalizing your Easy Taco Dip with these exciting variations that will delight your taste buds!
-
Vegetarian Swap: Substitute ground beef with black beans for a delicious vegetarian twist! This adds a hearty, protein-packed layer without compromising on flavor.
-
Creamy Avocado: Blend ripe avocados into the creamy base for a smooth, rich texture that enhances the dip while adding healthy fats. It’s a delightful twist everyone will love!
-
Kick of Spice: Include diced jalapeños or sprinkle in some chili flakes for those who crave an extra kick. The heat will balance beautifully with the creamy elements.
-
Flavor Explosion: Mix in chopped roasted red peppers for a smoky flavor that adds depth. Their sweetness complements the spices and enhances the overall taste experience.
-
Cheesy Delight: Experiment with different cheeses! Swap cheddar for pepper jack for a zesty twist, or mix in some cream cheese for added creaminess if you want a more indulgent option.
-
Sweet Surprise: Stir in some corn for a touch of sweetness and crunch that harmonizes with the savory profiles. It adds a delightful texture contrast!
-
Fresh Herb Burst: Garnish with fresh herbs like cilantro or green onions after baking. They brighten up every bite, offering a refreshing flavor that’s simply irresistible.
If you love exploring new dishes, try my delicious Apple Pie Tacos or the savory Ground Beef Tostadas for more fresh ideas!
Make Ahead Options
This Healthy Easy Taco Dip is perfect for meal prep enthusiasts looking to save time during busy weeknights! You can prepare the creamy filling (ground beef, Greek yogurt, cottage cheese, salsa, and cheese) up to 24 hours in advance—just cover it tightly with plastic wrap or store it in an airtight container in the refrigerator to maintain its freshness. For the best results, bake the dip right before serving; simply pour the mixture into a baking dish, sprinkle with remaining cheese, and pop it in a preheated oven for 20-25 minutes. This way, you’ll enjoy a bubbly, cheesy masterpiece that’s just as delicious as if you had made it fresh!
What to Serve with Easy Taco Dip
Elevate your gathering with perfect pairings that complement the creamy richness of this delightful dip.
-
Tortilla Chips: The classic choice, crunchy and salty chips are ideal for scooping and balancing the creamy dip.
-
Fresh Veggie Sticks: Carrot, celery, and bell pepper sticks offer a refreshing crunch and a healthy contrast to the rich flavors.
-
Guacamole: This creamy, avocado-based topping adds a vibrant flavor and extra creaminess, enhancing each delicious bite.
-
Sour Cream or Greek Yogurt: A dollop of sour cream or extra Greek yogurt brings a tangy freshness that complements the rich cheese and meat.
-
Pico de Gallo: Fresh, zesty salsa made with tomatoes, onion, and cilantro elevates the taste and adds a burst of color and freshness.
-
Black Bean Salad: This hearty salad filled with beans, corn, and lime juice mirrors the dip’s flavors while providing added protein and texture.
-
Margaritas: A refreshing margarita pairs wonderfully, with its citrusy notes cutting through the richness of the taco dip.
-
Churros: For dessert, crispy churros dusted with cinnamon sugar offer a sweet ending that complements the savory dip beautifully.
Expert Tips for Easy Taco Dip
- Ingredient Variety: Feel free to substitute ground beef with ground turkey or chicken for a lighter option while still enjoying the deliciousness of an Easy Taco Dip.
- Homemade Seasoning: Avoid excess sodium by making your own taco seasoning using spices you love, adding a personal touch to your dip’s flavor profile.
- Cheese Matters: Use freshly grated cheddar cheese for the best melt; pre-shredded cheese often contains anti-caking agents that can affect the texture.
- Serve Immediately: For the best experience, enjoy your Easy Taco Dip hot right out of the oven; it can become thick if left to cool too long.
- Customize Wisely: Experiment with toppings like jalapeños or cilantro, but avoid too many wet toppings to maintain the dip’s creaminess and avoid sogginess.
How to Store and Freeze Easy Taco Dip
Fridge: Store any leftover easy taco dip in an airtight container in the fridge for up to 3 days. This keeps it fresh and ready for snacking!
Freezer: To freeze easy taco dip, pour it into a freezer-safe container and seal it tightly. It can be frozen for up to 2 months. Thaw in the refrigerator overnight when you’re ready to enjoy it again.
Reheating: For best results, reheat in the oven at 350°F (175°C) covered with foil until warmed through. This keeps the dip creamy and avoids drying it out.
Easy Taco Dip Recipe FAQs
How do I choose ripe ingredients for the Easy Taco Dip?
Absolutely! For the best flavor and texture, choose fresh vegetables for garnishing. Look for firm avocados with dark green skin, and select tomatoes that are brightly colored and slightly soft yet not mushy. Onions should be crisp and firm, avoiding any with soft spots or blemishes.
How long can I store Easy Taco Dip in the fridge?
You can store leftover Easy Taco Dip in an airtight container in the fridge for up to 3 days. Make sure it’s completely cooled before sealing to maintain freshness. When you’re ready for a snack, simply reheat gently to preserve its creamy texture—about 10-15 minutes in the oven at 350°F (175°C) should do the trick!
Can I freeze Easy Taco Dip?
Yes, you can freeze Easy Taco Dip! After preparing the dip, transfer it to a freezer-safe container and seal tightly. It can be frozen for up to 2 months. When you’re ready to enjoy it, thaw in the refrigerator overnight. Reheat in the oven at 350°F (175°C) covered with foil until warmed through to keep that delightful creamy mouthfeel.
What can I do if my Easy Taco Dip turns out too watery?
Very! If your dip ends up a bit watery, try adjusting the protein or veggie content next time. Ensure you’re draining any canned ingredients like black beans well. Adding a little extra Greek yogurt or cottage cheese can help absorb moisture, or consider using less salsa. If it’s already made, try reheating it with an extra sprinkle of cheese or bake it a bit longer uncovered to evaporate excess moisture.
Are there any dietary considerations for the Easy Taco Dip?
Of course! This Easy Taco Dip is already gluten-free and high in protein, making it a great option for those on keto diets. Always check that your taco seasoning and salsa are gluten-free, as some brands may contain hidden gluten. If serving to guests with allergies, consider substituting cottage cheese with more Greek yogurt or silken tofu for those who are lactose intolerant, ensuring everyone can enjoy this savory treat!
What toppings can I use to customize my Easy Taco Dip?
The more the merrier! To make your Easy Taco Dip unique, consider topping it with diced tomatoes, sliced olives, or fresh avocado. If you crave a little heat, add jalapeños or a sprinkle of crushed red pepper flakes. Fresh herbs like cilantro or green onions add a delightful freshness, making each bite even more inviting and delicious.
Creamy Easy Taco Dip for Perfect Game Night Snacking
Ingredients
Equipment
Method
- Preheat your oven to 350°F (175°C). Gather your ingredients while the oven warms up.
- In a large skillet, cook the ground beef and onions over medium heat for about 10 minutes until browned.
- Stir in the taco seasoning and cook for another 1-2 minutes.
- In a mixing bowl, combine the beef mixture with Greek yogurt, cottage cheese, salsa, and ¾ cup of cheddar cheese. Stir until creamy.
- Pour the mixture into an 8x8 baking dish and sprinkle remaining cheddar cheese on top.
- Bake for 20-25 minutes until bubbly and golden.
- Remove from the oven, let cool slightly, garnish with toppings, and serve with tortilla chips.
Leave a Reply