
There’s something undeniably magical about the sight of freshly baked pastries warming in the oven, and my Gluten-Free Cruffins are no exception. As the aroma of buttery layers fills the kitchen, it’s hard not to feel transported to a charming café in Paris, where flavor meets texture in the most delightful way. This recipe combines the tender, airy interior of a muffin with the flaky, satisfying crunch of a croissant—perfect for anyone craving an indulgent treat without gluten. Not only are these cruffins quick to whip up, but they also offer endless filling possibilities from sweet Nutella to zesty orange. Whether you’re looking to impress at brunch or simply want a cozy snack with your afternoon tea, these cruffins are sure to elevate your baking repertoire. Curious about how to create this exquisite hybrid? Let’s dive into the details!
Why are Gluten-Free Cruffins a Must-Try?
Delightful Fusion: These cruffins beautifully blend the flaky textures of croissants with the comforting shape of muffins. Endless Variations: From zesty orange to rich Nutella, you can customize these treats to suit any palate. Quick to Make: Ideal for busy bakers, this recipe is straightforward and perfect for any occasion. Delicious Aroma: The smell of baking cruffins fills your home with an irresistible warmth. Perfect for Sharing: These treats are sure to impress friends and family, making them a hit at brunch or gatherings. Don’t forget to check out my Pecan Pie Dump for another delightful dessert option!
Gluten-Free Cruffins Ingredients
• Here’s what you’ll need to create these delightful pastries!
For the Dough
- Active Dry Yeast – A leavening agent that helps the dough rise; make sure it’s gluten-free!
- Sugar – Enhances sweetness and activates the yeast; cane sugar works wonderfully.
- Milk – Hydrates the dough and activates yeast; warm it to 110º F for the best results.
- Gluten-Free Flour Blend – Provides the ideal structure; choose a blend suited for yeast recipes.
- Unsalted Butter (Frozen) – Creates those flaky layers; using frozen makes for easier grating.
- Salt – Essential for enhancing flavor and overall balance.
For the Filling
- Pure Vanilla Extract – Adds a lovely depth of flavor.
- Ground Cinnamon – Infuses warmth and spice into the filling; don’t skip this step!
For the Topping
- Melting Butter – For brushing on top to achieve a golden finish and help sugar stick during rolling.
These Gluten-Free Cruffins are not just a treat but a delightful experience waiting to happen!
Step‑by‑Step Instructions for Gluten Free Cruffins
Step 1: Activate the Yeast
Begin by warming the milk to 110º F, then add the sugar and active dry yeast. Stir gently and let it sit for about 5 minutes. Watch for bubbles forming on the surface, indicating the yeast is activated. Meanwhile, preheat your oven to 200º F, then turn it off after reaching the temperature to create a warm environment for rising.
Step 2: Mix the Dry Ingredients
In a large mixing bowl, whisk together the gluten-free flour blend, remaining sugar, and salt until evenly combined. This dry mixture is crucial for the structure of your Gluten Free Cruffins, ensuring they rise beautifully. The ingredients should be well integrated, creating a fluffy base for your dough.
Step 3: Incorporate the Butter
Grate the frozen unsalted butter directly into the flour mixture. Use a box grater for a quick and even distribution, ensuring each piece is coated in flour. Mix everything together until the mixture resembles coarse crumbs. This process helps create the flaky layers expected in cruffins.
Step 4: Form the Dough
Pour the activated yeast mixture and add the vanilla extract into the flour mixture. Stir until a soft and workable dough forms. If the dough feels too sticky, gradually incorporate a bit more gluten-free flour. Aim for a smooth consistency, ensuring all ingredients are well combined.
Step 5: Roll Out the Dough
On a lightly floured silicone mat, roll out the dough evenly to a thickness of about 1/4 inch. Take your time to ensure it’s even, which helps with even baking and leads to the perfect texture in your Gluten Free Cruffins. You want a flat, manageable surface to work with for the next steps.
Step 6: Add Filling and Cut
Brush a layer of melted butter over the surface of the dough, then generously sprinkle with cinnamon and sugar. Using a sharp knife or pizza cutter, slice the dough into strips about 1 inch wide. This is where the magic begins, as these filled strips will create the layers of your cruffins.
Step 7: Shape the Cruffins
Take each strip and roll it up tightly, starting from one end to form a spiraled shape. Place each rolled cruffin into a greased muffin pan, ensuring they fit snugly. Cover the pan with a clean kitchen towel and let the cruffins rise in the warm oven for about 45 minutes, allowing them to puff up beautifully.
Step 8: Preheat and Prepare for Baking
After the second rise, preheat the oven to 375º F. While it heats, brush the tops of your cruffins with melted butter to achieve a golden, inviting finish. This final touch enhances the flavor and helps any additional toppings stick.
Step 9: Bake to Perfection
Carefully place the muffin pan in the preheated oven and bake for 25-30 minutes, or until the cruffins turn golden brown and are fragrant. Keep an eye on them during baking — they should puff up nicely, reaching that beautiful color that makes them so irresistible.
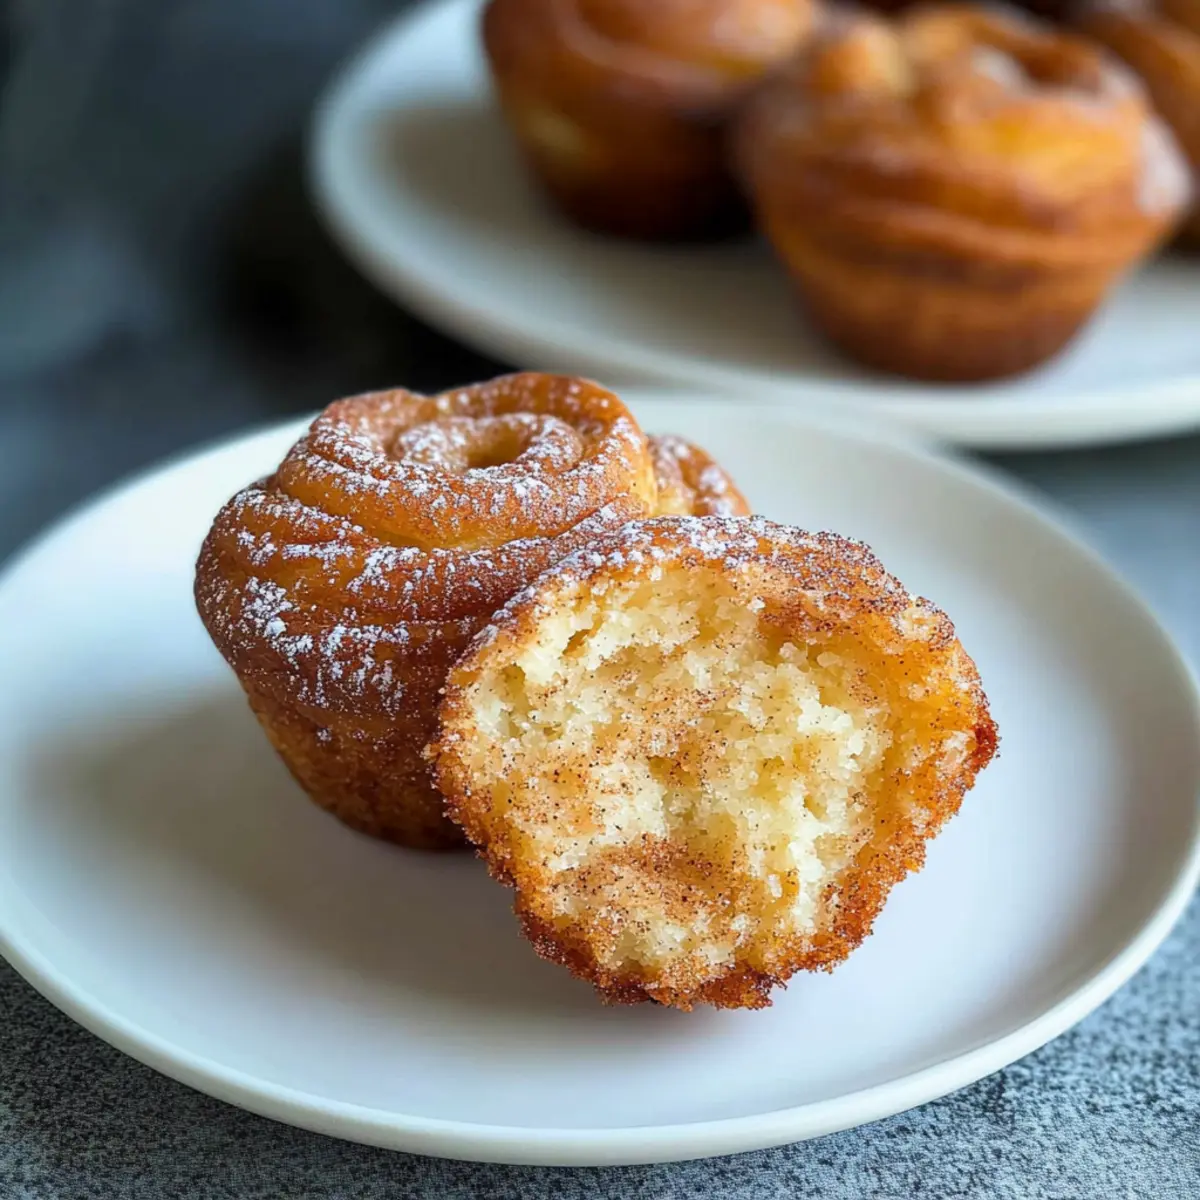
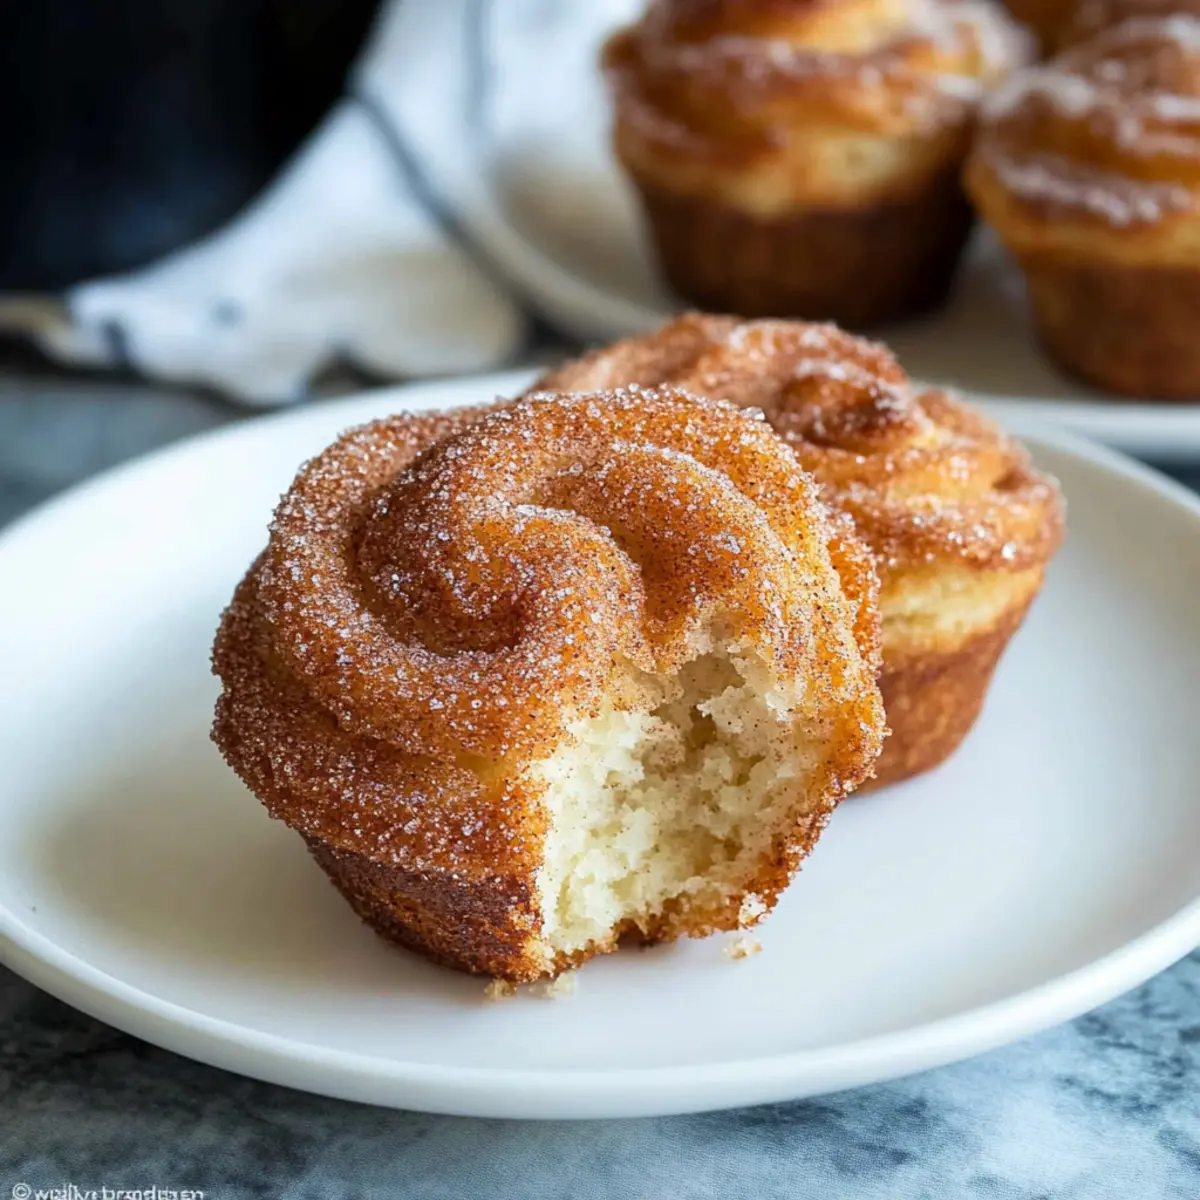
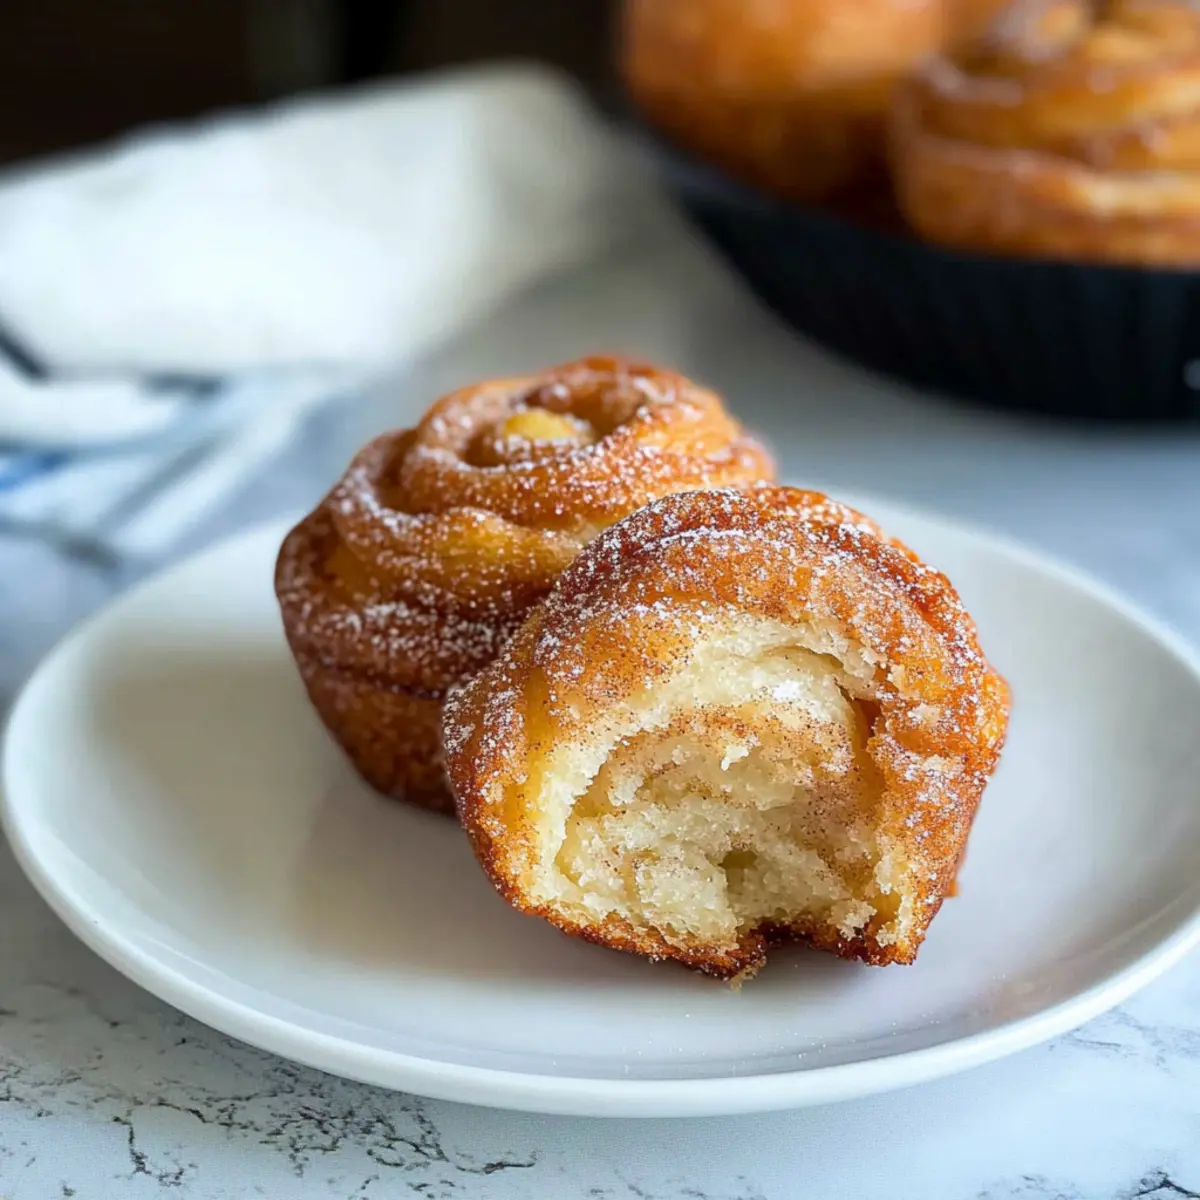
Step 10: Finish with a Sweet Touch
Once baked, remove the cruffins from the oven and let them cool slightly. While still warm, roll them in a cinnamon-sugar mixture for an extra burst of flavor. This step adds a delightful sweetness that perfectly complements the flaky, buttery texture of your Gluten Free Cruffins.
Gluten-Free Cruffins: Sweet Twists
Feel free to indulge in your creativity while making these lovely cruffins—there’s a world of flavors to explore!
-
Orange: Substitute part of the milk with fresh orange juice and add zest for a citrusy kick.
-
Nutella: Spread a generous layer of Nutella instead of sugar in the filling for a rich and decadent experience. This twist is perfect for chocolate lovers, offering a delightful contrast to the buttery layers.
-
Pumpkin Spice: Incorporate pumpkin spice into the cinnamon sugar layer for a cozy autumn flavor that pairs beautifully with coffee or tea.
-
Cinnamon Apple: Add finely diced apples on top of the sugar mixture before rolling for a fruity surprise. These cruffins become extra moist and bursting with flavor!
-
Lemon Poppy Seed: Use lemon juice instead of milk and toss in poppy seeds for a refreshing twist. The citrus and crunch balance beautifully with the flaky goodness.
-
Chocolate Chip: Mix mini chocolate chips into the dough for a melt-in-your-mouth sweetness that’s irresistible. They’ll add delightful pockets of chocolate in every bite!
-
Savory Spinach & Cheese: For a savory option, incorporate sautéed spinach and cheese into the filling. This delicious variation is perfect for a brunch gathering or an afternoon snack.
-
Coconut & Lime: Add shredded coconut and a hint of lime zest for a tropical flair. The combination will transport you to a sunny beach with every bite!
Don’t forget to keep these variations in mind next time you whip up a batch. And if you’re feeling adventurous, check out my Pecan Pie Dump for another delightful treat you can customize!
What to Serve with Decadent Gluten-Free Cruffins?
Imagine a cozy morning or afternoon gathering where the sweet, buttery aroma of freshly baked cruffins fills the air, perfectly paired with delectable sides and drinks.
- Fresh Fruit Salad: A vibrant mix of seasonal fruits adds a refreshing brightness, perfectly balancing the rich flavors of the cruffins.
- Creamy Yogurt Parfait: Layering yogurt with granola and honey provides a satisfying crunch and creaminess, making it an irresistible combination.
- Cinnamon Spiced Coffee: The warm notes of cinnamon in your coffee beautifully complement the flavors of your cruffins, creating a comforting beverage choice.
- Savory Breakfast Sausages: A hint of savory flavor enhances the sweetness of the cruffins, creating a delightful flavor contrast that elevates your meal.
- Herbal Tea: A soothing cup of herbal tea adds warmth and relaxation, enriching the overall experience of your sweet treats.
- Chocolate Sauce Dip: For those craving something indulgent, a warm chocolate sauce for dipping delivers a rich, decadent touch that chocolate lovers will adore.
- Ice Cream Scoop: Imagine a vanilla or cinnamon ice cream melting gently over a warm cruffin, transforming it into a deliciously unique dessert experience.
- Nutty Granola Bars: These offer a satisfying crunch and wholesome flavors that work wonderfully as a grab-and-go side to enjoy with your snacks.
- Maple Syrup Drizzle: A simple drizzle adds a touch of sweetness that enhances the overall flavor experience while keeping the cruffins moist.
Make Ahead Options
These Gluten Free Cruffins are perfect for meal prepping! You can prepare the dough up to 24 hours in advance; simply complete steps 1 through 5, then wrap the formed dough tightly in plastic wrap and refrigerate. If you’ve made the filling, keep it separate in an airtight container in the fridge for optimal freshness. When you’re ready to bake, simply roll out the dough, assemble the cruffins (steps 6 and 7), and allow them to rise in a warm place while you preheat the oven. This ensures they bake up just as delicious and flaky as if you made them fresh! Enjoy your time-saved treat anytime!
Storage Tips for Gluten-Free Cruffins
Room Temperature: Store cruffins in an airtight container for up to 3 days. They are best enjoyed fresh, as the texture may soften over time.
Fridge: If you need to extend their freshness, refrigerate cruffins in an airtight container for up to 5 days. Just remember to reheat for an enjoyable treat!
Freezer: For longer storage, freeze cruffins in a freezer-safe bag for up to 3 months. Thaw in the fridge overnight and reheat in the oven for the flaky texture.
Reheating: To restore the cruffins’ delightful crispness, warm them in a preheated oven at 350º F for about 5-10 minutes. Enjoy your Gluten-Free Cruffins like they were freshly baked!
Expert Tips for Gluten-Free Cruffins
- Choose the Right Flour: Ensure your gluten-free flour blend is specifically formulated for yeast baking. Regular blends may yield disappointing results.
- Don’t Rush the Yeast: Allow the yeast to froth properly before mixing with the dry ingredients; this step is crucial for that delightful rise in your Gluten-Free Cruffins.
- Grate the Butter: Always use frozen butter for grating. This method creates the flaky layers that define delicious cruffins—freshly softened butter won’t yield the same results.
- Roll Thinly: Spread the dough to 1/4 inch thickness to ensure you capture ample filling and achieve the desired flaky texture in your cruffins.
- Mind the Rise Time: Gluten-free doughs typically don’t re-rise well, so be sure to shape your cruffins after the first rise for optimal texture.
- Storage Tips: Keep leftover cruffins in an airtight container to maintain freshness; they can spoil more quickly due to the absence of preservatives in gluten-free baking.

Gluten-Free Cruffins Recipe FAQs
What type of gluten-free flour blend should I use?
Absolutely! Choose a gluten-free flour blend that is designed specifically for yeast recipes. These blends typically contain a mix of flours and starches that mimic the properties of wheat flour, providing the right structure for your cruffins. Avoid blends that are labeled as “all-purpose” as they may not yield the same fluffy, tender results.
How can I tell if my active dry yeast is still good?
Very! To check if your yeast is active, mix it with warm water (not hotter than 110º F) and a little sugar. Let it sit for about 5 to 10 minutes. If it bubbles and foams, you’re good to go! If it doesn’t, it may be expired, and you’ll need to buy a new packet.
How should I store leftover cruffins?
I often recommend storing leftover gluten-free cruffins in an airtight container at room temperature for up to 3 days to maintain their texture. If you’re planning to keep them longer, pop them into the refrigerator for up to 5 days. Remember to reheat them slightly to bring back that delightful flakiness!
Can I freeze my cruffins, and how?
Definitely! To freeze your gluten-free cruffins, first ensure they are completely cooled. Wrap each cruffin tightly in plastic wrap or aluminum foil, then place them in a freezer-safe ziplock bag. They can be kept in the freezer for up to 3 months. When you’re ready to enjoy, thaw them in the fridge overnight and reheat in a preheated oven at 350º F for about 5-10 minutes—get ready for that fresh-baked aroma!
Are there any common problems with gluten-free baking?
Yes! One common issue is that gluten-free dough can be crumbly or too sticky. If you find your dough is too sticky, gradually add a bit more gluten-free flour until it reaches a workable consistency. Also, gluten-free dough doesn’t rise as much as traditional dough, so make sure to shape your cruffins after the first rise instead of trying to re-shape them later.
Can I share these cruffins with my pets?
Not recommended! While gluten-free ingredients like butter and sugar are safe in moderation for pets, it’s best to avoid sharing pastries with them as they often contain high amounts of sugar and fat, which can be harmful. Always keep sweet treats for humans!
Irresistible Gluten Free Cruffins: Flaky & Flavorful Delights
Ingredients
Equipment
Method
- Warm the milk to 110º F, then add the sugar and active dry yeast. Let it sit for 5 minutes until bubbles form.
- In a mixing bowl, whisk together the gluten-free flour blend, remaining sugar, and salt until well combined.
- Grate the frozen unsalted butter directly into the flour mixture and mix until it resembles coarse crumbs.
- Pour the activated yeast mixture and vanilla extract into the flour mixture, stirring until a soft dough forms.
- Roll out the dough on a lightly floured silicone mat to a thickness of 1/4 inch.
- Brush melted butter over the dough, then sprinkle with cinnamon and sugar. Cut into strips about 1 inch wide.
- Roll each strip tightly and place them into a greased muffin pan, cover, and let rise in a warm oven for 45 minutes.
- Preheat the oven to 375º F. Brush the tops of the risen cruffins with melted butter.
- Bake for 25-30 minutes until golden brown and fragrant.
- Remove from the oven, cool slightly, then roll in a cinnamon-sugar mixture while still warm.
Leave a Reply