
The rich aroma of freshly baked pastries wafting through the kitchen can feel like a warm hug on a chilly morning. Today, I’m thrilled to share my recipe for Heavenly Cheese Danish with Maple Glaze, a delightful homemade treat that elevates your brunch game like nothing else. Imagine buttery, flaky layers embracing a luscious cream cheese filling, topped with a sweet maple glaze that brings everything together in perfect harmony. This recipe is not only quick to prepare, but it also fills your home with the kind of warmth that invites friends and family to linger a little longer. Whether you’re enjoying it for breakfast or as a cozy afternoon snack, I guarantee one bite will make you wonder why you ever settled for store-bought versions. Ready to create some magic in your kitchen? Let’s dive into this scrumptious journey together!

What Makes This Cheese Danish Irresistible?
Heavenly Flavors: The delightful blend of creamy filling and buttery pastry creates an irresistible treat that you won’t be able to resist!
Quick & Easy: With straightforward steps, even beginners can nail this recipe, making it a perfect choice for spontaneous baking sessions.
Versatile Treat: Enjoy these danishes at brunch, as a snack, or serve them at gatherings, and watch how they vanish before your eyes!
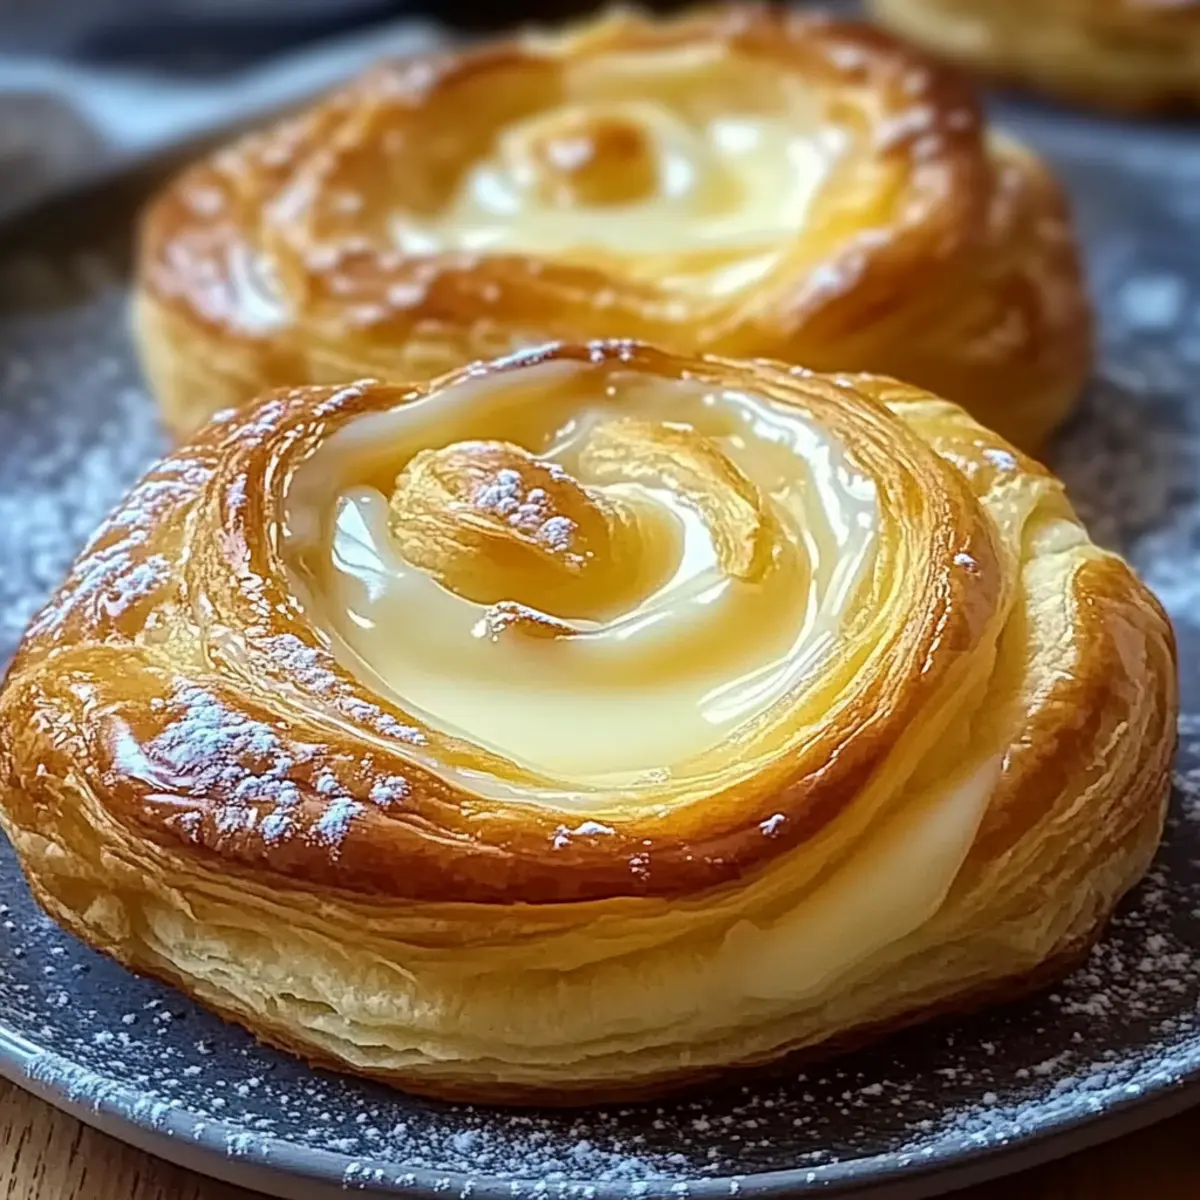
Impressive Appearance: Golden-brown, flaky layers topped with a sweet maple glaze make this a showstopper for any occasion.
Store-Bought No More: Elevate your baking skills and banish the thought of pre-packaged pastries! You’ll be tempted to try variations like adding chocolate chips or fruit preserves, making them even more enjoyable.
Ready to get started? Check out my recipe for Baked Mac Cheese if you’re in the mood for something savory alongside this sweet delight!
Heavenly Cheese Danish Ingredients
• Get ready to create flaky perfection!
For the Dough
- Active Dry Yeast – Helps the dough rise and develop a fluffy texture; ensure it’s active by checking for foam when mixed with warm water.
- Warm Water – Activates the yeast; suggested temperature is 110° to 115°F for best results.
- All-Purpose Flour – Provides structure to the pastry; no substitution recommended for optimal texture.
- Granulated Sugar – Adds sweetness and contributes to browning the pastry.
- Salt – Balances flavors and enhances the overall taste.
- Cold Butter (cubed) – Creates the flaky layers; remember to keep it cold for a lighter pastry.
- 2% Milk – Adds moisture to the dough.
- Egg Yolks – Enriches the dough and improves texture; using room temperature makes mixing easier.
- Ground Cinnamon – Infuses a warm, inviting spice flavor; adjust to taste for your preferred spice level.
For the Cream Cheese Filling
- Cream Cheese (softened) – The star of the show, offering a rich, creamy layer; can substitute with vegan cream cheese or ricotta for variation.
- Extra Sugar (for filling) – Sweetens the cream cheese filling beautifully.
- Whole Egg (separated) – Brushed on the dough for a shiny, appealing finish.
- Water (for egg wash) – Helps achieve a spreadable consistency for the egg wash.
For the Maple Glaze
- Maple Syrup – Glazes the danishes after baking, adding a delightful sweetness and shine that complements the filling perfectly.
Step‑by‑Step Instructions for Heavenly Cheese Danish
Step 1: Activate Yeast
Begin by combining the active dry yeast and warm water in a small bowl, ensuring the water temperature is between 110° to 115°F. Stir gently and let the mixture sit for about 5 minutes until it becomes frothy, signaling that your yeast is active and ready for the delicious dough of your Heavenly Cheese Danish.
Step 2: Prepare Dough
In a large mixing bowl, whisk together the all-purpose flour, granulated sugar, and salt. Next, cut in the cold cubed butter, using a pastry cutter or your fingers until the mixture resembles coarse crumbs. Pour in the milk, egg yolks, and the activated yeast mixture, stirring until a sticky dough forms that embraces the promise of flaky pastry.
Step 3: Chill Dough
Cover the dough tightly with plastic wrap or a clean kitchen towel and place it in the refrigerator. Chill the dough for 8 to 24 hours; this step is essential for developing the flavors and achieving that characteristic flakiness found in a perfect Heavenly Cheese Danish.
Step 4: Shape Dough
Once chilled, punch down the dough to release air. Divide it into four equal pieces and roll each piece out on a lightly floured surface into a rectangle. Sprinkle the surface lightly with ground cinnamon for an added flavor element, drawing everyone closer to this delightful treat.
Step 5: Twist and Coil
Cut each rectangle into long strips, about 1 inch wide. Gently twist each strip and wrap it into a coiled shape, placing them on a greased baking sheet. This artistic form allows the pastry to rise and become beautifully flaky as it bakes, making your Heavenly Cheese Danish visually delightful.
Step 6: Prepare Filling
In a mixing bowl, beat the softened cream cheese, extra sugar, and one egg yolk until the mixture is smooth and creamy. This filling is the heart of your Heavenly Cheese Danish, so don’t rush! Spoon a tablespoon of this luscious filling onto each pastry, inviting flavors that will mingle perfectly during baking.
Step 7: Rise
Cover the assembled pastries lightly with a towel and let them rise in a warm area for about 45 minutes, or until they have doubled in size. This process allows the yeast to work its magic, contributing to the airy texture of your Heavenly Cheese Danish.
Step 8: Preheat Oven
While your pastries are rising, preheat your oven to 350°F. A hot oven is crucial for creating that beautifully golden exterior and ensuring the insides bake to a creamy perfection, complementing the flaky layers of your Heavenly Cheese Danish.
Step 9: Egg Wash
In a small bowl, whisk together the separated egg white with a splash of water for your egg wash. Once the pastries have risen, gently brush this mixture over each twisted danish, adding a touch of shine that elevates the presentation and creates an irresistible golden color.
Step 10: Bake
Carefully place the baking sheet in your preheated oven and bake the pastries for 15 to 20 minutes. Keep an eye on them, and remove them when they turn golden brown and fragrant, filling your kitchen with the enchanting aroma of your Heavenly Cheese Danish.
Step 11: Glaze
Immediately after taking the danishes from the oven, brush them generously with maple syrup for a sweet finish that enhances their delightful flavors. The warm maple glaze not only adds a glossy sheen but ties together the heavenly components of this delicious pastry.

How to Store and Freeze Heavenly Cheese Danish
Room Temperature: Store at room temperature for up to 1 day, wrapped in foil to maintain freshness. Enjoy them as soon as possible for the best taste!
Fridge: Keep leftovers in an airtight container in the refrigerator for up to 5 days. Reheat in the microwave or oven for a few minutes before serving to restore that delightful flakiness.
Freezer: Freeze unbaked danishes for up to 2 months. Place them on a baking sheet, freeze until solid, then transfer to an airtight container. Bake directly from frozen, adding about 5 minutes to the baking time.
Reheating: To reheat, preheat your oven to 350°F and bake for 10-15 minutes until warm. This will help revive the tender, flaky texture of your Heavenly Cheese Danish.
Heavenly Cheese Danish Variations
Feel free to personalize your Heavenly Cheese Danish and make it truly yours with these fun twists and swaps!
-
Vegan Version: Substitute cream cheese with vegan cream cheese for a plant-based delight that everyone can enjoy. The flaky pastry pairs beautifully with the creamy, dairy-free filling!
-
Fruit-Infused Filling: Add a tablespoon of your favorite fruit preserves or fresh berries to the cream cheese mixture. This fruity burst adds a refreshing contrast to the rich creaminess.
-
Chocolate Lovers: Mix in chocolate chips or chunks to the cream cheese filling for a decadent chocolate twist. Imagine biting into a gooey chocolate surprise hidden within that flaky pastry!
-
Nutty Crunch: Incorporate chopped nuts like walnuts or pecans into the filling for added texture. The nutty flavor complements the sweetness of the cream cheese and provides a delightful crunch.
-
Citrus Zing: Grate some lemon or orange zest into the cream cheese filling for a bright, citrus kick. This subtle addition enhances the overall flavor profile and adds a lovely aroma.
-
Maple Twist: Infuse the dough with a hint of maple extract to intensify the sweet flavors. It creates a lovely harmony with the maple glaze, making it a real treat for maple lovers!
-
Spicy Sweet: Add a dash of cayenne pepper to the cream cheese mixture for a sweet and spicy contrast. The unexpected heat adds an adventurous twist that will surprise your taste buds.
If you’re looking for more delicious recipes, try pairing your danishes with my scrumptious Cheesesteak Tortellini Comfort for a delightful mix of savory and sweet!
Make Ahead Options
These Heavenly Cheese Danishes are perfect for busy home cooks looking to save time! You can prepare the dough and chill it in the refrigerator for up to 24 hours. Simply mix all the ingredients, then cover and refrigerate; this enhances both flavor and flakiness. Additionally, you can make the cream cheese filling a day in advance and store it in an airtight container for up to 3 days. When you’re ready to bake, follow the remaining steps by shaping the danishes and allowing them to rise before baking. Just a quick brush with maple syrup after baking will ensure they retain their delicious appeal, providing you with freshly baked delights that taste just as good as if made from scratch that day!
Expert Tips for Heavenly Cheese Danish
• Check Yeast Activity: Always ensure your active dry yeast is bubbly after mixing it with warm water; if not, it may affect your dough’s rise.
• Cold Butter is Key: For maximum flakiness in your cheese danish, be sure to use cold butter while mixing—it’s essential for creating those buttery layers!
• Chill for Flavor: Chilling the dough for at least 8 hours enhances flavor and texture, making your Heavenly Cheese Danish irresistibly good.
• Warm Environment: Keep your rising pastries in a warm place to help them puff up nicely; a drafty area can slow down yeast activation.
• Creative Fillings: Don’t hesitate to experiment with your cream cheese filling—adding fruit preserves or chocolate chips can give your Heavenly Cheese Danish a delightful twist!
What to Serve with Heavenly Cheese Danish
Each bite of this delightful pastry pairs beautifully with something special, ensuring your meal feels complete and deeply satisfying.
-
Fresh Berries: Bright and juicy strawberries or blueberries add a vibrant contrast, balancing the richness of the danish. Their natural sweetness enhances every scrumptious bite.
-
Coffee or Latte: The warm, bold flavors of coffee contrast nicely with the sweetness of the danishes, making for a classic pairing that revitalizes your mornings.
-
Crispy Bacon: The salty, savory crunch of bacon complements the sweet cream cheese filling, creating a delightful juxtaposition of flavors on your plate.
-
Greek Yogurt Parfait: Creamy yogurt layered with granola and honey provides a fresh, tangy element that lightens the meal and contributes a delightful crunch.
-
Chai Tea: Spiced chai’s warmth harmonizes with the sweet maple glaze while offering a cozy, aromatic experience, perfect for chillier days.
-
Fruit Salad: A refreshing mix of seasonal fruits adds a burst of freshness, countering the sweetness of the danish and providing a colorful, healthful bonus.
Indulge in these pairings for a balanced brunch that invites everyone to linger and savor the moment.
Heavenly Cheese Danish Recipe FAQs
How do I know if my yeast is active?
Absolutely! To check if your active dry yeast is working, simply combine it with warm water (110° to 115°F) and let it sit for about 5 minutes. You should see bubbles forming on the surface. This foaming action indicates that the yeast is active and ready to help your dough rise beautifully.
How should I store leftovers?
Very! Store your leftover Heavenly Cheese Danishes in an airtight container in the refrigerator for up to 5 days. For optimal taste, reheat them in the oven at 350°F for about 5 to 10 minutes or use a microwave for a quicker option. Ensure they’re warm throughout to restore that delightful flakiness!
Can I freeze the danishes?
Absolutely! You can freeze unbaked Heavenly Cheese Danishes for up to 2 months. To do this, place them on a baking sheet lined with parchment paper, freeze until solid, and then transfer them to an airtight container or freezer bag. When you’re ready to enjoy, bake them directly from frozen, adding about 5 minutes to the baking time for a warm, flaky treat.
What if my dough doesn’t rise?
Ah, don’t worry if your dough doesn’t rise as expected! Ensure your yeast was fresh and active, and double-check that your dough was kept in a warm, draft-free environment. If the kitchen is too cold, try placing the dough in a slightly heated (but turned off) oven or on a heating pad. It usually takes about 45 minutes to an hour to rise properly, so give it patience!
Can I use different types of cream cheese?
Yes! If you have dietary restrictions or preferences, feel free to substitute the regular cream cheese with vegan cream cheese or ricotta. Each alternative will give a slightly different flavor and texture, but they all bring the creamy goodness you crave. Adjust the sweetness accordingly if using a less sweet alternative.

Irresistible Heavenly Cheese Danish for Perfect Brunch Treat
Ingredients
Equipment
Method
- Activate Yeast: Combine the active dry yeast and warm water in a small bowl, let sit for about 5 minutes until frothy.
- Prepare Dough: Whisk together flour, sugar, and salt, cut in butter until crumbs form. Add milk, egg yolks, and yeast mixture, stir until sticky.
- Chill Dough: Cover dough and refrigerate for 8 to 24 hours.
- Shape Dough: Roll chilled dough into a rectangle, sprinkle with cinnamon.
- Twist and Coil: Cut into strips, twist and wrap into coils, place on greased baking sheet.
- Prepare Filling: Beat cream cheese, sugar, and egg yolk until smooth, spoon filling onto pastries.
- Rise: Cover pastries, let rise for about 45 minutes.
- Preheat Oven: Preheat to 350°F.
- Egg Wash: Whisk together egg white and water, brush over pastries.
- Bake: Bake for 15 to 20 minutes until golden brown.
- Glaze: Brush with maple syrup immediately after baking.
Leave a Reply