
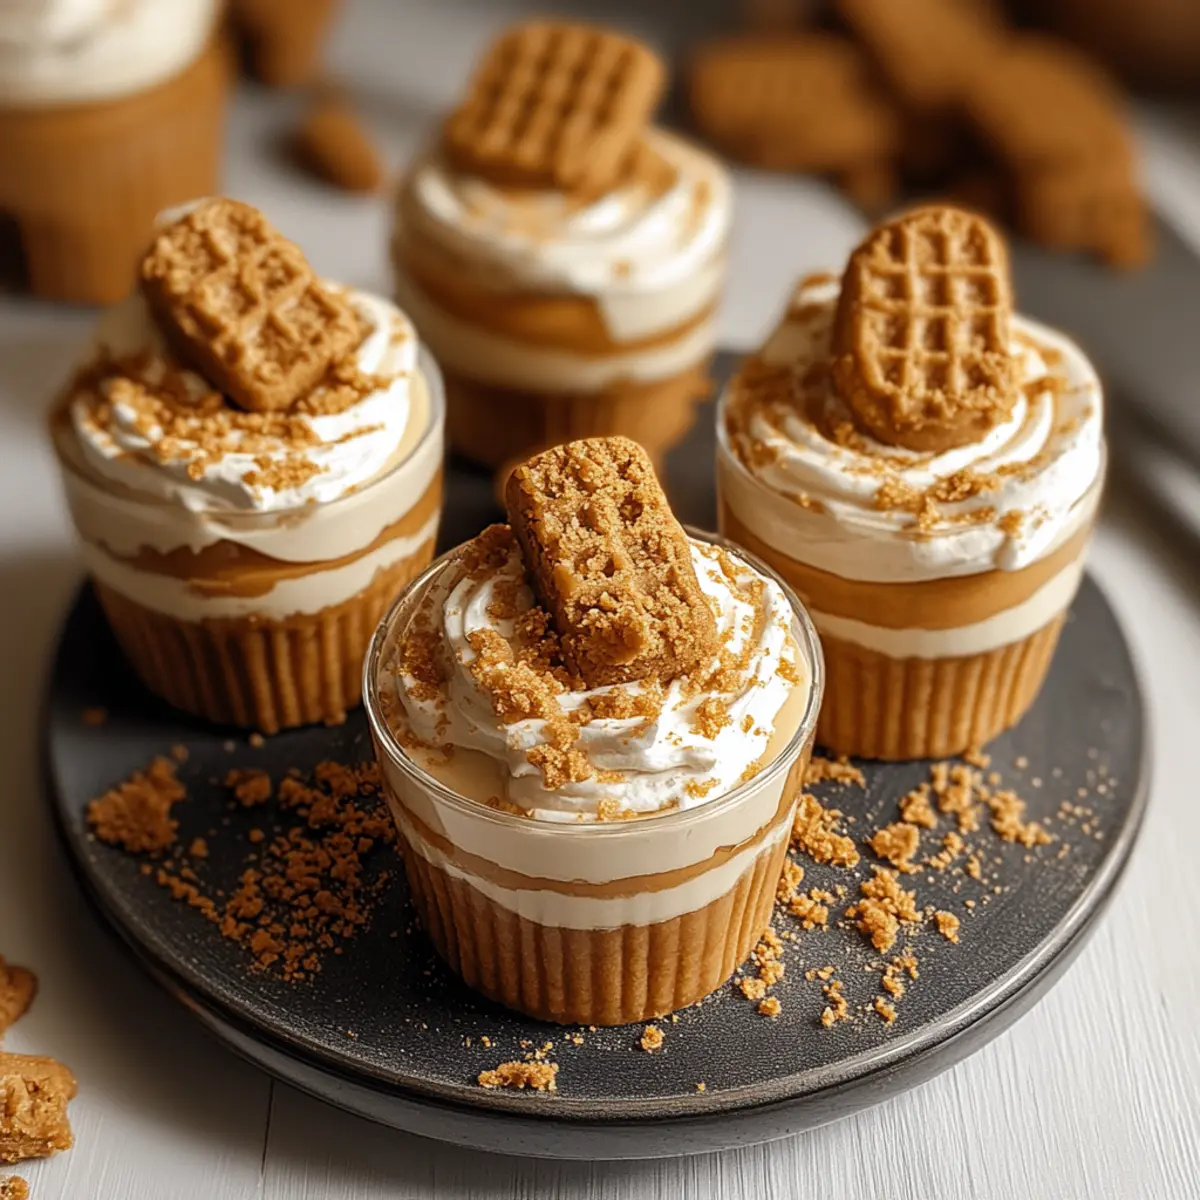
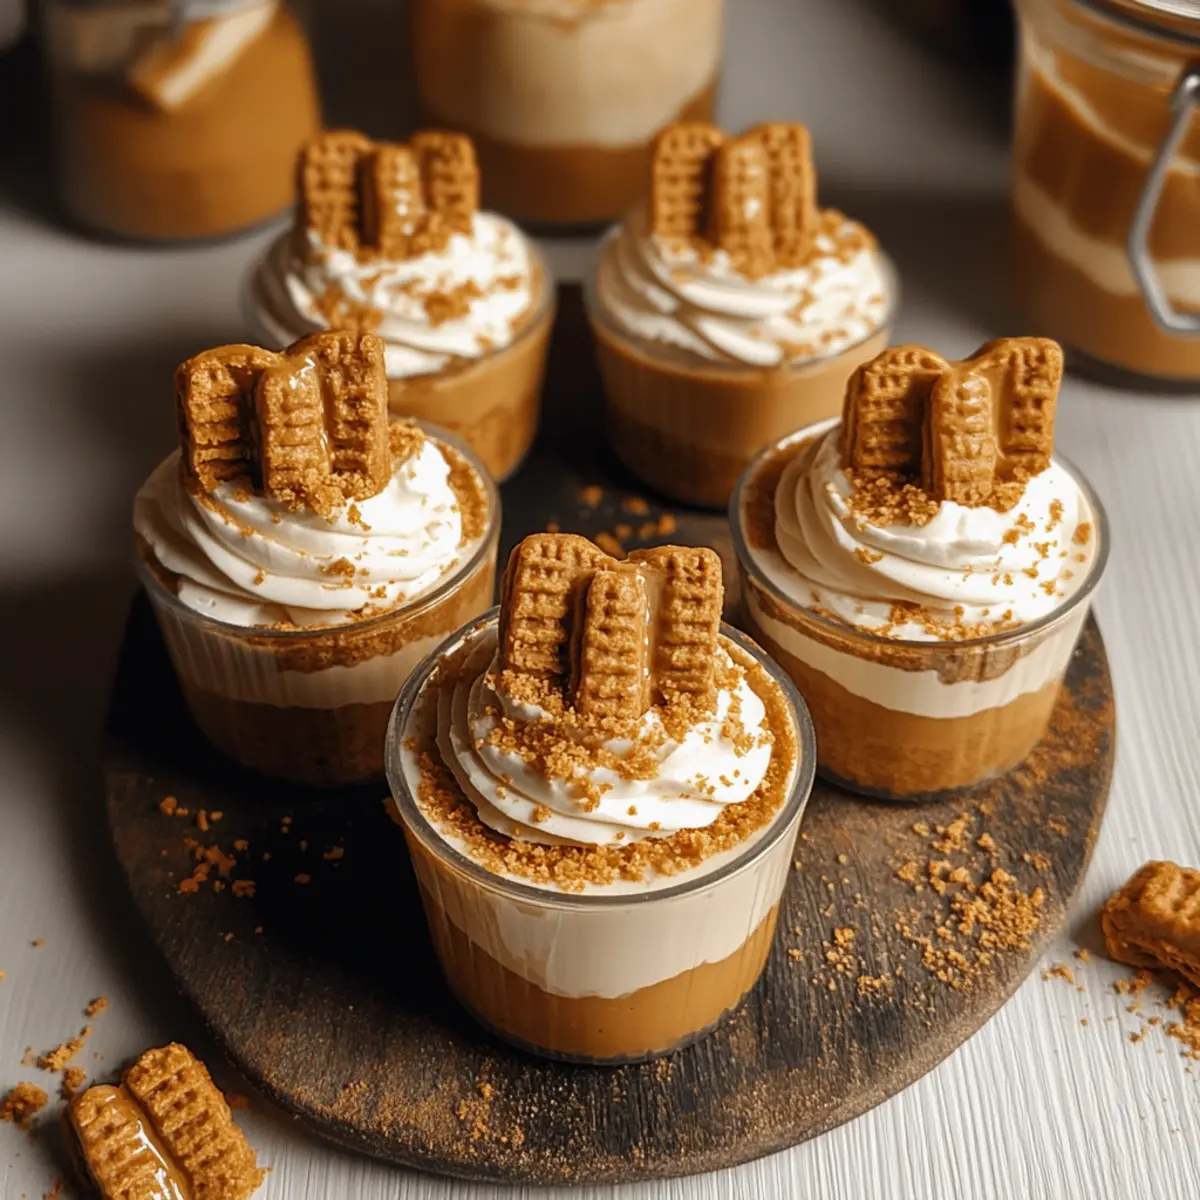
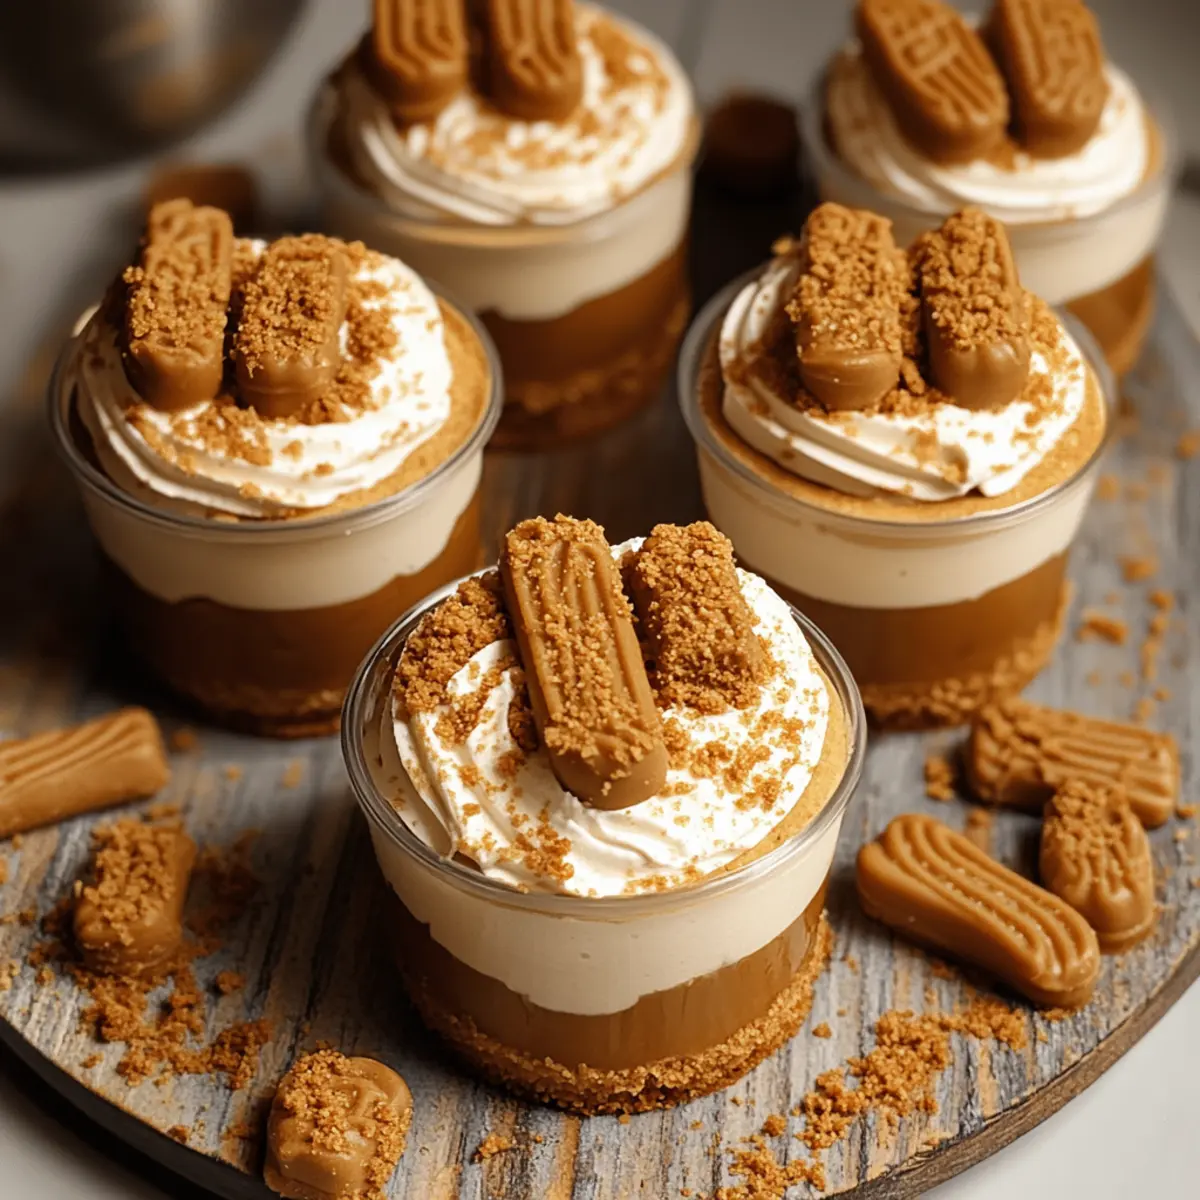
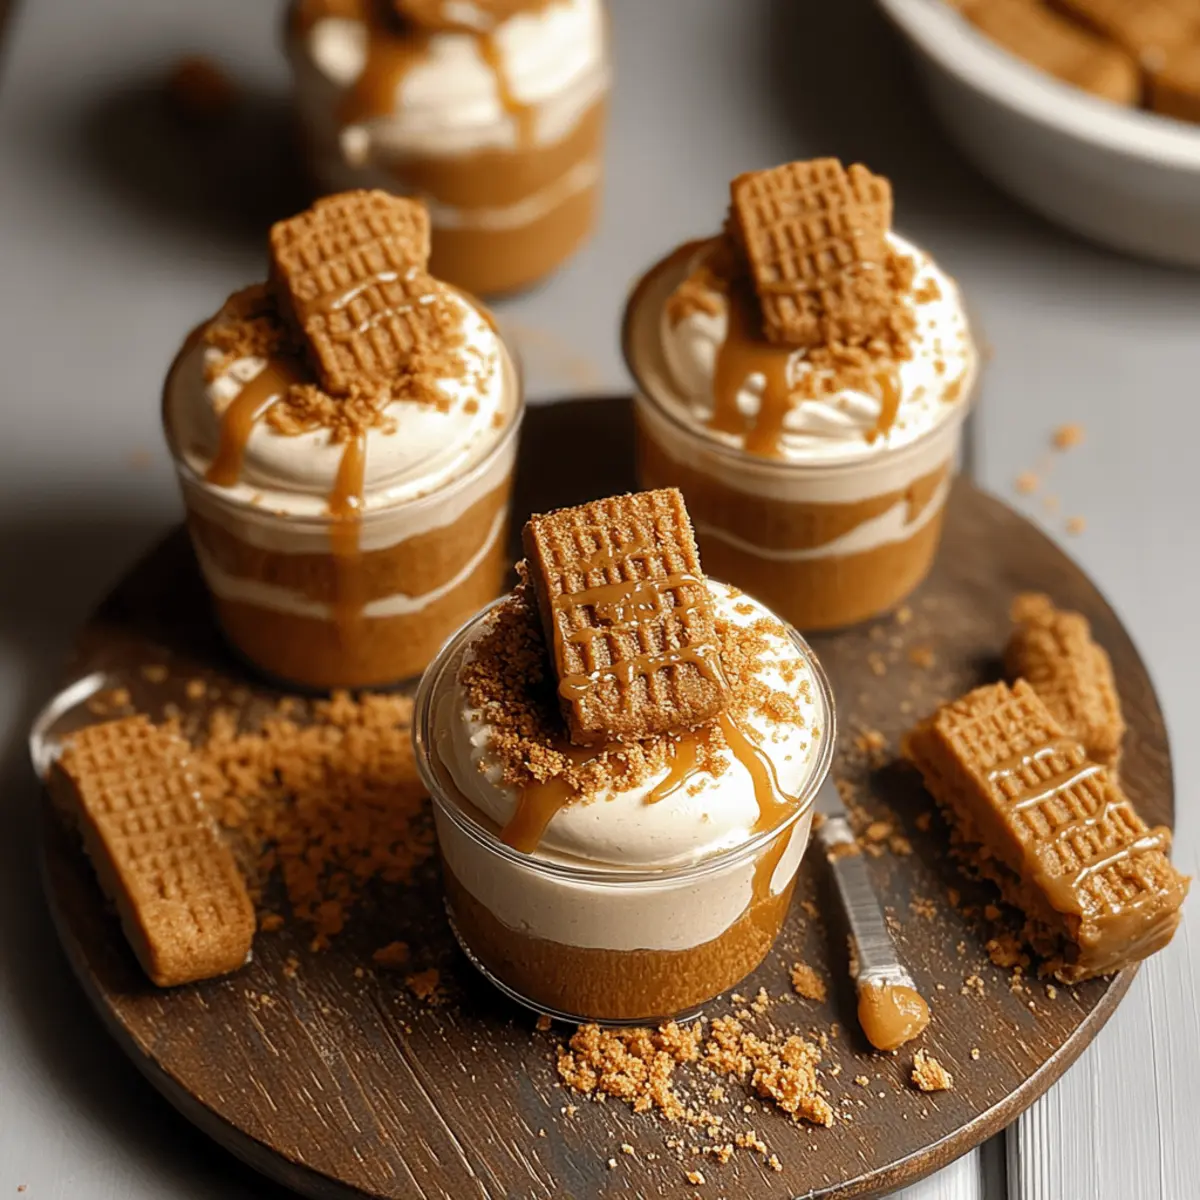
The moment I uncovered the magic of No-Bake Biscoff Cheesecake Cups, my dessert-making world shifted into overdrive. These luscious little cups, with their buttery Biscoff crust and fluffy cheesecake filling topped with a glossy layer of cookie butter, have quickly become my go-to for effortless entertaining. Perfect for those busy weeknights or impromptu gatherings, these desserts not only eliminate the hassle of baking but are also sure to impress your guests with their delightful presentation. With just a few simple ingredients and a little chilling time, you’ll be able to whip up a treat that feels indulgent yet is incredibly easy to make. Curious how to craft these creamy delights? Let’s dive into the recipe!
Why are these cheesecake cups so irresistible?
Easy to Make: Whip up these indulgent treats without turning on the oven! With simple, no-bake steps, you’ll be enjoying your dessert in no time.
Delightful Presentation: Each cup is a feast for the eyes, layered beautifully and garnished for a touch of elegance—perfect for impressing guests or treating yourself!
Perfectly Sweet: The creamy cheesecake balances flawlessly with the spiced notes of Biscoff, creating a harmonious blend of flavors.
Make Ahead: With the ability to prepare in advance, these cups are ideal for busy hosts. Just pop them in the fridge, and you’re set!
Customizable Options: Add fresh berries, chocolate drizzle, or even a fruity compote for a personal twist that fits any palate—a perfect way to switch things up!
Whether you’re a fan of cheesecakes or want to explore new dessert options, these No-Bake Biscoff Cheesecake Cups are bound to become a favorite!
No-Bake Biscoff Cheesecake Cups Ingredients
For the Crust
- Lotus Biscoff biscuits – A crunchy yet buttery base that perfectly complements the creamy filling. Substitution: Any caramelized spiced cookie can work.
- Unsalted butter – Binds the cookie crumbs into a delicious crust. Use salted butter for a slightly different flavor.
For the Cheesecake Filling
- Heavy cream – Adds a whipped, airy texture to the cheesecake. Substitution: Whipping cream or coconut cream for a dairy-free version.
- Cream cheese – The creamy foundation of the filling that creates a rich taste. Ensure it’s at room temperature for smooth mixing.
- Powdered sugar – Provides sweetness with a velvety consistency. Granulated sugar can be used, but may alter texture.
- Biscoff (cookie butter) spread – Infuses the filling with a rich, spiced flavor. Alternative: Other nut or cookie spreads can be experimented with.
- Vanilla extract – Elevates the overall flavor of the cheesecake. Substitution: Any other flavored extract (like almond) can work for a unique twist.
For Garnish
- Garnish (halved Biscoff cookies and reserved cookie crumbs) – Adds visual appeal and a delightful textural contrast on top.
Step‑by‑Step Instructions for No-Bake Biscoff Cheesecake Cups
Step 1: Prepare the Crust
Start by crushing about 20 Lotus Biscoff biscuits into fine crumbs using a food processor or a plastic bag with a rolling pin. Transfer the crumbs into a mixing bowl and combine them with 4 tablespoons of melted unsalted butter until well moistened. Spoon the mixture into dessert cups, pressing firmly to form an even, compact layer at the bottom. This buttery Biscoff crust will provide the perfect base for your cheesecake filling.
Step 2: Make the Cheesecake Filling
In a mixing bowl, whip 1 cup of heavy cream until stiff peaks form, taking about 4-5 minutes at medium speed. In a separate bowl, beat together 8 ounces of softened cream cheese, 1/2 cup of powdered sugar, 1/2 cup of Biscoff spread, and 1 teaspoon of vanilla extract until smooth and creamy. Gently fold the whipped cream into the cream cheese mixture until fully incorporated, creating a light, fluffy cheesecake filling for your No-Bake Biscoff Cheesecake Cups.
Step 3: Assemble the Cups
Using a piping bag or spoon, carefully layer the prepared cheesecake filling into the cups over the crust. Aim for a neat and even layer, filling each cup to about three-quarters full. After adding the cheesecake, gently heat 1/4 cup of Biscoff spread in the microwave for about 15 seconds until it’s pourable, then drizzle over the cheesecake layer for a glossy finish.
Step 4: Garnish and Chill
For an elegant touch, garnish the tops of each No-Bake Biscoff Cheesecake Cup with halved Biscoff cookies and a sprinkle of reserved cookie crumbs. Cover the cups with plastic wrap and place them in the refrigerator to chill for at least 4 hours, or overnight if possible. This chilling step ensures the layers set beautifully, creating a delightful dessert experience.
Step 5: Serve and Enjoy
Once chilled, remove the cheesecake cups from the refrigerator and unveil their delicious layers. Serve these indulgent No-Bake Biscoff Cheesecake Cups straight from the fridge for the best texture. Surprise your family or guests with this treat at your next gathering, and watch as they delight in every creamy, spiced bite!
What to Serve with No-Bake Biscoff Cheesecake Cups?
These delightful cheesecake cups create a perfect sweet ending, but pairing them with the right accompaniments can elevate your dessert experience to new heights.
-
Fresh Berries: Juicy strawberries or raspberries offer a refreshing burst of flavor that contrasts beautifully with the creamy sweetness of the cheesecake cups.
-
Chocolate Drizzle: A rich, warm chocolate sauce adds decadent depth, playing beautifully with the spiced notes of Biscoff.
-
Whipped Cream: A dollop of lightly sweetened whipped cream adds an airy texture that complements the lush filling, enhancing the overall indulgence.
-
Coffee or Espresso: A warm cup of coffee balances the sweetness, making for a delightful pairing that awakens the palate.
-
Mint Sprigs: A sprig of fresh mint not only adds a pop of color but also refreshes the taste buds between each creamy bite.
-
Spiced Chai: The aromatic spices present in a cup of chai echo the notes in Biscoff cookies, creating a warm, inviting flavor complement.
-
Dark Chocolate Shavings: For an added textural contrast, dark chocolate shavings bring a bitter sweetness that harmonizes well with the cheesecake’s flavors.
These pairings invite your guests to savor each layer while enhancing the overall dining experience with delightful textures and flavors.
No-Bake Biscoff Cheesecake Cups Variations
Feel free to unleash your creativity and customize these delightful cheesecake cups for a twist that matches your taste buds!
-
Fruit-Infused:
Layer fresh berry compote between the crust and filling for a burst of fruity goodness. The vibrant flavors will elevate the entire dessert! -
Chocolate Lovers:
Incorporate cocoa powder into the cheesecake filling or drizzle melted chocolate on top. This decadent addition adds richness that chocolate fans will adore. -
Nutty Delight:
Swap Biscoff spread for almond or hazelnut spread for a nutty flavor twist. This substitution brings a whole new dimension to your cheesecake cups! -
Dairy-Free Option:
Use coconut cream instead of heavy cream and a dairy-free cream cheese alternative. You won’t sacrifice taste, and it’s perfect for lactose-intolerant friends! -
Seasonal Theme:
Top your cheesecake cups with seasonal toppings like pumpkin spice or peppermint for holiday flair. These cozy flavors make for a festive treat! -
Crunchy Add-Ins:
Mix in chopped nuts or crushed cookies into the filling for an added textural element. It makes each bite a delightful surprise! -
Spiced Cheesecake:
Add a pinch of cinnamon or nutmeg to the cheesecake filling for a warming spice profile. It complements the Biscoff perfectly, making it even more indulgent. -
Mini-Cupcakes Twist:
Transform these cheesecake cups into mini cupcakes using your favorite cupcake liners. They’re a delightful handheld dessert everyone will love!
Explore these variations to make each batch of No-Bake Biscoff Cheesecake Cups a unique experience that your family and guests will rave about!
Make Ahead Options
These No-Bake Biscoff Cheesecake Cups are perfect for busy home cooks looking to save time without sacrificing flavor! You can prepare the buttery Biscoff crust and store it in the refrigerator for up to 3 days. Just make sure to keep it covered to maintain its crunch. As for the cheesecake filling, it can also be prepped in advance and stored separately in the fridge for up to 2 days. When you’re ready to serve, simply layer the filling into the prepared crusts, drizzle with melted Biscoff spread, and garnish. This way, you’ll have delectable dessert cups ready to impress, with minimal effort on the day of serving!
How to Store and Freeze No-Bake Biscoff Cheesecake Cups
Fridge: Store covered in the refrigerator for up to 2 days to keep the texture fresh and creamy. While delicious, they are best enjoyed within this timeframe.
Freezer: These cheesecake cups can be frozen for up to 1 month if wrapped tightly in plastic wrap and placed in an airtight container. Thaw in the fridge before serving.
Serving After Storage: For best results, serve chilled straight from the fridge. If the layers appear soft after storage, a quick chill can restore the delightful texture of your No-Bake Biscoff Cheesecake Cups.
Reheating: There’s no need to reheat these dessert cups. Enjoy them cold for a refreshing and indulgent treat!
Expert Tips for No-Bake Biscoff Cheesecake Cups
-
Room Temperature Cream Cheese: Make sure your cream cheese is at room temperature to prevent lumps, ensuring a smooth and creamy filling for these indulgent cups.
-
Whip Heavy Cream Properly: Beat the heavy cream until stiff peaks form. This provides the light and airy texture that makes the cheesecake filling irresistible.
-
Chilling Time Is Key: Be patient and chill the cups for at least 4 hours or overnight. This allows the layers to set properly and enhances the overall flavor of your No-Bake Biscoff Cheesecake Cups.
-
Use a Piping Bag: For a cleaner and more aesthetically pleasing presentation, use a piping bag to layer the cheesecake filling into the cups.
-
Customize Your Garnish: Feel free to get creative with your toppings! Adding fresh fruit or chocolate drizzle can elevate the flavor and look of your dessert.
No-Bake Biscoff Cheesecake Cups Recipe FAQs
What type of Biscoff biscuits should I use?
Absolutely! I recommend using Lotus Biscoff biscuits for the best flavor and texture. Their crunchy, buttery nature provides the perfect base for the cheesecake cups. If you’re unable to find them, any caramelized spiced cookie will work as a substitute!
How should I store leftover No-Bake Biscoff Cheesecake Cups?
You can store these delicious cheesecake cups in the refrigerator for up to 2 days. Just cover them with plastic wrap or place them in an airtight container to keep their creamy texture fresh. Enjoy them within this timeframe for the best taste!
Can I freeze No-Bake Biscoff Cheesecake Cups?
Yes, you can freeze these delightful cups! Wrap each one tightly in plastic wrap and place them in an airtight container to ensure they stay fresh. They can be kept in the freezer for up to 1 month. When you’re ready to indulge, thaw them in the fridge for several hours before serving.
What should I do if my whipped cream doesn’t hold its shape?
Very! If your cream doesn’t achieve stiff peaks, it might be due to under-whipping or the cream being too warm. Make sure to start with chilled heavy cream and whip it at medium speed until stiff peaks form—this typically takes about 4-5 minutes. If it still isn’t firming up, you can try adding a tablespoon of powdered sugar or a touch of cornstarch to help stabilize it.
Are No-Bake Biscoff Cheesecake Cups suitable for anyone with nut allergies?
Yes, but with caution! While the original recipe uses Biscoff spread, which is nut-free, if you’re considering alternatives like almond butter or other nut spreads for variations, it’s essential to check for allergies. Always make sure that your guests are aware of the ingredients used to avoid any allergic reactions.
Decadent No-Bake Biscoff Cheesecake Cups
Ingredients
Equipment
Method
- Start by crushing about 20 Lotus Biscoff biscuits into fine crumbs using a food processor or a plastic bag with a rolling pin. Transfer the crumbs into a mixing bowl and combine them with 4 tablespoons of melted unsalted butter until well moistened. Spoon the mixture into dessert cups, pressing firmly to form an even, compact layer at the bottom.
- In a mixing bowl, whip 1 cup of heavy cream until stiff peaks form, taking about 4-5 minutes at medium speed. In a separate bowl, beat together 8 ounces of softened cream cheese, 1/2 cup of powdered sugar, 1/2 cup of Biscoff spread, and 1 teaspoon of vanilla extract until smooth and creamy. Gently fold the whipped cream into the cream cheese mixture until fully incorporated.
- Using a piping bag or spoon, carefully layer the prepared cheesecake filling into the cups over the crust. Fill each cup to about three-quarters full. After adding the cheesecake, gently heat 1/4 cup of Biscoff spread in the microwave for about 15 seconds until it’s pourable, then drizzle over the cheesecake layer.
- For an elegant touch, garnish the tops of each No-Bake Biscoff Cheesecake Cup with halved Biscoff cookies and a sprinkle of reserved cookie crumbs. Cover the cups and place them in the refrigerator to chill for at least 4 hours, or overnight if possible.
- Once chilled, remove the cheesecake cups from the refrigerator and serve straight from the fridge for the best texture.
Leave a Reply