
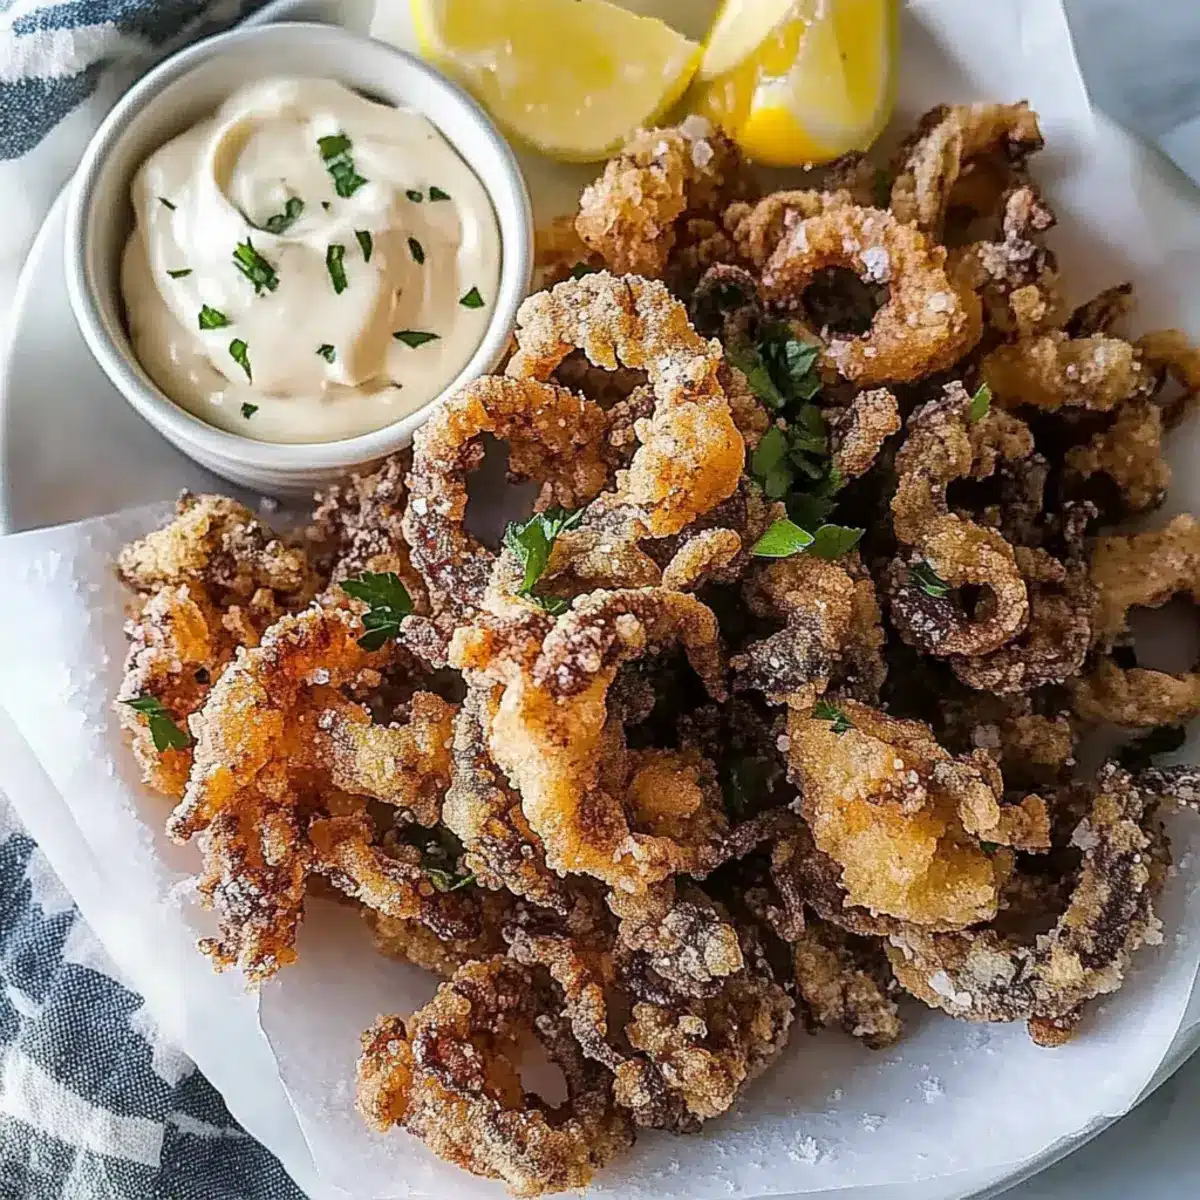
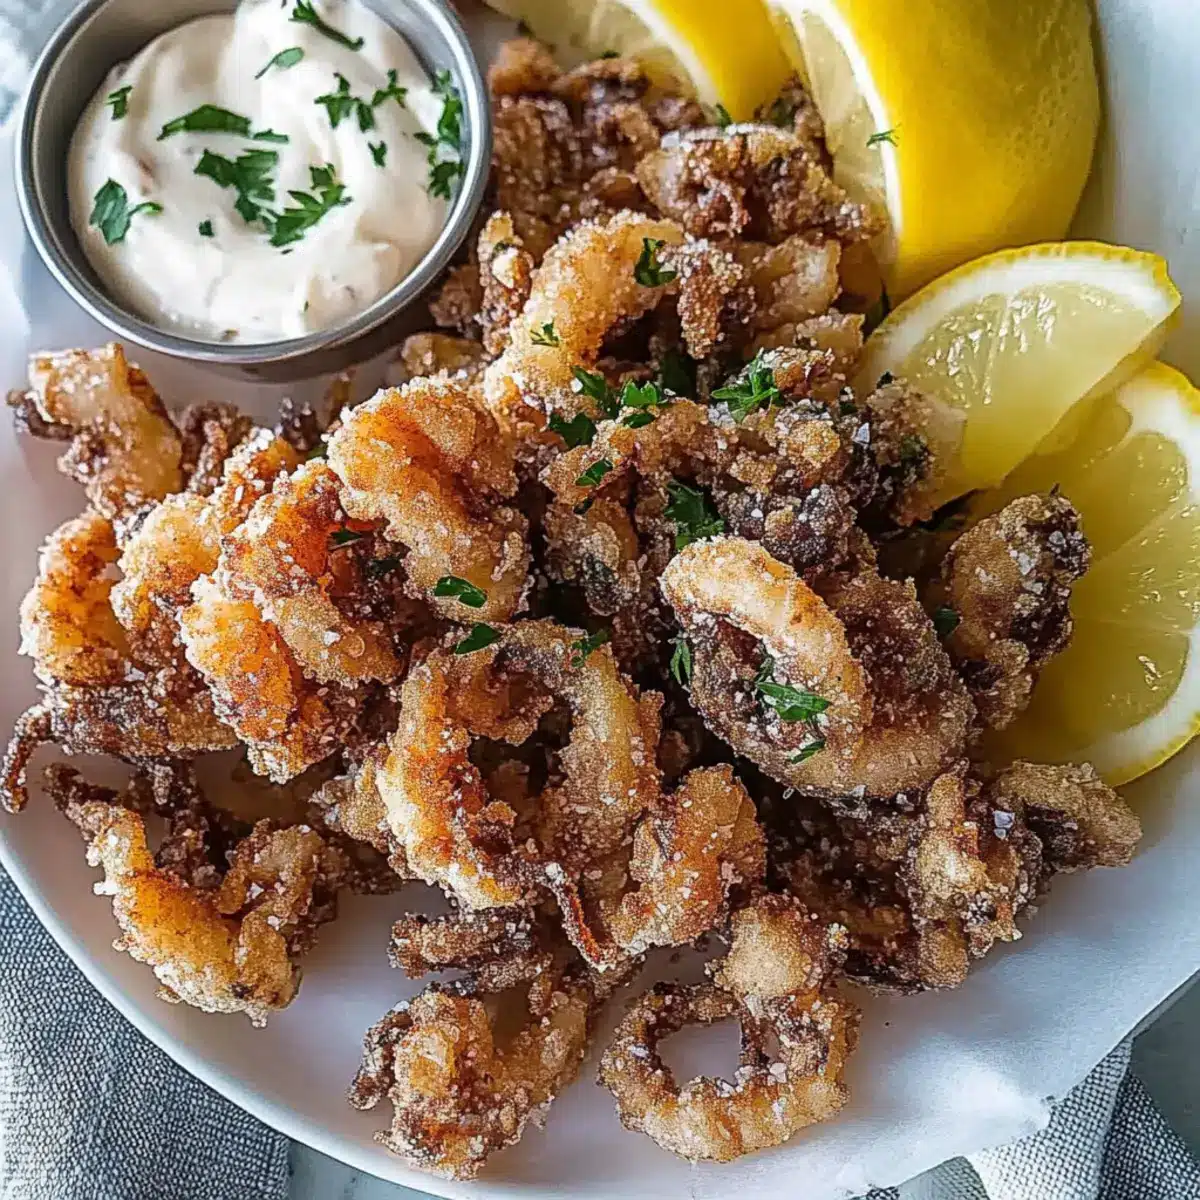
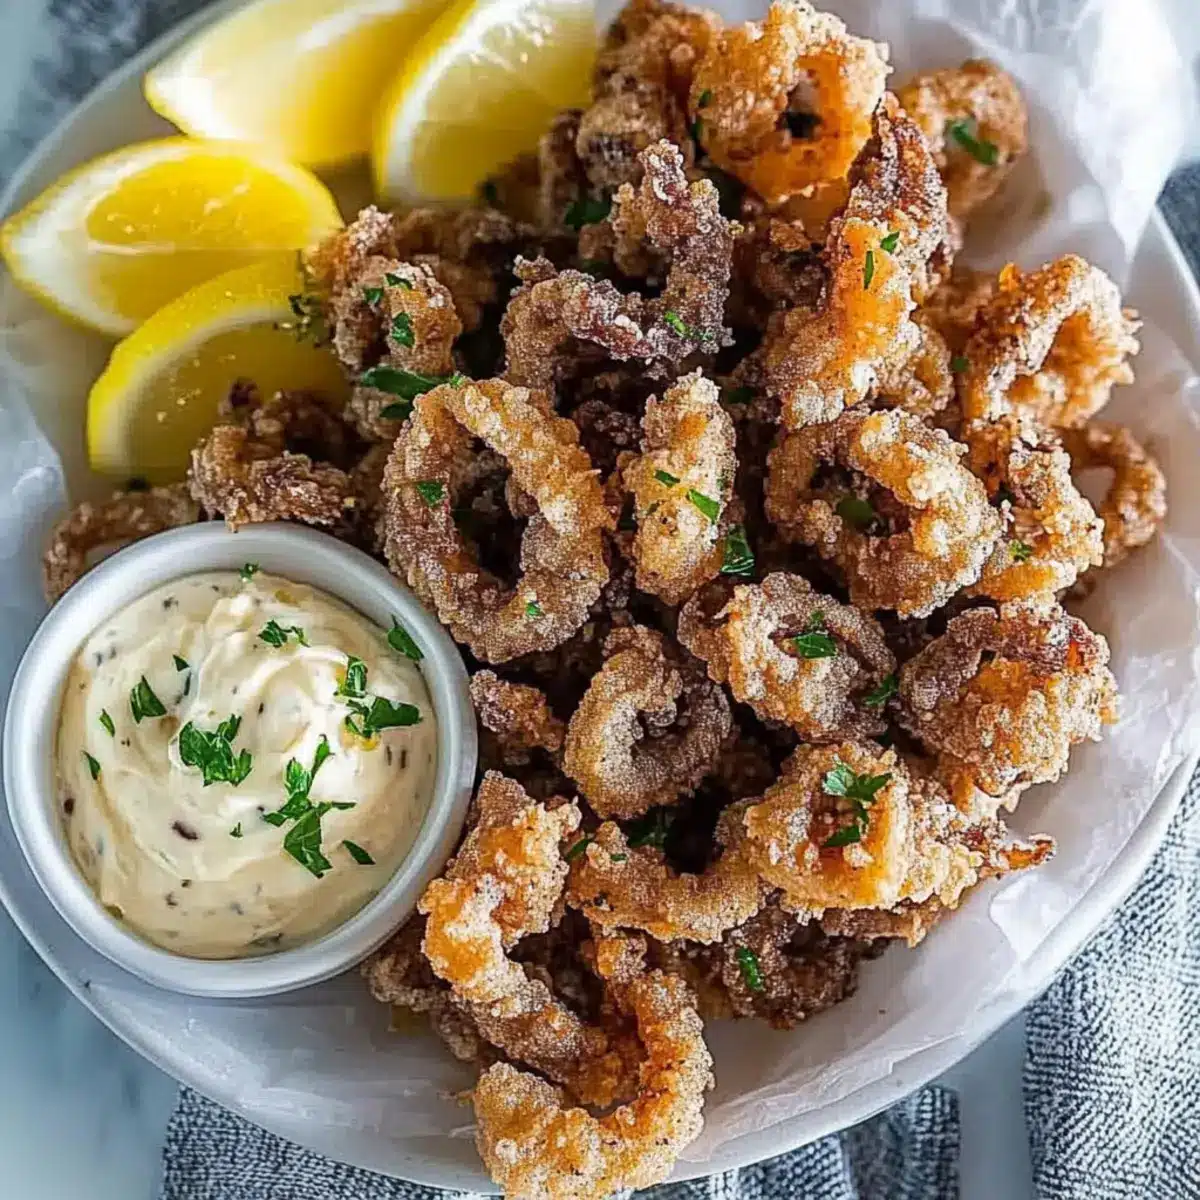
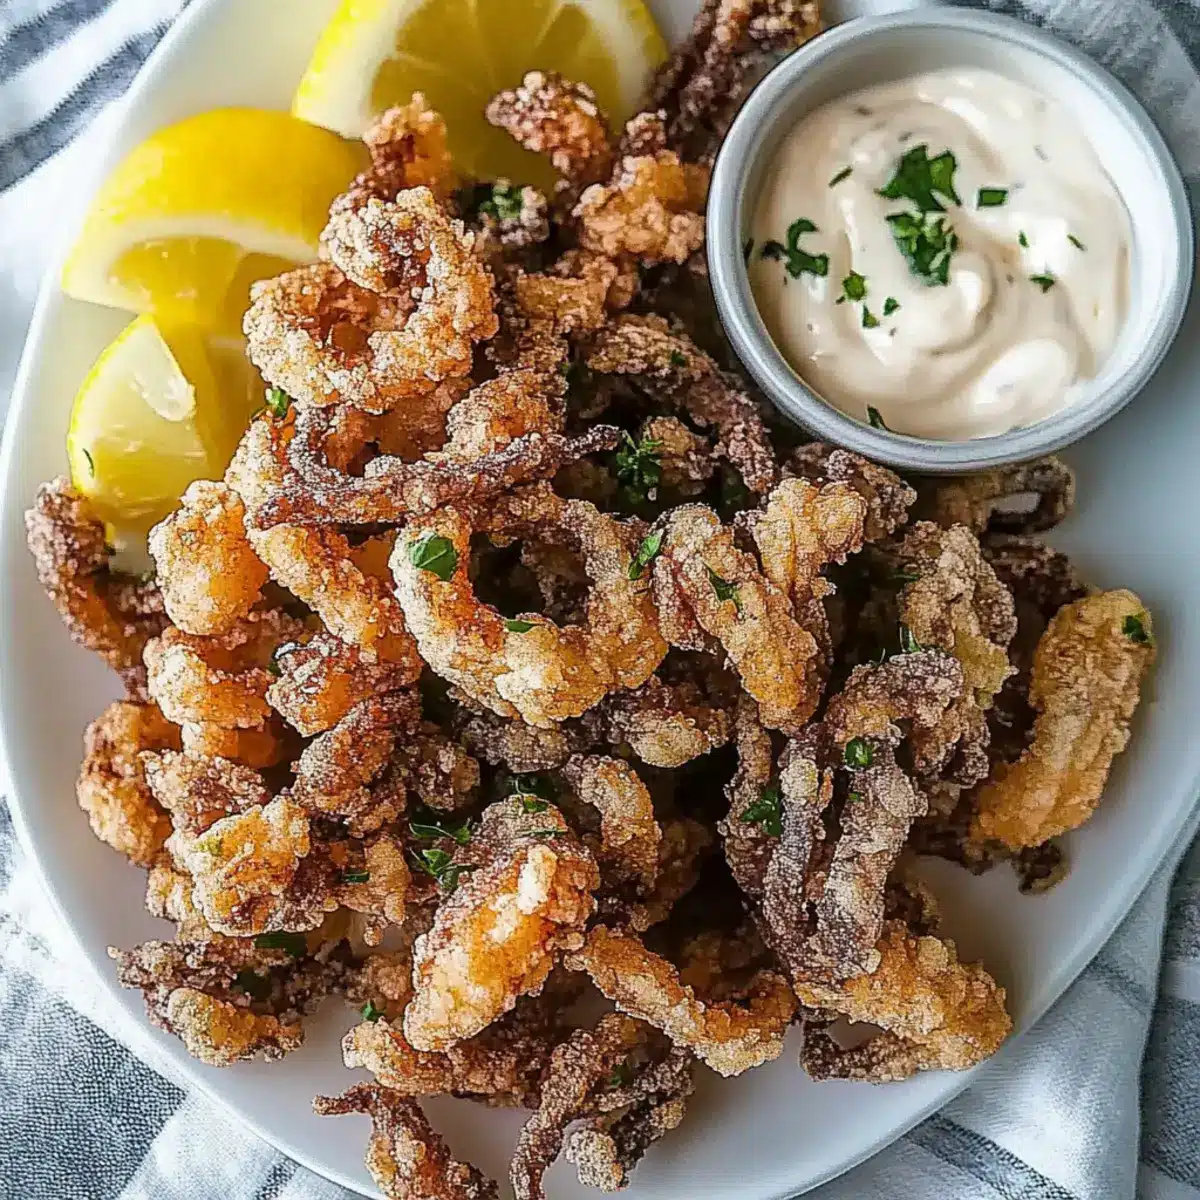
The aroma of sizzling seafood wafted through my kitchen as I embarked on the delicious task of making crispy salt and pepper fried squid. This classic Mediterranean dish, often enjoyed as an appetizer, delivers a tantalizing crunch with just two simple seasonings—salt and pepper. With its quick prep time, this recipe is perfect for those spontaneous gatherings or cozy nights in when you crave something satisfying yet elegant. Each golden bite of calamari brings a light, airy texture that’s simply irresistible, especially when paired with a homemade garlic mayo and a squeeze of fresh lemon. Ready to elevate your appetizer game? Let’s dive into this crowd-pleaser that’s bound to impress friends and family alike!
Why is Fried Calamari So Irresistible?
Crispy Texture: Each ring of squid is coated perfectly, delivering a satisfyingly crunchy bite that pairs beautifully with the tender interior.
Quick & Easy: This recipe requires minimal ingredients and can be whipped up in just 30 minutes, making it an ideal choice for busy weeknights or last-minute entertaining.
Versatile: Serve these crispy delights as a stand-alone appetizer, or elevate your meal by pairing them with a refreshing Greek salad or placing them on a mezze platter with assorted dips for variety.
Flavor Forward: With just salt and pepper, the natural taste of the squid shines through, making it a wonderful choice for those who appreciate simple, fresh seafood experiences. Plus, if you love exploring different flavors, consider trying variations by adding spices like paprika or cayenne pepper.
Crowd Pleaser: Whether it’s a gathering of friends or a cozy family dinner, this dish is sure to impress and satisfy, becoming a favorite at any table. For an easy side, check out our recipe for Baked Mac Cheese, which pairs wonderfully with your calamari!
Salt and Pepper Fried Squid Ingredients
• Ready to create a crunchy delight? Here’s what you need!
For the Squid
• Squid – Provides the main texture and seafood flavor; use fresh or thawed frozen squid.
For the Coating
• Flour – Offers a light coating to achieve a crispy texture; it can be substituted with gluten-free flour if needed.
• Cornstarch – Enhances crispiness and texture; no direct substitute, but you can slightly increase flour quantity in absence.
• Baking Powder – Aids in lightness of the fry; essential for achieving the desired texture.
• Salt – Provides essential flavor; adjust based on dietary requirements.
• Black Pepper – Adds a hint of spice; can be substituted with white pepper for a milder taste.
For Frying
• Oil – Necessary for frying; vegetable or canola oil is recommended for even cooking and crisping.
For the Dipping Sauce
• Mayonnaise – Serves as the base for the dipping sauce, providing creaminess; can be substituted with Greek yogurt for a healthier version.
• Garlic Cloves – Adds robust flavor to the mayo; fresh is ideal, but garlic powder can be a quick substitute.
• Lemon Wedges – Enhances flavor and freshness when serving; fresh lemon juice can be used in place of wedges.
Step‑by‑Step Instructions for Salt and Pepper Fried Squid
Step 1: Prep Squid
If using frozen squid, defrost it overnight in the refrigerator and pat it dry thoroughly with paper towels. If needed, cut the whole squid into thick rings, about half an inch thick, ensuring each piece is uniform for even cooking. This initial step is crucial for achieving perfectly crispy salt and pepper fried squid.
Step 2: Mix Coating
In a medium bowl, combine flour, cornstarch, baking powder, salt, and black pepper. Whisk these ingredients together until well mixed, ensuring an even distribution of flavors. This dry mix will provide the light and crispy coating that makes your fried squid oh-so-delicious.
Step 3: Dredge Squid
Take your squid rings and dredge them one at a time through the flour mixture, ensuring each piece is thoroughly coated. Shake off any excess flour before moving on, as too much can lead to a heavy coating. This step is key to achieving that crispy texture in your salt and pepper fried squid.
Step 4: Heat Oil
In a heavy pot or Dutch oven, pour enough vegetable oil to cover the bottom by about two inches and heat over medium-high until it reaches 350°F (about 180°C). You can test if the oil is hot enough by dropping in a small bit of the flour mixture; it should sizzle immediately.
Step 5: Fry Squid
Working in batches, carefully add the coated squid to the hot oil, avoiding overcrowding the pot. Fry each batch for about 2–3 minutes, or until the squid turns a lovely golden brown and is crispy. Use a slotted spoon to gently stir the squid, ensuring even frying and preventing sticking.
Step 6: Drain
Once the squid is golden and crispy, remove it from the oil with a slotted spoon and place it on a plate lined with paper towels. This will help absorb excess oil and keep your salt and pepper fried squid delightfully crispy. Repeat with the remaining squid until all are cooked.
Step 7: Make Dipping Sauce
In a small bowl, mix together mayonnaise and minced garlic until well combined. Adjust the garlic to your taste for a stronger or milder flavor. This quick dipping sauce will enhance the flavors of your crispy fried squid, balancing the dish beautifully.
Step 8: Serve
Arrange the hot, crispy salt and pepper fried squid on a serving plate alongside the garlic mayo and lemon wedges. The fresh lemon juice adds a burst of brightness that perfectly complements the dish. Serve immediately for the best texture and flavor!
Make Ahead Options
These crispy salt and pepper fried squid are ideal for meal prep, allowing you to enjoy restaurant-quality appetizers with ease! You can clean and cut the squid up to 24 hours in advance; just remember to pat it dry thoroughly to maintain crispness. Additionally, mix the dry coating—flour, cornstarch, baking powder, salt, and pepper—and refrigerate it in an airtight container for up to 3 days. When ready to serve, simply dredge the squid, fry, and make the garlic mayo. This method not only saves you time but ensures your calamari remains just as delicious and crispy when finished. Enjoy the convenience of delicious seafood without the last-minute rush!
Variations & Substitutions for Salt and Pepper Fried Squid
Customize your crispy salt and pepper fried squid to suit your palate and dietary needs with these creative variations!
-
Gluten-Free: Use gluten-free all-purpose flour for the coating to make this dish suitable for those avoiding gluten without sacrificing taste.
-
Spicy Twist: Add cayenne pepper or crushed red pepper flakes to the flour mixture for a delightful kick that’ll tantalize your taste buds. The heat beautifully contrasts with the squid’s natural flavor, creating a fabulous experience.
-
Herbaceous Flavor: Mix in dried herbs like oregano or basil to your flour for an aromatic touch that enhances the overall flavor profile. The addition of herbs creates a refreshing element that’s perfect for summertime gatherings.
-
Zesty Lemon Pepper: Replace standard black pepper with lemon pepper seasoning for a bright, citrusy twist that uplifts the dish. It works wonderfully with the fresh lemon juice served on the side, making every bite burst with flavor!
-
Crispy Coleslaw Topper: Serve the fried squid over a crunchy coleslaw instead of a traditional plate. The cool, crisp contrast harmonizes beautifully with the hot calamari—a dazzling match that’s delightfully unexpected!
-
Yogurt Dip: Substitute the mayonnaise with Greek yogurt for a tangy, healthier dipping option. Mix in some dill or mint for a refreshing twist that pairs perfectly with the fried squid.
-
Asian Influence: Toss in some sesame seeds or drizzle with a soy sauce and sesame oil blend before serving for an Asian-inspired creation. This new spin introduces an enticing umami flavor that’s simply irresistible.
-
Mediterranean Style: Add a side of marinara sauce for dipping, inspired by classic Italian cooking. This combination is a beloved favorite that brings a comforting, familiar taste to your appetizer spread.
Feel free to experiment, and don’t forget to check out our recipe for Shrimp Corn Bisque if you’re looking for another delightful seafood dish to accompany your squid!
How to Store and Freeze Salt and Pepper Fried Squid
Fridge: Store any leftovers in an airtight container for up to 1 day. To maintain maximum freshness and flavor, consume as soon as possible.
Freezer: While it’s best enjoyed fresh, you can freeze cooked squid for up to 2 months. Place cooled, fried squid in a single layer on a baking sheet, freeze until solid, then transfer to a freezer bag.
Reheating: For best results, reheat in an air fryer at 350°F (175°C) for about 3–5 minutes to regain crispness. Avoid microwaving, as it can make the salt and pepper fried squid rubbery.
Important Tip: Always pat the squid dry before frying to prevent sogginess, which can impact storage quality!
Expert Tips for Salt and Pepper Fried Squid
-
Hot Oil Test: Before frying, ensure your oil is hot enough. Drop in a small piece of batter; it should sizzle immediately for optimal frying of your salt and pepper fried squid.
-
Don’t Crowd the Pan: Fry the squid in small batches. Overcrowding can lower the oil temperature, resulting in soggy rings instead of crispy perfection.
-
Pat Dry: Always pat the squid dry after rinsing or thawing. This step prevents excess moisture from making the coating soggy before frying.
-
Careful with Coating: When dredging, shake off excess flour to avoid a thick, heavy crust. A light coating is crucial for achieving that desired crispy texture.
-
Drain Properly: After frying, place squid on a wire rack or paper towels right away. This helps keep your salt and pepper fried squid crispy for longer, avoiding that greasy feel.
What to Serve with Crispy Salt and Pepper Fried Calamari
The perfect side dishes can transform your crispy fried squid into a memorable meal bursting with flavor and color.
-
Greek Salad: A refreshing medley of cucumbers, tomatoes, and feta adds a burst of freshness, perfectly balancing the rich, crispy calamari.
-
Garlic Bread: Warm, crusty slices of garlic bread are ideal for dipping into garlic mayo, enhancing your overall dining experience.
-
Roasted Vegetables: A colorful platter of roasted bell peppers and zucchini brings earthy flavors and vibrant colors, making your plate visually appealing.
-
Tartar Sauce: Creamy and tangy, tartar sauce offers a classic seafood pairing that heightens the flavor of the calamari.
-
Chilled White Wine: A glass of crisp Sauvignon Blanc or light Pinot Grigio beautifully complements the seafood’s delicate flavors, enhancing your dining experience.
-
Mezze Platter: Create a Mediterranean spread with olives, hummus, and pita for an opulent, shareable feast that pairs wonderfully with the calamari.
-
Lemon Sorbet: A refreshing, palate-cleansing dessert that complements the savory taste of fried squid, leaving you feeling satisfied but not overwhelmed.
-
Spicy Aioli: Elevate the garlic mayo by adding a little sriracha or chipotle for a spicy kick that pairs wonderfully with the calamari’s crispy texture.
-
Fried Rice: A side of simple fried rice infuses your meal with savory flavors and complements the seafood delight perfectly.
Crispy Salt and Pepper Fried Squid Recipe FAQs
What type of squid should I use for this recipe?
Absolutely! Fresh squid is ideal for this recipe, providing that tender texture and sweet seafood flavor. If fresh isn’t available, thawed frozen squid works well too—just be sure to pat it dry before cooking to prevent any excess moisture from making the coating soggy.
How should I store leftover fried calamari?
If you have any leftovers, store them in an airtight container in the refrigerator for up to 1 day. For the best taste, I recommend consuming them as soon as possible. To reheat, you can use an air fryer at 350°F (175°C) for about 3-5 minutes to regain that delightful crispiness.
Can I freeze fried squid?
Yes, you can freeze cooked salt and pepper fried squid! Once cooled, lay the fried squid in a single layer on a baking sheet and freeze until solid. After that, transfer them to a freezer bag, and they’ll keep well for up to 2 months. When you’re ready to enjoy them again, simply reheat in the air fryer—this will help maintain their crispiness.
What should I do if my fried squid turns out soggy?
If your calamari isn’t as crispy as you hoped, there are a few things to consider. Ensure your oil is hot enough before adding the squid; it should reach around 350°F (180°C). If it’s not hot enough, the squid will absorb the oil instead of frying properly. Fry in small batches to avoid overcrowding the pan, and always dredge well while shaking off excess flour for a lighter coating. Lastly, pat the squid dry before dredging to keep moisture at bay.
Are there any dietary considerations I should be aware of?
Certainly! This recipe can easily accommodate gluten-free diets by substituting regular flour with gluten-free flour. Additionally, the mayonnaise can be swapped with Greek yogurt for a healthier dip. Just be cautious if you’re serving this to pets or individuals with shellfish allergies, as squid is a type of seafood that could trigger allergic reactions. Always consult with your guests about any dietary restrictions to ensure everyone enjoys this dish!
Crispy Salt and Pepper Fried Squid for a Perfect Bite
Ingredients
Equipment
Method
- If using frozen squid, defrost it overnight in the refrigerator and pat it dry thoroughly with paper towels. Cut the squid into thick rings, about half an inch thick.
- In a medium bowl, combine flour, cornstarch, baking powder, salt, and black pepper. Whisk until well mixed.
- Dredge the squid rings one at a time in the flour mixture, ensuring each piece is thoroughly coated and shaking off excess flour.
- Heat oil in a heavy pot over medium-high until it reaches 350°F. Test with a small bit of the flour mixture; it should sizzle.
- Carefully add the coated squid to the hot oil in batches, frying for 2–3 minutes until golden brown.
- Remove squid with a slotted spoon and place on paper towels to absorb excess oil.
- In a small bowl, mix mayonnaise and minced garlic until well combined.
- Serve the fried squid with garlic mayo and lemon wedges.
Leave a Reply