
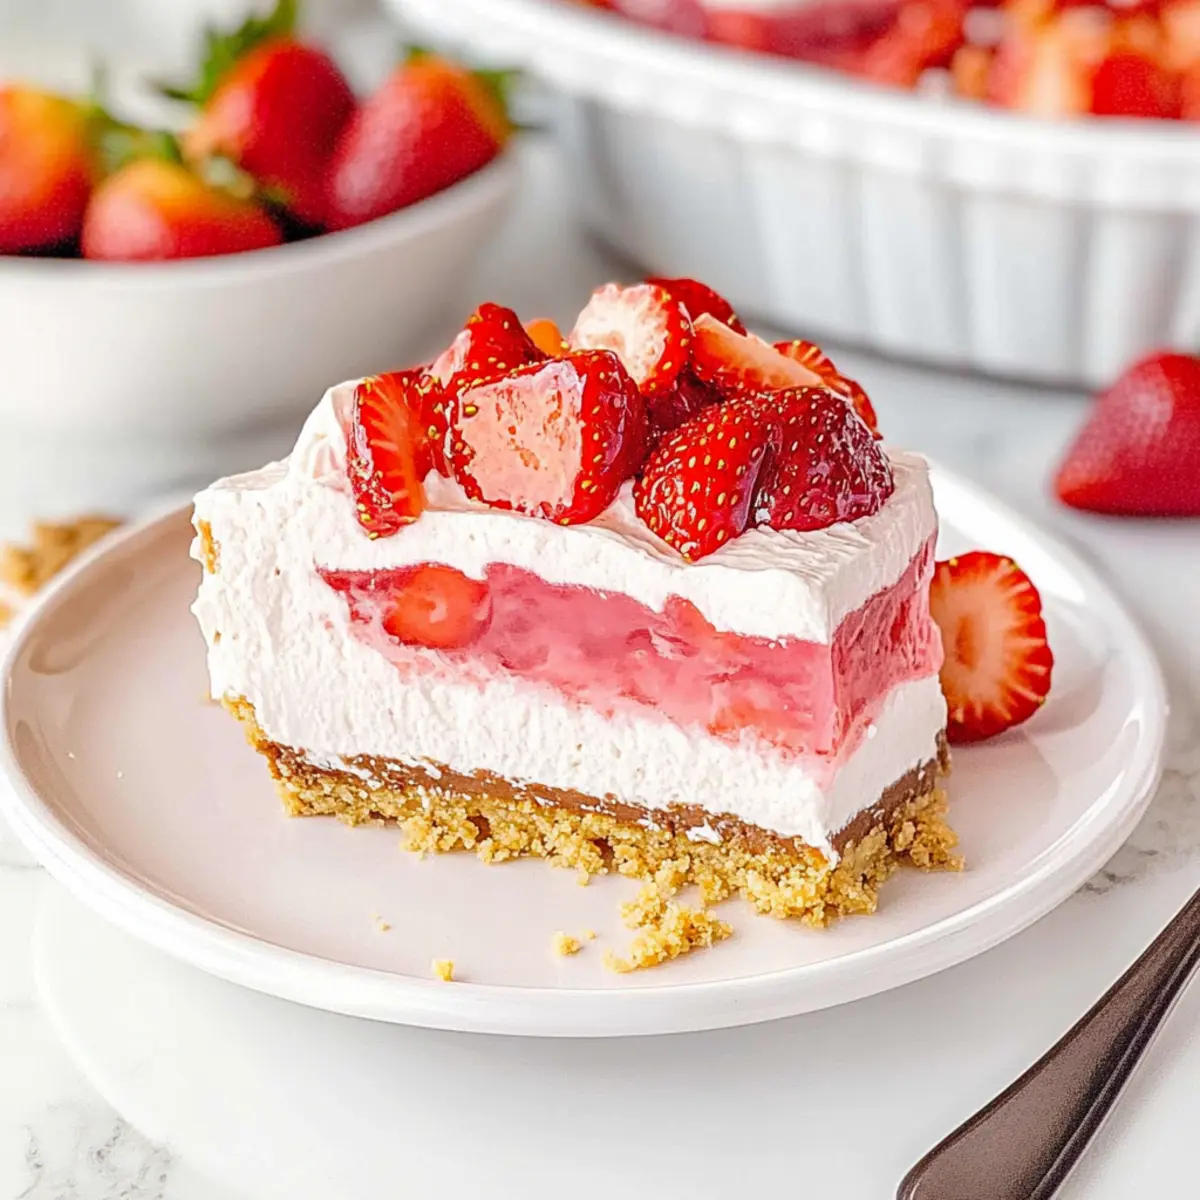
As I watched the sun slowly dip below the horizon, I felt that unmistakable summer thrill—it’s dessert time! Nothing says “cool off” quite like this no-bake Strawberry Cheesecake Lush. Combining a crunchy Golden Oreo crust with layers of creamy cheesecake and fluffy strawberry Jell-O, this dish is the perfect companion for sun-soaked gatherings. It’s an effortless recipe that will have you spending less time in the kitchen and more time enjoying heartwarming moments with friends and family. Plus, being no-bake means you can whip it up in a flash, making it an ideal choice for last-minute entertaining! So, are you ready to create a show-stopping dessert that delights with every luscious bite?
Why is Strawberry Lush so special?
No-Bake Convenience: This Strawberry Lush eliminates the need for baking, making dessert prep a breeze—perfect for busy summer days.
Refreshing Flavor: With its luscious layers of creamy cheesecake and fruity strawberry Jell-O, every bite is a taste of summer bliss.
Crowd-Pleasing Appeal: It’s a dessert that captivates guests of all ages—ideal for potlucks, BBQs, or family gatherings where everyone wants a sweet treat.
Customizable Layers: Feel free to experiment with berry variations or add chocolate drizzles to personalize your dessert.
Quick Preparation: You can assemble this gorgeous dish in no time, leaving you free to relax and enjoy those moments with loved ones.
Elevate your summer dessert game and impress with this delightful no-bake option!
Strawberry Lush Ingredients
For the Crust
• Golden Oreos – The sweet and crunchy base that brings a delightful texture. Substitution: Replace with classic Oreos or graham cracker crumbs for a unique twist.
• Unsalted Butter – Helps bind the crust together while adding richness. Prep Note: Melt before mixing with cookie crumbs for easy blending.
• Salt – Enhances the sweetness of the crust. Note: Just a pinch is all you need for flavor balance.
For the Cheesecake Layer
• Cream Cheese – The star of the cheesecake layer, providing creaminess and tang. Note: Make sure it’s softened for smooth mixing.
• Pure Vanilla Extract – Adds a depth of flavor to the cheesecake. Substitution: Imitation vanilla also works well if you’re in a pinch.
• Confectioners Sugar – Sweetens the cheesecake while contributing to its creamy texture. Note: Add gradually to prevent clumping.
• Whipped Topping – This lightens up the cheesecake for a fluffy finish. Note: Thaw before using for easier mixing.
• Diced Strawberries – Fresh and fruity, adding a burst of real strawberry flavor. Prep Note: Pat dry to avoid excess moisture.
For the Jell-O Layer
• Strawberry Jell-O Mix – Provides a pop of sweetness and a lovely pink hue. Substitution: Substitute with raspberry or cherry Jell-O for a different fruity flavor.
• Boiling Water – Activates the Jell-O mix, ensuring it dissolves properly. Note: Ensure the water is boiling for best results.
• Ice Water – Used to cool the Jell-O mixture before adding it to the layers. Prep Note: Mix ice with water until chilled for quick cooling.
• Additional Whipped Topping (for garnish) – A final creamy layer that makes it visually appealing. Note: Garnish with sliced strawberries for an enhanced presentation.
This Strawberry Lush, with its vibrant layers and no-bake convenience, is sure to become a fast favorite for summer gatherings!
Step‑by‑Step Instructions for Strawberry Lush
Step 1: Prepare the Crust
In a food processor, pulse the Golden Oreos until they become fine crumbs—about 20-30 seconds. Melt the unsalted butter in a microwave-safe bowl. Mix the melted butter and a pinch of salt with the cookie crumbs until well-coated, then press the mixture firmly into a greased 9×13 pan. Place in the freezer for 10-15 minutes, or until it’s solid and set.
Step 2: Make the Cheesecake Layer
In a mixing bowl, blend the softened cream cheese and pure vanilla extract until smooth and creamy, about 2-3 minutes. Gradually incorporate the confectioners sugar to avoid clumps, then fold in the thawed whipped topping and diced strawberries until just combined. Spread this luscious cheesecake mixture evenly over the chilled crust, smoothing the top with a spatula, and return it to the freezer to set for at least 30 minutes.
Step 3: Prepare the Jell-O Layer
Boil water in a kettle or saucepan, then dissolve the strawberry Jell-O mix in 1 cup of the boiling water, stirring until fully combined. Pour in 1 cup of ice water to help cool the mixture quickly. Once cooled, gently fold in another cup of thawed whipped topping for a fluffy texture. Let this mixture chill in the refrigerator for about 15 minutes, or until slightly thickened.
Step 4: Assemble and Chill
Carefully pour the Jell-O layer over the cheesecake layer, ensuring an even distribution. Cover the pan with plastic wrap, then refrigerate it for at least 4 hours, or ideally overnight, until the Jell-O is fully set and firm. The Strawberry Lush will achieve its beautiful layers and flavors during this chilling time, ensuring a delightful treat for any occasion.
Step 5: Garnish and Serve
Once set, remove the pan from the refrigerator and spread an additional layer of whipped topping on top for a beautiful finish. Optionally, garnish with sliced strawberries or cookie crumbs for an added touch of elegance. Cut into squares and serve chilled to enjoy this refreshing Strawberry Lush—perfect for summer gatherings or any sweet indulgence!
Strawberry Lush Variations & Substitutions
Unleash your creativity with these tempting twists and substitutions to make the Strawberry Lush truly your own!
-
Chocolate Toppings: Drizzle with chocolate syrup or sprinkle with chocolate shavings for a rich contrast. This will add a lovely depth to the fruity layers, making each bite indulgently decadent.
-
Nutty Crunch: Incorporate finely chopped nuts, like pecans or almonds, into the topping for added texture. The nutty surprise beautifully complements the creaminess and makes for a delightful crunch.
-
Berry Variations: Substitute the strawberries with a mix of berries like blueberries or raspberries for diverse flavors. A medley of berries captures the essence of summer and adds a vibrant color splash!
-
Gluten-Free Option: Use gluten-free cookies for the crust to cater to dietary needs. Everyone deserves a slice of this luscious dessert, and this simple swap ensures all can enjoy it.
-
Vegan Delight: Replace the cream cheese with a dairy-free alternative and use coconut whipped cream instead of regular whipped topping. This creates a light and vegan-friendly version without sacrificing flavor.
-
Citrus Zest: Stir in a bit of lemon or lime zest into the cheesecake layer for a refreshing zing. The citrusy notes will brighten the flavor profile and balance the sweetness perfectly.
-
Mint Infusion: Add finely chopped mint leaves into the Jell-O layer for a refreshing herbal twist. Mint and strawberry pair beautifully, giving your dessert a unique summer vibe.
-
Spicy Kick: Mix in a pinch of cayenne pepper or chili powder to the Jell-O layer for a sweet and spicy surprise. It’s an unexpected twist that can take the classic dessert to new heights!
Get ready to marvel at how little adjustments can transform your Strawberry Lush into a unique masterpiece that reflects your personal taste!
Make Ahead Options
These no bake Strawberry Cheesecake Lush is perfect for meal prep enthusiasts! You can prepare the crust and cheesecake layer up to 3 days in advance, simply keeping them covered in the refrigerator. For the Jell-O layer, you can mix it up to 24 hours ahead and store it in an airtight container. To maintain quality, ensure that the cheesecake layer is fully chilled before adding the Jell-O on top; this prevents any mixing of layers. When you’re ready to serve, simply let it sit at room temperature for about 10 minutes before slicing and adding fresh garnishes like whipped topping and strawberries. Enjoy the liberated time for summer fun while still treating your guests to a delicious Strawberry Lush!
Storage Tips for Strawberry Lush
Fridge: Store any leftovers in the refrigerator for up to 3 days, covered with plastic wrap to prevent it from absorbing odors.
Freezer: If you need to store the Strawberry Lush for longer, freeze it for up to 2 months. Wrap it tightly in plastic wrap and then foil to prevent freezer burn.
Thawing: When ready to enjoy, transfer it to the fridge to thaw overnight. Allowing it to chill in the fridge helps maintain its creamy texture.
Reheating: Since this is a no-bake dessert, there’s no need to reheat. Simply serve chilled for the best taste!
Expert Tips for Strawberry Lush
-
Chill Time Matters: Allowing the Strawberry Lush to chill thoroughly is key for setting the layers. Skipping this step can result in a messy, runny texture.
-
Strawberry Prep: Make sure to pat the diced strawberries dry before adding them to the cheesecake layer to prevent excess moisture, keeping the texture light and fresh.
-
Smooth Layers: Use an offset spatula to smooth the cheesecake and Jell-O layers. This tool minimizes air pockets and ensures a beautiful presentation.
-
Flexible Flavors: Experiment with different flavored Jell-O mixes (like raspberry or cherry) for a unique twist on the classic Strawberry Lush.
-
Garnishing Tips: For an appealing look, add the whipped topping and fresh strawberries right before serving to maintain their freshness and texture.
What to Serve with Strawberry Cheesecake Lush
As the sun sets and you savor your Strawberry Cheesecake Lush, consider these delightful pairings to elevate your warm-weather gatherings.
-
Fresh Fruit Salad: A rainbow of seasonal fruits adds brightness and a refreshing crunch, perfectly balancing the creamy layers of your dessert.
For added texture, incorporate citrus fruits like oranges and grapefruits to enhance your fruit medley. -
Grilled BBQ Chicken: The smoky flavors of grilled chicken create a delightful contrast to the sweet and rich cheesecake, making for a well-rounded meal.
The sweetness from the BBQ sauce harmonizes with the dessert, bridging the savory and sweet. -
Minty Lemonade: Refreshing and zesty, a minty lemonade quenches thirst and offers a light palate cleanser between bites of the luscious dessert.
Infusing the lemonade with fresh mint sprigs enhances both aroma and flavor, intensifying your summer vibe. -
Chocolate-Dipped Strawberries: This indulgent pairing adds an elegant touch to your dessert table, with rich chocolate beautifully offsetting the sweetness of the lush.
These bite-sized treats can be a hit with both kids and adults, making your gathering even more special. -
Pineapple Coconut Smoothie: A creamy, tropical smoothie offers a refreshing sip that complements the flavors of strawberries and adds a delightful chill.
The coconut provides a hint of nuttiness, while the pineapple ensures every sip is reminiscent of a sunny beach. -
Vanilla Bean Ice Cream: A scoop of velvety vanilla bean ice cream softens the richness of the cheesecake, delivering extra creaminess to each bite.
The ice cream’s simplicity lets the flavors of the Strawberry Lush shine through while providing a satisfying cold contrast.
Strawberry Cheesecake Lush Recipe FAQs
How do I choose ripe strawberries for this recipe?
Absolutely! When selecting strawberries, look for firm berries with a bright red hue and a fresh, green leaf attached. Avoid those with dark spots or mold, as they indicate overripeness. Ideally, choose strawberries that are sweet and fragrant, ensuring a burst of flavor in your Lush!
How should I store the Strawberry Lush after making it?
Very! Store leftover Strawberry Lush in the refrigerator for up to 3 days. Ensure it’s well-covered with plastic wrap to keep it fresh and prevent it from absorbing any odors. If you want to keep it longer, wrap it tightly in plastic wrap and then foil to freeze, which will last up to 2 months.
Can I freeze this Strawberry Lush, and how do I do it properly?
Absolutely! To freeze your Strawberry Lush, make sure it’s well-sealed—in plastic wrap and aluminum foil—before placing it in the freezer. This prevents freezer burn and retains its delightful flavors. When you’re ready to enjoy it, move it to the refrigerator the night before to thaw slowly and maintain its creamy texture.
What should I do if my cheesecake layer is too runny?
Ah, don’t worry! If you find your cheesecake layer is a bit too runny, it might be due to not allowing the layers to set long enough or excessive moisture from the strawberries. Make sure to pat the strawberries dry before adding them. To salvage the runny layer, you can try chilling it longer until it firms up enough to hold its shape.
Are there any dietary considerations I should keep in mind?
Absolutely! If you’re catering to specific dietary needs, you can opt for gluten-free cookies for the crust. Additionally, those with dairy allergies can use vegan cream cheese and whipped topping alternatives. Always check the labels for any hidden ingredients that may not suit your dietary restrictions.
How can I customize my Strawberry Lush for other occasions?
Very! You can easily adjust the flavors by mixing in different fruits or switching out the Jell-O for flavors like raspberry or lemon! Adding a drizzle of chocolate syrup on top or chopped nuts can create a fun twist to match different occasions. Experiment and have fun with it—it’s all about making it your own!
Light & Refreshing Strawberry Lush for Easy Summer Indulgence
Ingredients
Equipment
Method
- In a food processor, pulse the Golden Oreos until they become fine crumbs—about 20-30 seconds.
- Melt the unsalted butter in a microwave-safe bowl.
- Mix the melted butter and a pinch of salt with the cookie crumbs until well-coated, then press the mixture firmly into a greased 9x13 pan.
- Place in the freezer for 10-15 minutes, or until it’s solid and set.
- In a mixing bowl, blend the softened cream cheese and pure vanilla extract until smooth and creamy, about 2-3 minutes.
- Gradually incorporate the confectioners sugar to avoid clumps, then fold in the thawed whipped topping and diced strawberries until just combined.
- Spread this cheesecake mixture evenly over the chilled crust, smoothing the top with a spatula, and return it to the freezer to set for at least 30 minutes.
- Boil water and dissolve the strawberry Jell-O mix in 1 cup of the boiling water, stirring until fully combined.
- Pour in 1 cup of ice water to help cool the mixture quickly.
- Once cooled, gently fold in another cup of thawed whipped topping for a fluffy texture.
- Let this mixture chill in the refrigerator for about 15 minutes, or until slightly thickened.
- Carefully pour the Jell-O layer over the cheesecake layer, ensuring even distribution.
- Cover the pan with plastic wrap, then refrigerate it for at least 4 hours, or ideally overnight, until the Jell-O is fully set.
- Once set, remove the pan and spread an additional layer of whipped topping on top.
- Garnish with sliced strawberries or cookie crumbs before serving.
- Cut into squares and serve chilled.
Leave a Reply