
As I stirred the golden grains of rice, a wave of comforting aromas filled my kitchen, bringing back memories of family dinners around the table. Allow me to introduce you to my ultimate comfort food: Cheesy Rice! This creamy side dish is a go-to in my home, offering a quick and satisfying solution for busy weeknights or cozy gatherings. With just a handful of simple ingredients, you can whip up a delightful dish that pairs beautifully with grilled chicken or baked ribs. Not only is it a crowd-pleaser, but it’s also a versatile canvas for your culinary creativity—feel free to customize it with your favorite mix-ins! Are you ready to elevate your meals with this delicious cheesy delight?

Why is Cheesy Rice a Must-Try?
Comforting Warmth: This recipe envelops you in creamy, cheesy goodness that warms the heart and soul.
Quick and Easy: With minimal prep and a straightforward stovetop method, it’s perfect for busy weeknights.
Versatile Delight: Transform your Cheesy Rice by mixing in proteins or veggies, making it complete and nutritious. Thinking of a hearty family meal? Pair it with oven-baked ribs or grilled chicken for unmatched satisfaction.
Crowd-Pleasing Flavor: Everyone loves a cheesy dish—this one is no exception, ensuring smiles all around the dinner table.
Simple Ingredients: You likely have these staples in your pantry already, making this an instant go-to for delicious quick meals.
Make sure to savor every bite of your Cheesy Rice alongside a delightful slice of Cheesy Mashed Potato or upgrade your dinner with the flavors of Parmesan Chicken Cheesy.
Cheesy Rice Ingredients
For the Cheesy Base
- Long Grain White Rice – provides the perfect fluffy texture; avoid instant or brown rice without adjustments.
- Unsalted Butter – enriches the flavor during sautéing for a creamy finish.
- Onion (½ small, diced) – adds aromatic sweetness; dried onion (2 tbsp) can be used if fresh is unavailable.
- Chicken Broth (8 oz) – infuses savory depth; opt for low-sodium broth for a lighter touch.
- Whole Milk (8 oz) – supplies that creamy consistency you love; heavy cream works for an indulgent twist.
- Paprika (½ tsp) – brings warmth and color; use smoked paprika for a richer flavor profile.
- Salt (¼ tsp) & Pepper (¼ tsp) – essential for seasoning; adjust to your taste for perfect flavor.
- Sharp Cheddar Cheese (4 oz, grated) – gives the classic cheesy richness; feel free to try Monterey Jack or Pepper Jack for variations.
Feel the warmth and comfort that Cheesy Rice brings to your kitchen, creating delightful meals for family and friends!
Step‑by‑Step Instructions for Cheesy Rice
Step 1: Rinse the Rice
Begin by rinsing 1 cup of long grain white rice in a fine mesh sieve under cool running water. The goal is to wash away excess starch, so continue rinsing until the water runs clear, which should take about 1-2 minutes. This step is critical for achieving fluffy, non-sticky Cheesy Rice.
Step 2: Sauté the Onions
In a medium saucepan, melt 2 tablespoons of unsalted butter over medium heat until it begins to bubble. Add the diced onion and sauté for about 3-4 minutes, or until the onions are softened and lightly browned. This aromatic foundation will enhance the flavors of your Cheesy Rice significantly.
Step 3: Combine Ingredients
Once the onions are ready, add the rinsed rice to the saucepan, stirring it in with the onions for about 1 minute to coat the grains. Then pour in 8 ounces of chicken broth, 8 ounces of whole milk, and sprinkle in ½ teaspoon of paprika, along with ¼ teaspoon of salt and pepper. Stir everything together until well combined.
Step 4: Simmer the Mixture
Increase the heat until the mixture starts to simmer gently. At this point, cover the saucepan with a tight-fitting lid, reduce the heat to low (almost off), and let it cook undisturbed for 18-20 minutes. During this time, the rice will absorb the liquid and become tender.
Step 5: Check for Doneness
After 18-20 minutes, carefully remove the saucepan from heat without lifting the lid. Let it sit for an additional 5 minutes to steam and finish cooking. This resting period helps ensure that the Cheesy Rice has a perfect, creamy consistency without being mushy.
Step 6: Stir in the Cheese
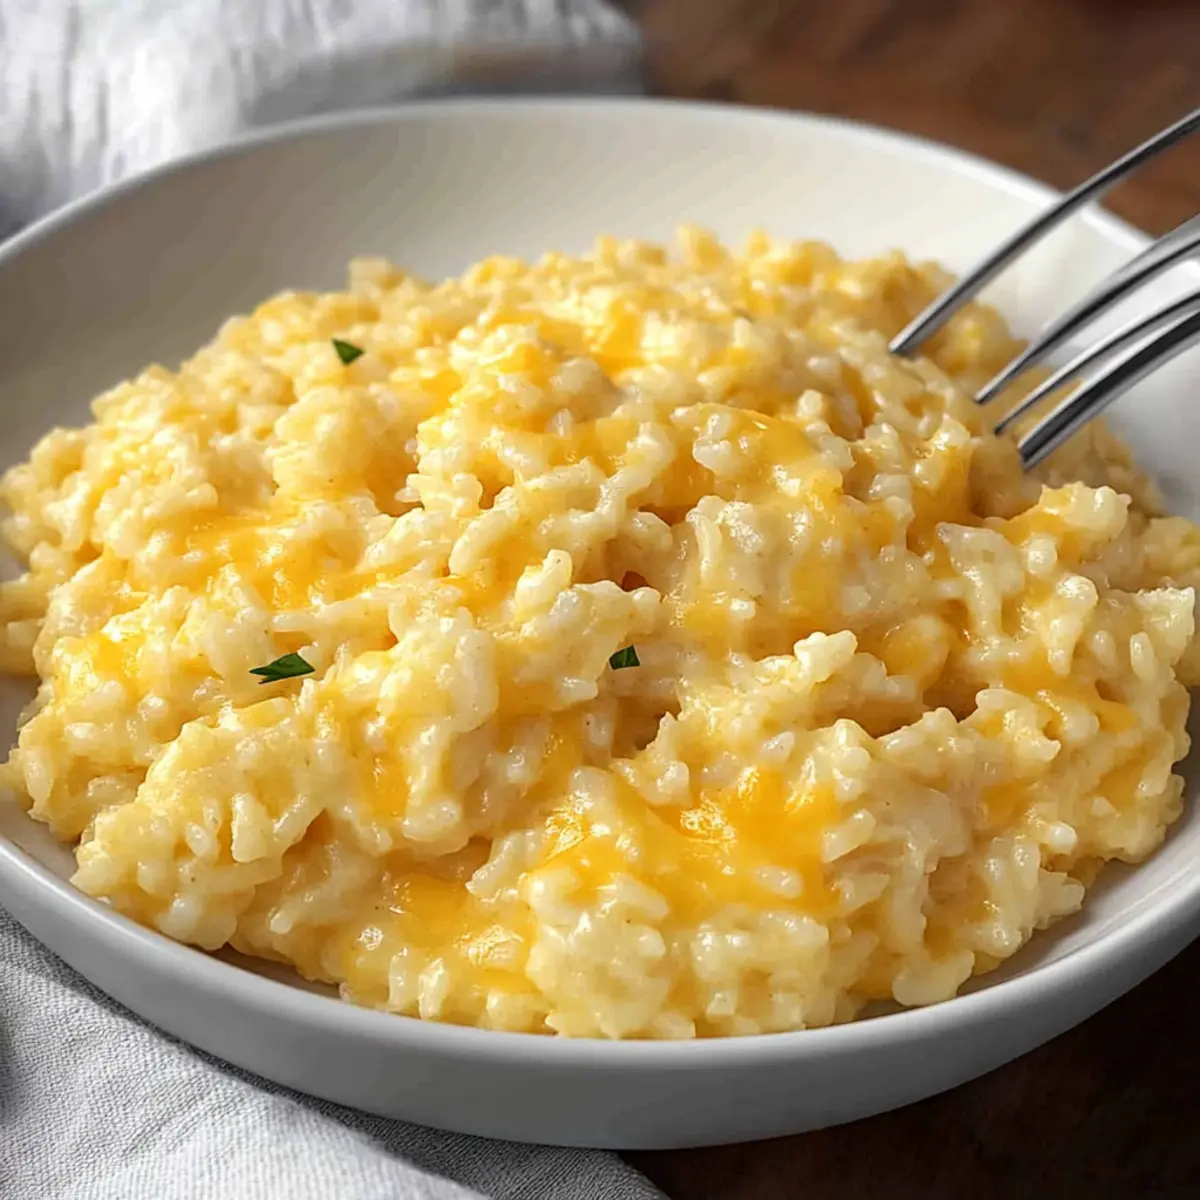
Once the resting period is over, remove the lid and gently fluff the rice with a fork. Add in 4 ounces of grated sharp cheddar cheese, stirring it until melted and well incorporated. The result should be creamy and luscious Cheesy Rice, ready to be served warm alongside your favorite main dishes.
Storage Tips for Cheesy Rice
-
Room Temperature: Keep Cheesy Rice at room temperature for no more than 2 hours after cooking to prevent bacterial growth.
-
Fridge: Store leftovers in a tightly sealed container for up to 3-4 days in the refrigerator. Make sure to cool it completely before sealing.
-
Freezer: While it’s not ideal, you can freeze Cheesy Rice in an airtight container for up to 2 months. Expect some texture changes upon thawing.
-
Reheating: Reheat in the microwave or on the stovetop, adding a splash of milk to restore creaminess, and heat until warmed through.
Make Ahead Options
These Cheesy Rice are perfect for meal prep enthusiasts! You can fully prepare the dish up to 24 hours in advance by following the instructions through to the cheese incorporation step. Simply allow the cooked Cheesy Rice to cool, then transfer it to an airtight container and refrigerate. To maintain its creamy texture, keep it covered tightly to prevent drying out. When you’re ready to serve, reheat gently in a saucepan over low heat, adding a splash of milk to restore the creaminess. Stir until warmed through, and you’ll have delicious, comforting Cheesy Rice with minimal effort, making busy weeknights oh-so-easy!
Expert Tips for Cheesy Rice
-
Rinse Thoroughly: Ensure rice is rinsed until water runs clear to avoid sticky, clumpy cheesy rice. This step is essential for a light texture.
-
Check Liquid Ratios: Use the correct ratio of broth and milk. Too little liquid can lead to dry rice, while too much can make it mushy.
-
Resist Lifting the Lid: Avoid opening the lid while it simmers. Keeping the steam trapped is crucial for perfect cooking and creaminess of your cheesy rice.
-
Mix-Ins with Care: When adding proteins or vegetables, do so halfway through cooking, and account for additional moisture to maintain creamy consistency.
-
Taste Test Seasoning: Before serving, taste the cheesy rice and adjust salt and pepper. The flavors should be balanced for maximum satisfaction.
Cheesy Rice Variations & Substitutions
Feel free to unleash your culinary creativity and make this Cheesy Rice your own with these delightful variations!
-
Dairy-Free: Use plant-based milk and vegan cheese for a creamy, dairy-free option that tastes just as good.
-
Extra Veggies: Add steamed broccoli, peas, or bell peppers halfway through, bringing vibrant color and nutrition to your dish.
-
Protein Boost: Stir in shredded chicken, cooked sausage, or diced ham for a heartier meal that stands alone.
-
Flavor Explosion: Sprinkle in fresh herbs like thyme or parsley at the end, or stir in sautéed garlic for an aromatic kick.
-
Spicy Twist: Add diced jalapeños or a sprinkle of cayenne pepper to amp up the heat and make your cheese rice extra exciting!
-
Different Grains: Swap traditional white rice for quinoa or brown rice, adjusting the cooking time for a nutritious twist.
-
Cheese Variety: Experiment with different cheeses like Pepper Jack or Gruyère for a distinct flavor profile and added complexity.
-
Mushroom Delight: Sauté sliced mushrooms along with onions for an earthy, umami-rich addition that pairs wonderfully with cheese.
As you make these variations, consider pairing your comforting Cheesy Rice with some oven-baked ribs or grilled chicken, alongside a slice of Cheesy Beef Enchiladas for a full-on feast that brings everyone to the table!
What to Serve with Cheesy Rice
Create a complete and delightful meal by pairing Cheesy Rice with comforting sides and dishes that will tantalize your taste buds.
-
Grilled Chicken: Juicy and succulent, grilled chicken adds a savory contrast to the creamy Cheesy Rice, making for a balanced plate.
-
Oven-Baked Ribs: The sweet and smoky flavors of tender ribs beautifully complement the rich, cheesy texture, creating a mouthwatering combination that’s hard to resist.
-
Steamed Broccoli: Fresh and vibrant, steamed broccoli adds a pop of color and nutrients, balancing out the richness of the Cheesy Rice.
-
Garlic Bread: Crunchy and buttery, garlic bread is the perfect vehicle for soaking up any extra cheesy goodness, enhancing every bite.
-
Coleslaw: This crisp and tangy side adds a refreshing contrast, making your meal lively while providing a delightful crunch against the creamy rice.
-
Caesar Salad: With its crisp romaine and creamy dressing, a Caesar salad brings a bright, zingy flavor that meshes beautifully with the richness of Cheesy Rice.
-
Sweet Tea or Lemonade: A refreshing glass of sweet tea or tangy lemonade serves as the perfect drink to cleanse the palate, enhancing the overall meal experience.
-
Chocolate Cake: End your meal on a sweet note with a slice of moist chocolate cake, balancing the savory flavors of the main meal with a touch of indulgence.

Cheesy Rice Recipe FAQs
How do I choose the right rice for Cheesy Rice?
Absolutely! For this recipe, I recommend using long grain white rice as it provides the perfect fluffy texture. Avoid instant rice, as it requires different cooking times and will not produce the same creamy result. If using brown rice, be sure to adjust the cooking time to around 40-45 minutes and check package instructions for liquid adjustments.
What is the best way to store leftover Cheesy Rice?
Very good question! To store leftover Cheesy Rice, place it in a tightly sealed container and refrigerate it within 2 hours of cooking. It will stay fresh for up to 3-4 days. Make sure to let it cool completely before sealing the container to avoid condensation which can affect its texture.
Can I freeze Cheesy Rice, and how should I do it?
Certainly! Although freezing can alter the texture, you can freeze Cheesy Rice in an airtight container for up to 2 months. To do this, allow the rice to cool fully, then portion it out into meal-sized servings. When you’re ready to enjoy it again, thaw it in the refrigerator overnight, then reheat gently on the stovetop, adding a splash of milk to revive the creaminess.
My Cheesy Rice turned out too dry; what should I do?
No problem, it happens to the best home chefs! Should your Cheesy Rice appear dry, you can add a splash of broth or water to it while reheating. Stir gently to incorporate the moisture and heat over low heat until warmed through. This should help restore the creamy texture we’re aiming for!
Is this recipe suitable for those with dairy allergies?
Great to consider! This Cheesy Rice recipe is not dairy-free due to the use of milk and cheese. However, you can substitute with non-dairy alternatives such as almond milk or coconut milk for creaminess, and try using a dairy-free cheese alternative in place of cheddar. Do check labels for possible allergens if you’re preparing it for others.
What if I want to spice up my Cheesy Rice?
Thinking outside the box is always encouraged! You can mix in cooked proteins like shredded chicken or diced kielbasa for a heartier dish. Additionally, adding colorful vegetables such as peas or broccoli halfway through cooking not only enhances nutrition but also adds delightful flavors and textures. Don’t hesitate to experiment with different cheeses or seasonings, such as garlic or herbs, for an elevated taste experience.

Creamy Cheesy Rice for Quick Comfort Food Bliss
Ingredients
Equipment
Method
- Begin by rinsing the rice in a fine mesh sieve under cool running water until it runs clear.
- In a medium saucepan, melt the butter over medium heat and sauté the diced onion until softened.
- Add the rinsed rice to the saucepan, stirring with the onions. Then add broth, milk, paprika, salt, and pepper.
- Increase the heat until the mixture simmers, then cover and reduce the heat to low. Cook undisturbed for 18-20 minutes.
- After 18-20 minutes, let it sit for an additional 5 minutes without lifting the lid.
- Fluff the rice with a fork and stir in the cheddar cheese until melted and creamy.
Leave a Reply