
As I rummaged through my pantry, a jar of ricotta cheese caught my eye, reminding me of a cherished Italian dessert—cannoli. I decided to pay homage to this classic by creating Cannoli Cookies, a delightful fusion of flavor in bite-sized treats. With their tender, cake-like texture and creamy filling of ricotta, these cookies come together quickly, making them a perfect choice for a busy weeknight or festive holiday gatherings. Rich chocolate chips and warm spices dance within each morsel, creating a comforting experience that’s sure to satisfy your sweet tooth. Whether enjoyed with a hot cup of coffee or proudly displayed on a cookie platter, these Cannoli Cookies bring a taste of Italy right to your kitchen. Curious about how to recreate this delectable treat? Let’s dive into the recipe!
Why Make Cannoli Cookies?
Irresistible Flavor: Each bite is a delightful blend of creamy ricotta, rich chocolate chips, and warm spices like cinnamon and nutmeg, echoing the beloved Italian dessert.
Quick and Easy: With simple ingredients and straightforward instructions, you’ll whip up these cookies in no time, perfect for busy weeknights or unexpected guests.
Versatile Variations: Feel free to customize your cookies; swap in almond extract or white chocolate chips for a unique twist, or try adding chopped almonds instead of pistachios for a change.
Crowd-Pleasing Treat: Whether you’re serving them at a family gathering or bundling them up as a thoughtful gift, these Cannoli Cookies are sure to impress and satisfy any sweet cravings.
Storage Friendly: Store them in an airtight container for up to a week or freeze for those moments when you’re in need of a sweet pick-me-up. Enjoy these delightful treats after sharing the love of Winter Wonderland Cookies or Pumpkin Pie Cookies!
Cannoli Cookies Ingredients
• Let’s gather everything you need to create these delightful Cannoli Cookies!
For the Cookie Base
- Ricotta Cheese – Provides signature moistness and creaminess; ensure it is well-drained for the right texture.
- Butter – Adds richness and contributes to the cake-like crumb; use softened, room-temperature butter for optimal incorporation.
- Sugar – Sweetens the cookies and helps achieve a tender texture through creaming.
- Flour – Gives structure and body; measure accurately to avoid dryness or spreading.
- Baking Powder – Serves as a leavening agent for lightness.
- Salt – Enhances flavor and balances sweetness.
- Cinnamon & Nutmeg – Introduce warm spices reminiscent of traditional cannoli filling.
- Eggs – Provides moisture and binds ingredients together; bring to room temperature for better emulsification.
For the Flavor Boost
- Vanilla Extract – Adds depth of flavor.
- Orange Zest – Offers a fresh citrus note, enhancing the overall flavor profile.
For the Sweet Additions
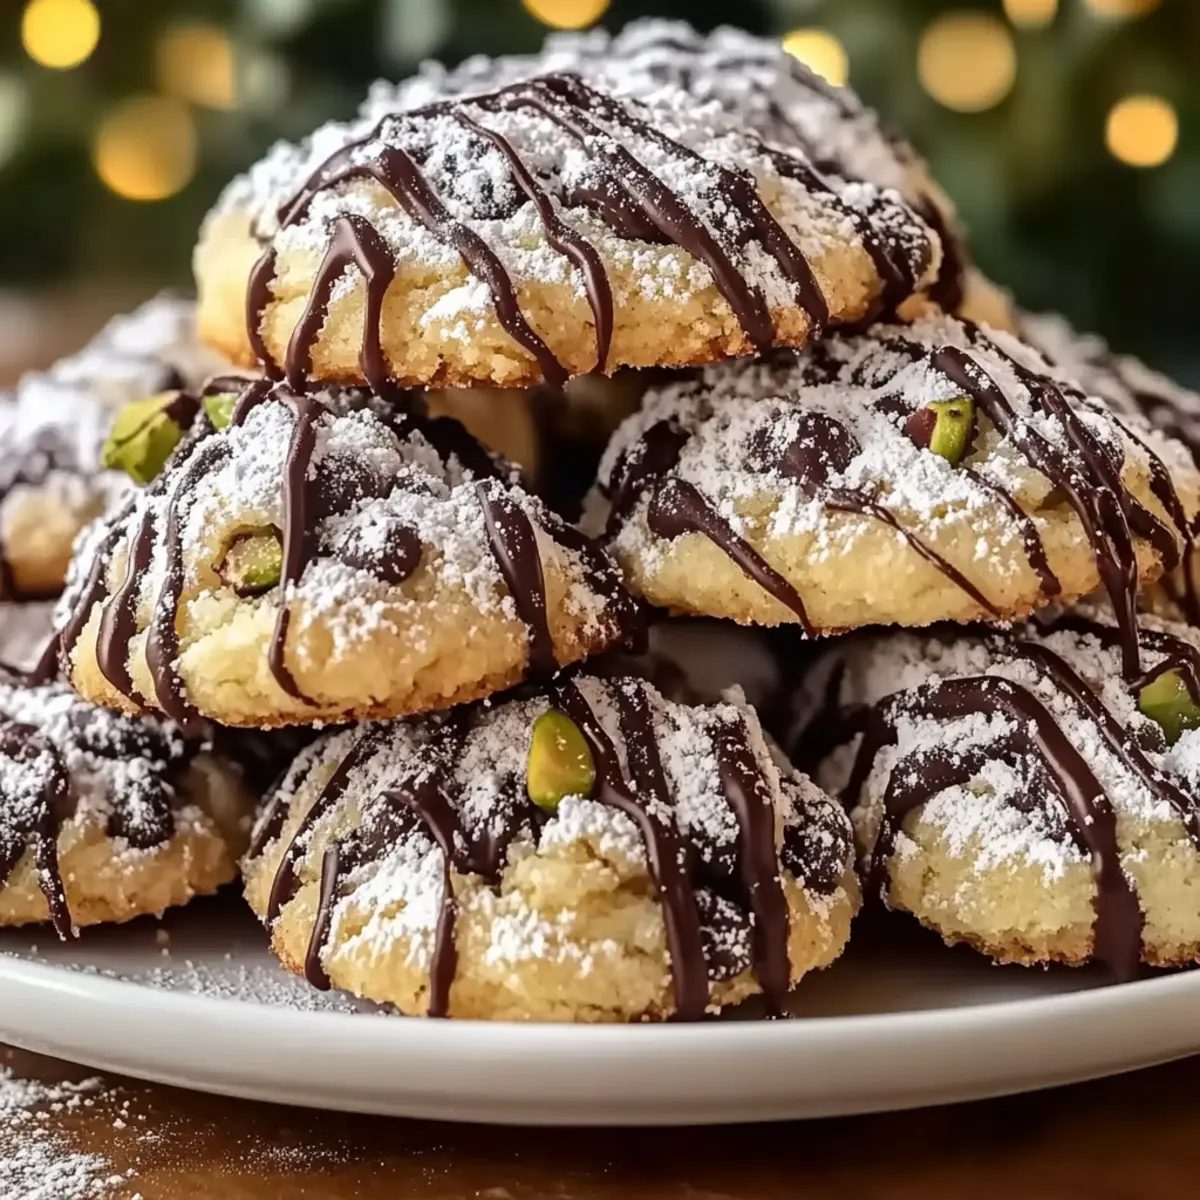
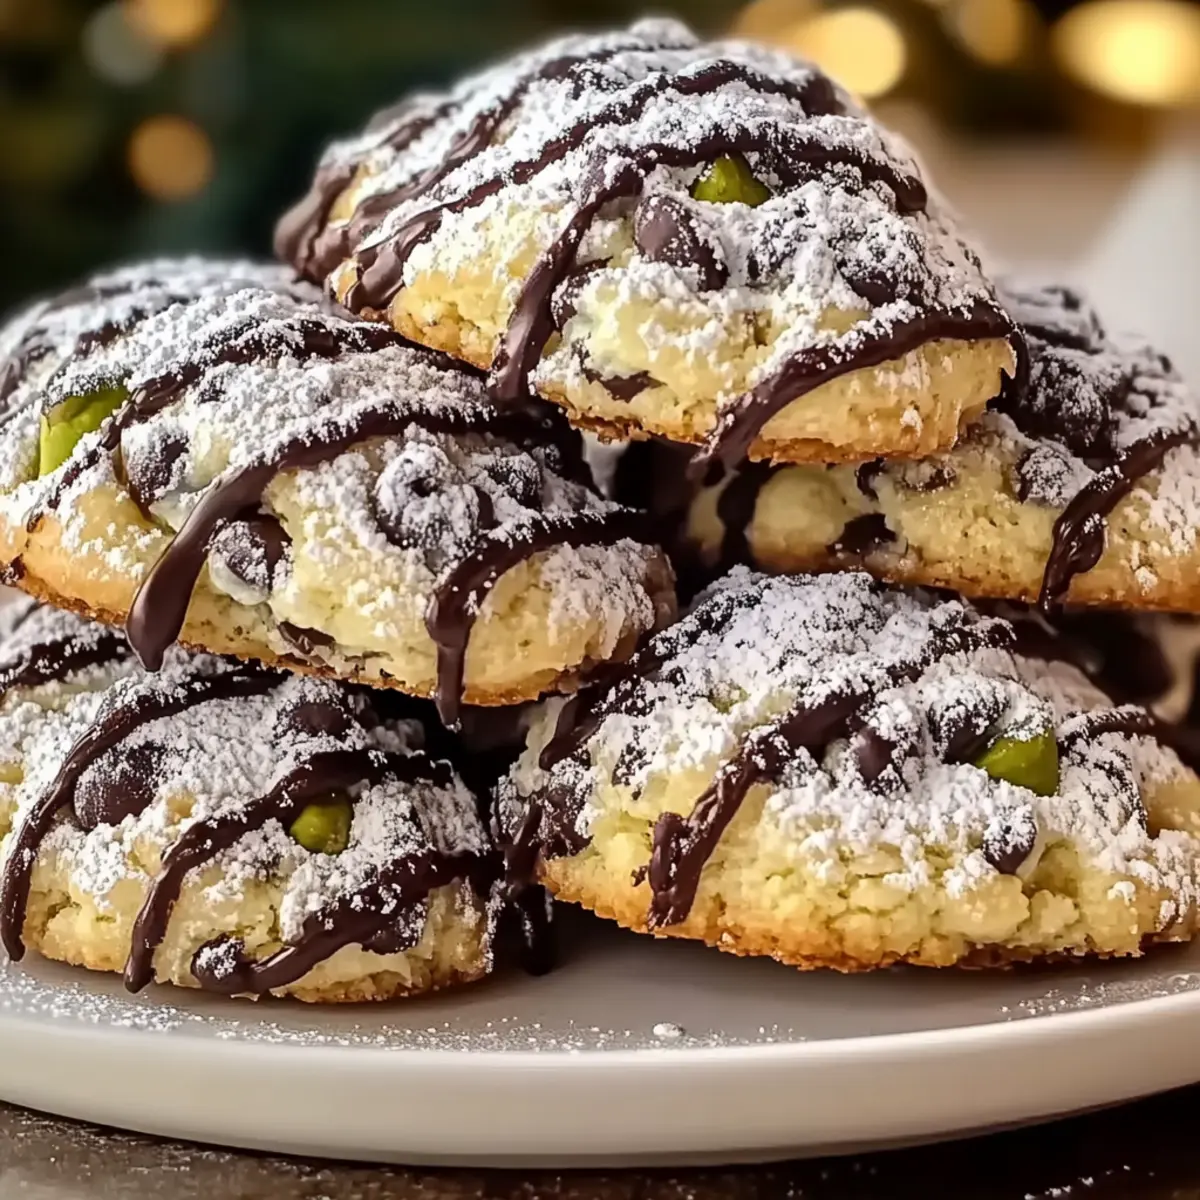
- Mini Chocolate Chips – Contributes sweetness and texture; smaller size ensures even distribution in your Cannoli Cookies.
- Chopped Pistachios – Provides crunch and a classic flavor pairing with chocolate.
Use these ingredients to create a mouthwatering batch of Cannoli Cookies that will leave your family and friends craving more!
Step‑by‑Step Instructions for Cannoli Cookies
Step 1: Prep Ricotta
Start by draining the ricotta cheese in a fine-mesh strainer for at least 30 minutes to ensure it reaches the right consistency. This step is crucial for achieving the perfect texture in your Cannoli Cookies, as excess moisture can lead to flat cookies. Once drained, set the ricotta aside, ready to be mixed into the dough.
Step 2: Mix Dry Ingredients
In a medium bowl, whisk together the flour, baking powder, salt, cinnamon, and nutmeg until well combined. This mix creates a flavorful base for your Cannoli Cookies. Once combined, set the dry ingredients aside to prepare for the next steps, making sure they are fully incorporated and ready to enhance the cookie’s texture.
Step 3: Cream Butter and Sugar
In a large mixing bowl, beat the softened butter and sugar together with an electric mixer on medium speed until the mixture is light and fluffy, about 3-4 minutes. This step incorporates air, which will help the cookies rise and achieve that delightful, cake-like quality. Once lightened in color and texture, prepare to add your wet ingredients.
Step 4: Incorporate Eggs and Ricotta
Gradually add the eggs to the creamed butter and sugar, mixing in one at a time to ensure even distribution. Next, blend in the drained ricotta cheese, vanilla extract, and orange zest until well combined. The addition of these ingredients brings moisture and flavor to your Cannoli Cookies, creating a rich, creamy texture that resembles traditional cannoli filling.
Step 5: Combine Ingredients
Gently fold the dry ingredient mixture into the wet ingredients in three additions. Use a spatula to combine, being careful not to over-mix; stop when you see a few visible streaks of dry flour. This ensures your Cannoli Cookies maintain a tender and soft crumb, which is essential for their delightful cake-like texture.
Step 6: Add Mix-Ins
With the dough now combined, fold in the mini chocolate chips and chopped pistachios, reserving a small amount of each for topping later. This step infuses your Cannoli Cookies with extra sweetness and crunch, giving them that extra touch of flavor and texture that you’ll love in every bite.
Step 7: Scoop and Bake
Using a cookie scoop, portion out tablespoon-sized amounts of dough and place them onto parchment-lined baking sheets, spacing them about 2 inches apart. Preheat your oven to 350°F and bake the cookies for 12-14 minutes, or until the edges are golden brown. Keep an eye on them; they should appear set but slightly soft in the center.
Step 8: Cool and Decorate
Once baked, allow the Cannoli Cookies to cool on the baking sheets for a few minutes before transferring them to wire racks to cool completely. When fully cooled, drizzle melted chocolate over the cookies and dust with powdered sugar for an elegant finish. These decorations add a lovely visual touch, enhancing your already irresistible Cannoli Cookies!

Make Ahead Options
These Cannoli Cookies are perfect for meal prep enthusiasts looking to save time during busy weeks! You can prepare the cookie dough up to 24 hours in advance by scooping the dough onto parchment-lined baking sheets, covering them well, and refrigerating. This not only allows the flavors to meld beautifully but also helps with the cookies’ texture. When you’re ready to bake, simply preheat your oven and bake the chilled cookie dough for about 12-14 minutes without thawing. For even longer storage, you can freeze the cookie dough balls for up to 3 months. Just remember to add a couple of extra minutes to the baking time if baking straight from the freezer. Enjoy delicious, fresh Cannoli Cookies with minimal effort on hectic days!
How to Store and Freeze Cannoli Cookies
Room Temperature: Keep Cannoli Cookies in an airtight container at room temperature for up to 1 week, ensuring they stay fresh and moist.
Fridge: If you prefer chilled cookies, you can store them in the fridge for up to 2 weeks. Just make sure they’re well-wrapped to prevent them from drying out.
Freezer: For longer storage, freeze the cookies in a single layer on a baking sheet before transferring them to a freezer-safe container. They’ll last for up to 3 months.
Reheating: To enjoy your frozen Cannoli Cookies, simply thaw them at room temperature or warm them in the oven at 350°F for about 5-7 minutes.
Cannoli Cookies: Creative Variations
Feeling adventurous in the kitchen? Let’s explore some fun twists and substitutions for your Cannoli Cookies that will keep your taste buds tingling!
-
Nut Alternatives: Substitute chopped almonds for pistachios for a nutty flavor that adds a unique crunch. The sweet, buttery notes of almonds create a delightful shift in texture and taste.
-
Extract Options: Try adding almond or lemon extract for a fragrant burst of flavor. Each of these extracts brings its own charm; lemon will brighten your cookies, while almond provides a rich depth.
-
White Chocolate Chips: Swap mini chocolate chips for white chocolate chips for a creamy, decadent twist. The sweetness of white chocolate beautifully complements the ricotta’s mild flavor.
-
Zesty Upgrade: Incorporate lemon or lime zest in addition to orange zest for a bright, refreshing citrus punch. The zing will make your cookies even more vibrant and aromatic.
-
Dairy-Free Version: Use vegan butter and substitute ricotta with a plant-based alternative, such as tofu or a dairy-free cream cheese. You’ll still enjoy a delightful batch of cookies without dairy content.
-
Spice It Up: Add a pinch of cardamom for an exotic twist. This fragrant spice will elevate the flavor profile and give your Cannoli Cookies an intriguing aroma.
-
Reduced Sugar Option: For a lighter touch, reduce sugar slightly and replace it with a natural sweetener like maple syrup or honey. Adjust dry ingredients accordingly to maintain the right texture.
-
Spicy Surprise: Introduce a hint of cayenne pepper or chili powder for a surprising kick! This contrasts beautifully with the sweetness, giving your cookies an unexpected depth that’ll please adventurous palates.
Feel free to mix and match these variations to create your signature Cannoli Cookies! For more delightful cookies, you might enjoy the festive flavors of Winter Wonderland Cookies or the seasonal goodness found in Pumpkin Pie Cookies.
Expert Tips for Cannoli Cookies
-
Ricotta Consistency: Ensure the ricotta is well-drained for a thick, paste-like texture; excess moisture can lead to flat Cannoli Cookies.
-
Room Temperature Ingredients: Always use room-temperature butter and eggs to promote better mixing and a lighter cookie texture.
-
Even Baking: Use a cookie scoop to portion the dough uniformly, ensuring all cookies bake evenly with no surprises.
-
Gentle Mixing: Avoid over-mixing after adding the dry ingredients to preserve that soft, tender crumb that makes these Cannoli Cookies a delight.
-
Cooling Time: Let the cookies cool slightly on the baking sheets before moving them. This helps maintain their shape and texture before decorating.
What to Serve with Cannoli Cookies?
Elevate your Cannoli Cookies experience by pairing them with these delightful accompaniments that complement their sweet, creamy flavors.
- Brewed Espresso: A rich shot of espresso balances the sweetness of the cookies, enhancing their flavors while providing a chic Italian vibe.
- Vanilla Ice Cream: The creamy coldness of vanilla ice cream contrasts beautifully with the warm spices, creating a soothing dessert duo.
- Fruit Salad: A refreshing mix of seasonal fruits adds a burst of color and freshness, cutting through the richness of the cookies perfectly.
- Hazelnut Liqueur: This sweet and nutty drink enhances the pistachio flavors in your cookies while providing an adult twist for holiday soirées.
- Chocolate Fondue: Dip your Cannoli Cookies in warm chocolate for a decadent treat that combines different textures and flavors—truly indulgent!
- Whipped Cream: Light, airy whipped cream adds a delightful fluff, enhancing the rich flavors of the cookies without overpowering them.
Consider serving your Cannoli Cookies alongside these options to create a charming dessert spread that brings smiles to every gathering!
Cannoli Cookies Recipe FAQs
What type of ricotta cheese should I use for Cannoli Cookies?
Absolutely! It’s best to use whole-milk ricotta for these cookies, as it provides the creaminess and moisture needed for that delightful texture. Make sure to drain it in a fine-mesh strainer for at least 30 minutes to achieve the right consistency—this prevents excess moisture, ensuring your cookies don’t turn out flat.
How should I store Cannoli Cookies to keep them fresh?
Very simply! Store your Cannoli Cookies in an airtight container at room temperature for up to 1 week. If you’re planning to keep them longer, you can refrigerate them for up to 2 weeks. Just ensure they are well-wrapped to avoid drying out, keeping that delightful moistness intact.
Can I freeze Cannoli Cookies? If so, how?
Definitely! To freeze your Cannoli Cookies, first, allow them to cool completely. Then place them in a single layer on a baking sheet and freeze until solid. Once frozen, transfer them to a freezer-safe container or resealable bag. They can be stored in the freezer for up to 3 months. When you’re ready to enjoy them, just thaw them at room temperature or warm them in the oven at 350°F for 5-7 minutes.
What if my Cannoli Cookies are too flat?
No worries! If your cookies turn out flat, it could be due to excess moisture in the ricotta or over-mixing the dough. Ensure your ricotta is well-drained—a thick paste-like consistency is crucial. Additionally, avoid over-mixing after adding the dry ingredients; just mix until combined for the best texture.
Are Cannoli Cookies safe for people with nut allergies?
Absolutely! However, to make these Cannoli Cookies nut-free, simply omit the chopped pistachios. You can easily replace them with extra chocolate chips or leave them out altogether. Always check your ingredient labels to avoid cross-contamination if you are serving someone with allergies.
Can I modify the ingredients for dietary preferences?
Very much so! If you want to make these Cannoli Cookies gluten-free, you can substitute all-purpose flour with a 1:1 gluten-free flour blend. For a dairy-free option, consider using a dairy-free ricotta alternative and vegan butter. Your cookies may have slightly different textures, but they’ll still be deliciously enjoyable!

Delightful Cannoli Cookies: A Taste of Italy in Every Bite
Ingredients
Equipment
Method
- Start by draining the ricotta cheese in a fine-mesh strainer for at least 30 minutes.
- Whisk together the flour, baking powder, salt, cinnamon, and nutmeg in a medium bowl.
- Beat the softened butter and sugar together until light and fluffy, about 3-4 minutes.
- Gradually add the eggs to the creamed mixture, mixing in one at a time, then blend in the drained ricotta, vanilla extract, and orange zest.
- Gently fold the dry ingredients into the wet ingredients in three additions.
- Fold in the mini chocolate chips and chopped pistachios, reserving some for topping.
- Using a cookie scoop, portion out tablespoon-sized amounts of dough and place them on parchment-lined baking sheets.
- Preheat your oven to 350°F and bake for 12-14 minutes, or until edges are golden brown.
- Allow to cool on baking sheets for a few minutes, then transfer to wire racks and let cool completely. Decorate with melted chocolate and dust with powdered sugar.
Leave a Reply