
As I stood in my kitchen, a sudden craving hit me—something wholesome yet delightful, a treat that could easily fit into my busy mornings. That’s when I remembered these scrumptious Homemade Easy Cereal Bars. Made with just three ingredients, they come together with the swiftness of a favorite song. These cereal bars are not only customizable to match any flavor eagerness—from chocolate to peanut butter—but also present a healthier alternative to store-bought snacks, keeping those pesky cravings at bay without any guilt. Perfect for a nutritious breakfast on-the-go or an afternoon pick-me-up, they are sure to become a staple in your kitchen. Are you ready to whip up a batch and explore the delightful variations?
Why Are These Cereal Bars So Great?
Simplicity Meets Deliciousness: With only three simple ingredients, you can whip up these bars in no time!
Endless Customization: Choose from a variety of flavors like Chocolate, Nutella, or Cookie Dough to match your mood.
Healthy Snacking: Packed with wholesome ingredients, these bars serve as a guilt-free snack option that can curb cravings.
Perfect for Any Occasion: Whether it’s breakfast on-the-go or a sweet afternoon treat, these bars fit seamlessly into any busy lifestyle.
Meal Prep Friendly: Make a big batch and store them in the fridge for a week of quick snacks; just like Homemade Granola Bars, they’re perfect for sharing!
Kid-approved Treats: Even the pickiest eaters will love these; they’ll never guess how easy they are to make!
Cereal Bars Ingredients
For the Base
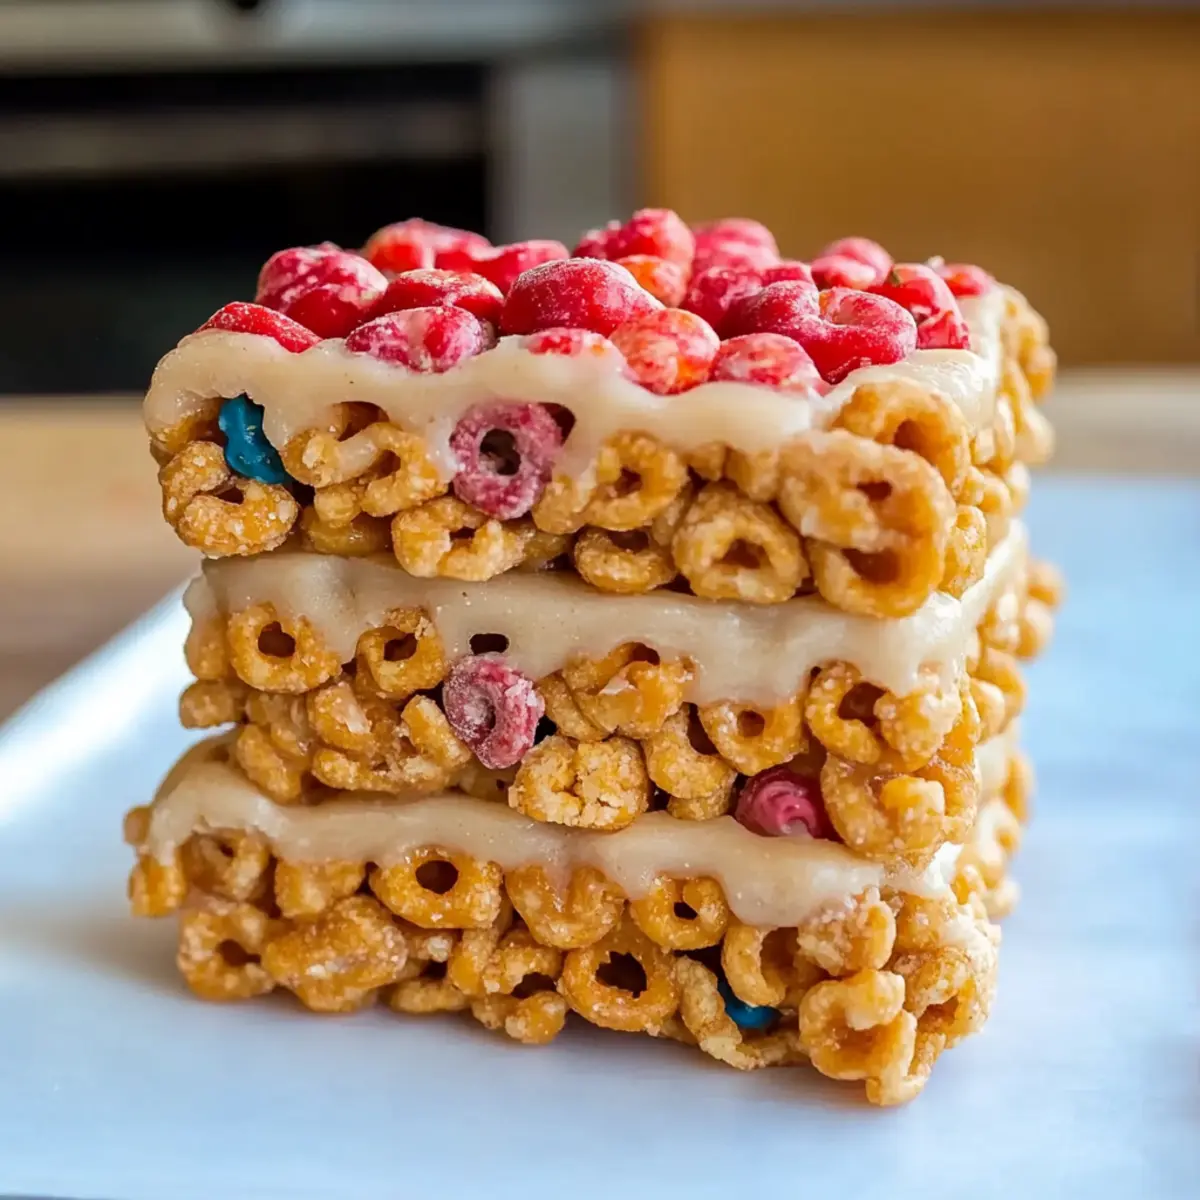
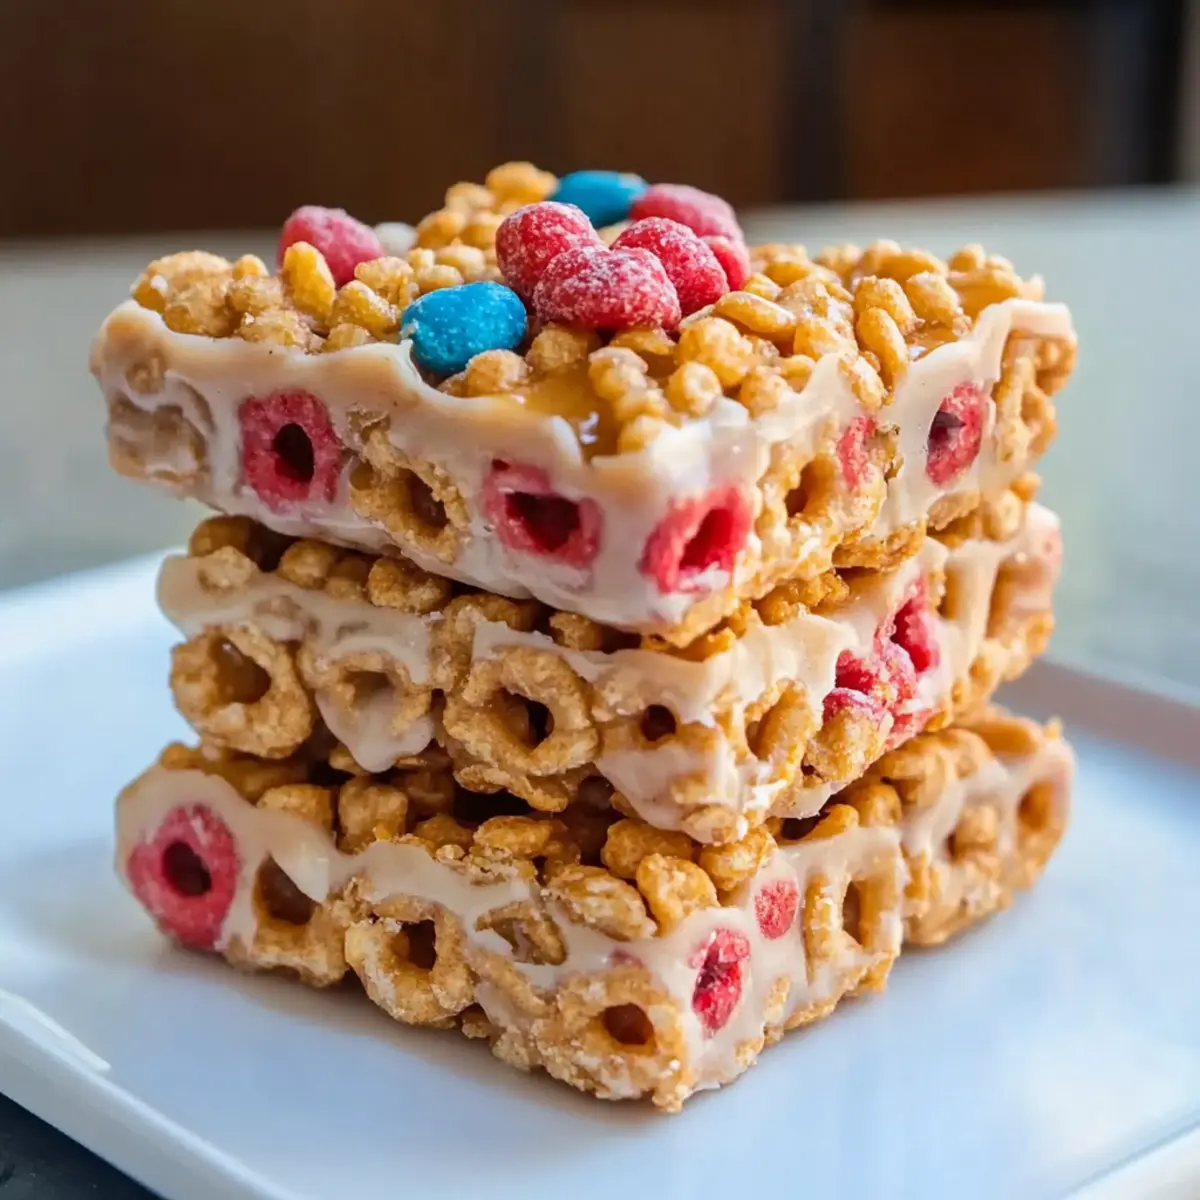
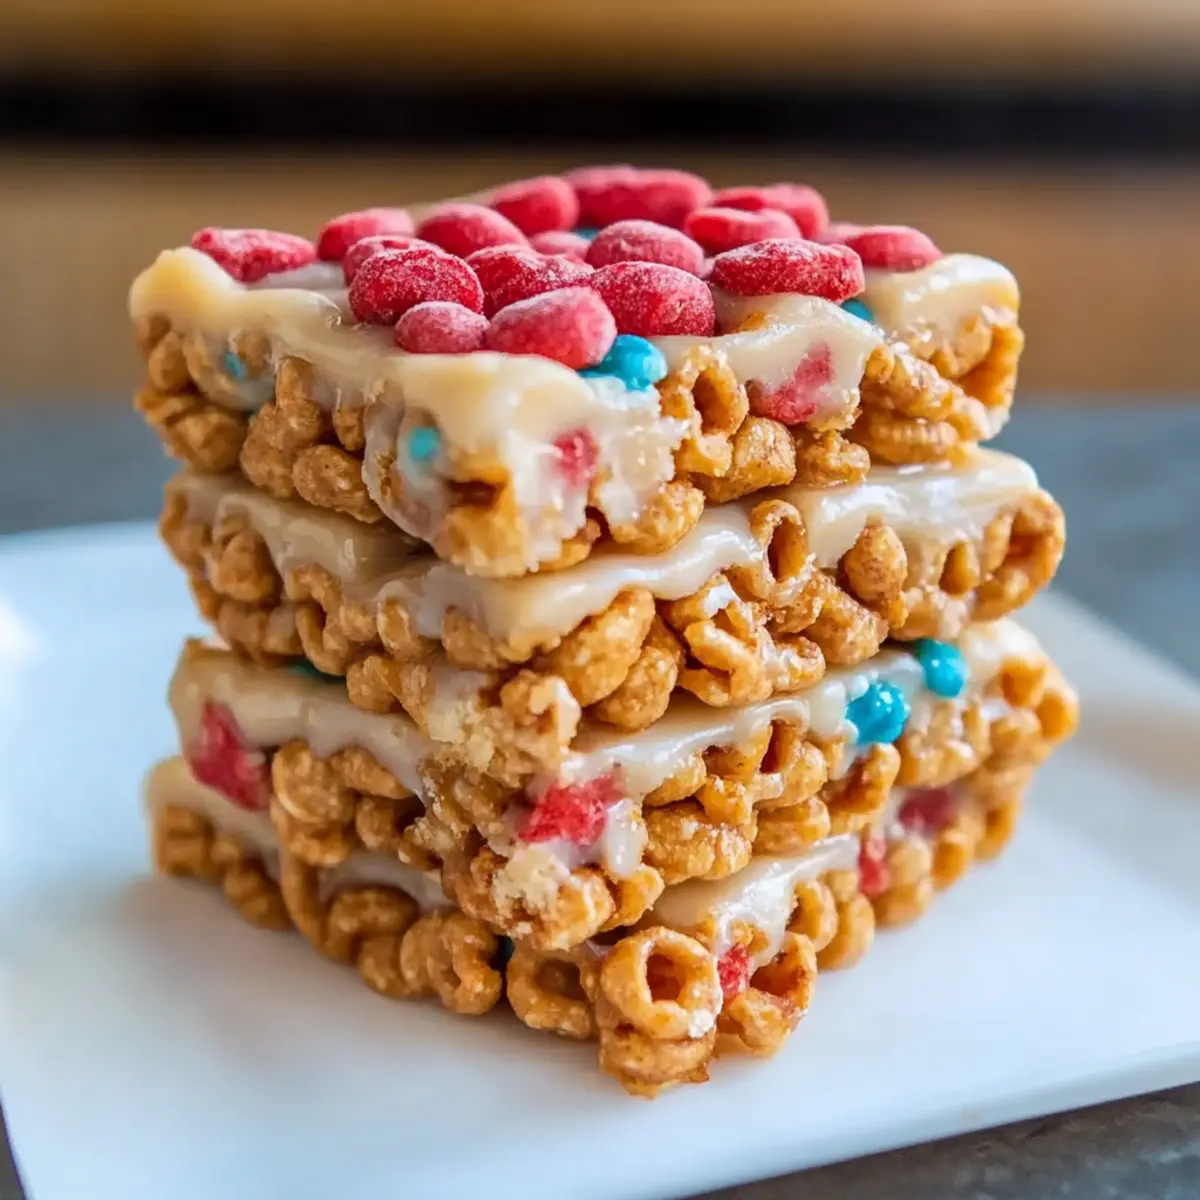
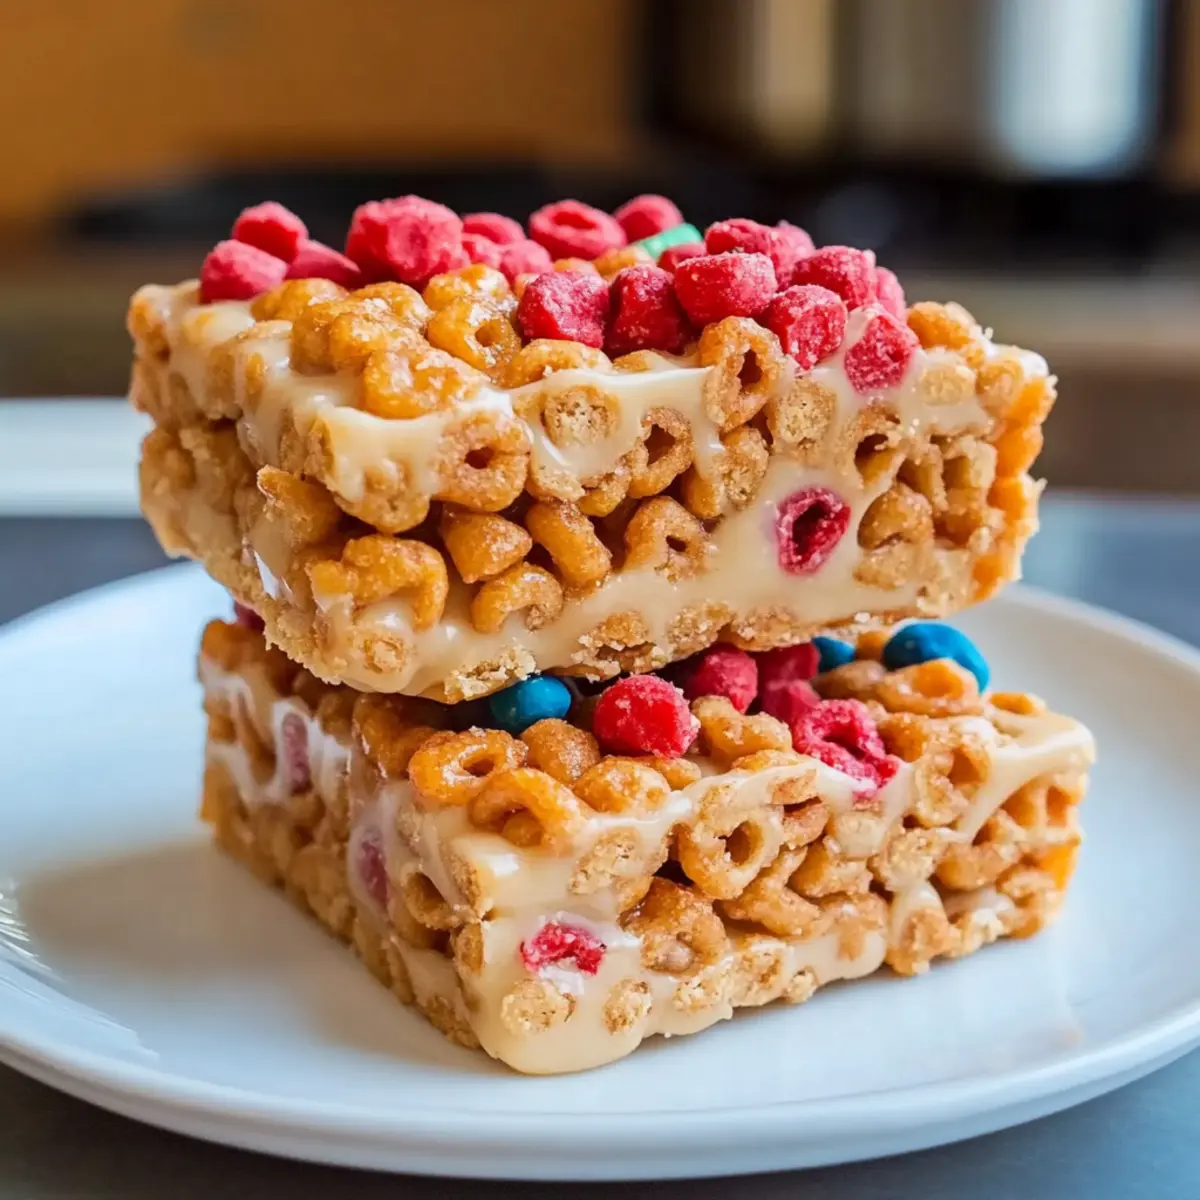
• Cereal – Aim for 3 cups of small flake or shape cereals like Cheerios or Rice Krispies; ensure they’re vegan if needed.
• Nut Butter – Use 2/3 cup of your favorite nut butter; options include peanut butter, almond butter, or sunbutter for a nut-free choice.
• Liquid Sweetener – Add 1/2 cup of a sweetener like agave, honey, or brown rice syrup; for a vegan option, opt for agave or brown rice syrup.
Optional Enhancements
• Optional Salt – A pinch (1/2 tsp) enhances the overall flavor of your cereal bars.
• Optional Protein Powder – Boost your bars with 3 tbsp of protein powder for an extra nutritional punch.
Step‑by‑Step Instructions for 3-Ingredient Chewy Homemade Cereal Bars
Step 1: Prepare Pan
Begin by lining an 8-inch square pan with wax paper or parchment paper, allowing some overhang for easy removal later. This will prevent the cereal bars from sticking and ensure they come out neatly. Make sure the paper fits snugly in the corners to create a solid base for your delicious cereal bars.
Step 2: Warm Nut Butter
In a microwave-safe bowl, gently heat 2/3 cup of your chosen nut butter for about 20-30 seconds until it’s warm and easily stirrable. This step enhances the creaminess, making it simpler to combine with other ingredients. Stir well to achieve a smooth consistency, which will greatly help in blending all elements of your cereal bars together.
Step 3: Mix Ingredients
In a large mixing bowl, combine your 3 cups of cereal, the warmed nut butter, and 1/2 cup of liquid sweetener. If desired, include optional ingredients like a pinch of salt or protein powder. Using a spatula, mix everything thoroughly until the cereal is evenly coated. Aim for a well-distributed mixture that’s both sticky and cohesive, perfect for forming into bars.
Step 4: Transfer Mixture
Pour the cereal mixture into the prepared pan, using the spatula to spread it out evenly. To prevent sticking, cover the mixture with a second sheet of parchment paper. This will help you press down the mixture without getting your hands sticky while ensuring an even surface for your cereal bars.
Step 5: Press Firmly
Using your hands or a flat object, press down firmly on the mixture to compact it tightly into the pan. This important step ensures your cereal bars will hold together when cut. Aim for a compact, flat surface that feels solid, which will translate into perfectly chewy and satisfying cereal bars once they set.
Step 6: Chill
Place the pan in the refrigerator or freezer for about 30 minutes, allowing the mixture to firm up completely. If refrigerating, check after 30 minutes to ensure it’s set and not too soft. The cold helps the bars solidify and makes them easier to slice into perfect chewy squares later.
Step 7: Slice and Store
Once chilled and firm, carefully lift the cereal bars out of the pan using the parchment overhang. Place them on a cutting board and slice into desired sizes, typically 10-12 bars. Store your delicious homemade cereal bars in an airtight container in the refrigerator, at room temperature, or freeze them for long-lasting freshness.
What to Serve with 3-Ingredient Chewy Homemade Cereal Bars
These nutritious cereal bars are not just a snack; they can be the foundation for a delightful meal experience.
-
Greek Yogurt Parfaits: Layer creamy Greek yogurt with fresh fruits and a sprinkle of granola. A vibrant contrast that adds creaminess and freshness!
The tartness of yogurt beautifully balances the sweetness of the cereal bars, making for a wholesome breakfast or snack. -
Fresh Fruit Salad: Mix seasonal fruits like berries, apples, and bananas for a refreshing side.
This adds a crisp, juicy texture and enhances the nutritious quotient of your meal! -
Nutty Trail Mix: Combine mixed nuts, seeds, and a few chocolate chips for a crunchy bite.
The diversity of flavors and textures will pair wonderfully with the chewy bars, making snacking more exciting. -
Nut Butter Dip: Set out a small bowl of your favorite nut butter for a fun dip.
Spread a spoonful on the bars for an extra dose of creaminess and healthy fats. -
Smoothie Bowl: Blend your favorite fruits and top with granola and seeds.
The creamy texture of the smoothie complements the chewy bars, creating a delightful contrast. -
Herbal Tea: Enjoy a warm cup of chamomile or peppermint tea alongside your bars.
The soothing flavors of tea are a perfect companion that complements the sweetness without overwhelming it. -
Chocolate Muffins: Serve with rich, moist chocolate muffins for a delectable treat.
The synergy of flavors will leave everyone wanting more—what a delightful pairing! -
Coconut Chia Pudding: A tropical treat that brings a creamy, satisfying texture.
The subtle sweetness and crunchiness of chia seeds work harmoniously with the cereal bars.
Expert Tips for Cereal Bars
Press Firmly: Ensure you compact the mixture tightly in the pan. This prevents your cereal bars from crumbling when sliced, keeping them together nicely.
Adjust Sweetness: Feel free to tweak the amount of liquid sweetener according to your taste preference. Just remember, less sweetener may result in a more crumbly texture!
Nut Butter Variations: Vary your nut butter for different flavor profiles. If you want to lower calories, reduce the quantity slightly, but know it may affect firmness when at room temperature.
Flavor Experimentation: Don’t hesitate to mix in additional ingredients like dried fruit, seeds, or chocolate chips for extra texture and flavor in your cereal bars.
Cooling Time: Allow enough chilling time for the bars to set properly before slicing. A solid base will make for cleaner cuts and firmer bars!
Storage Tips for Cereal Bars
Room Temperature: Keep cereal bars in an airtight container at room temperature for up to 3 days. Just make sure they’re in a cool, dry spot to maintain their chewiness.
Fridge: Storing your cereal bars in the refrigerator extends their freshness for up to a week. This helps retain their texture, making them a quick grab-and-go snack.
Freezer: For longer storage, freeze the bars in an airtight container or freezer bags for up to 3 months. Thaw overnight in the fridge before enjoying again.
Reheating: If you prefer a warm snack, just microwave the bars for about 10-15 seconds. This brings back their delightful chewiness without compromising flavor!
Make Ahead Options
These homemade cereal bars are perfect for meal prep, allowing you to save valuable time during busy weeks! You can mix the cereal, nut butter, and sweetener up to 3 days in advance, simply storing the mixture in an airtight container in the fridge. When you’re ready to enjoy your cereal bars, press the mixture into the prepared pan and chill for about 30 minutes to firm up. This way, you can create a batch of delicious treats without the last-minute fuss. Don’t forget, pressing firmly helps maintain their quality, ensuring they are just as chewy and delicious when you finally slice and serve them!
Cereal Bars Variations & Substitutions
Get ready to create your very own spin on these delicious cereal bars!
- Chocolate Delight: Add ¼ cup of cocoa powder and coat bars in melted chocolate for an indulgent treat. Chocolate lovers will adore this rich twist!
- Nutella Indulgence: Swap out the nut butter for a 2/3 cup of Nutella for a sweet, creamy option that evokes childhood memories.
- Cookie Dough Cravings: Use cashew butter, stir in ½ cup of mini chocolate chips, and a splash of vanilla for a delightful cookie dough flavor. Your taste buds will be singing with joy!
- Berry Goodness: Incorporate 1 cup of freeze-dried strawberries and drizzle with melted coconut butter for a fruity burst. Your snack just got a refreshing kick!
- Peanut Butter Crunch: Add 1/4 cup of crushed peanuts or peanut butter chips for an extra crunch with that classic peanut flavor. It’s like your favorite candy bar in a healthier form.
- Warm S’mores: Mix in mini marshmallows and crushed graham crackers for a s’mores-inspired treat that captures those campfire vibes. Who wouldn’t love to sneak a bit of nostalgia into their day?
- Custom Flavor Combinations: Experiment with different themes like snickerdoodle by mixing in cinnamon and sugar, or birthday cake with sprinkles and vanilla extract. The flavor possibilities are endless!
If you’re looking for more delightful snacks, why not try these Homemade Granola Bars? They’re another wonderful option for healthy, easy-to-make treats that the whole family will love!
Homemade Easy Cereal Bars Recipe FAQs
What type of cereal is best for these bars?
I recommend using small flake or shape cereals like Cheerios or Rice Krispies. Make sure to choose a cereal that is vegan-friendly if necessary, checking for the absence of vitamin D3, which can come from animal sources.
How should I store these cereal bars?
Store your cereal bars in an airtight container at room temperature for up to 3 days, or place them in the refrigerator for up to a week to maintain their delightful texture. It’s best to keep them in a cool, dry spot to preserve their chewiness and taste.
Can I freeze homemade cereal bars?
Absolutely! To freeze, wrap the cereal bars individually in plastic wrap and place them in an airtight container or freezer bag. They’ll stay fresh for up to 3 months. When you’re ready to enjoy them, thaw overnight in the fridge or leave them at room temperature for a few hours.
What if my bars crumble apart?
If you find that your cereal bars are crumbling when sliced, it’s likely that they weren’t pressed tightly enough during the initial mixing phase. Make sure to press the mixture firmly into the pan, compacting it well for better adhesion. If the bars are too dry, consider increasing the nut butter slightly or adding a touch more liquid sweetener for better binding.
Are there any dietary considerations with these bars?
Yes! These cereal bars can be easily customized to fit various dietary needs. Use nut butters that are allergen-friendly, like sunbutter for nut-free options. For a vegan version, simply opt for agave or brown rice syrup as the liquid sweetener. Always check ingredient labels for potential allergens.
How long do these cereal bars last?
When stored properly, these cereal bars last about 3 days at room temperature, up to a week in the fridge, or can be frozen for up to 3 months. Just be sure to allow enough time for them to chill properly before slicing, ensuring they hold together nicely!
Delicious 3-Ingredient Cereal Bars: Customizable and Healthy
Ingredients
Equipment
Method
- Begin by lining an 8-inch square pan with wax paper or parchment paper, allowing some overhang for easy removal later.
- In a microwave-safe bowl, gently heat 2/3 cup of nut butter for about 20-30 seconds until warm and easily stirrable.
- In a large mixing bowl, combine 3 cups of cereal, the warmed nut butter, and 1/2 cup of liquid sweetener, mixing thoroughly.
- Pour the cereal mixture into the prepared pan, spreading it out evenly. Cover the mixture with a second sheet of parchment paper.
- Press down firmly on the mixture to compact it tightly into the pan.
- Place the pan in the refrigerator or freezer for about 30 minutes, allowing the mixture to firm up completely.
- Carefully lift the cereal bars out of the pan using the parchment overhang, then slice into desired sizes.
Leave a Reply