
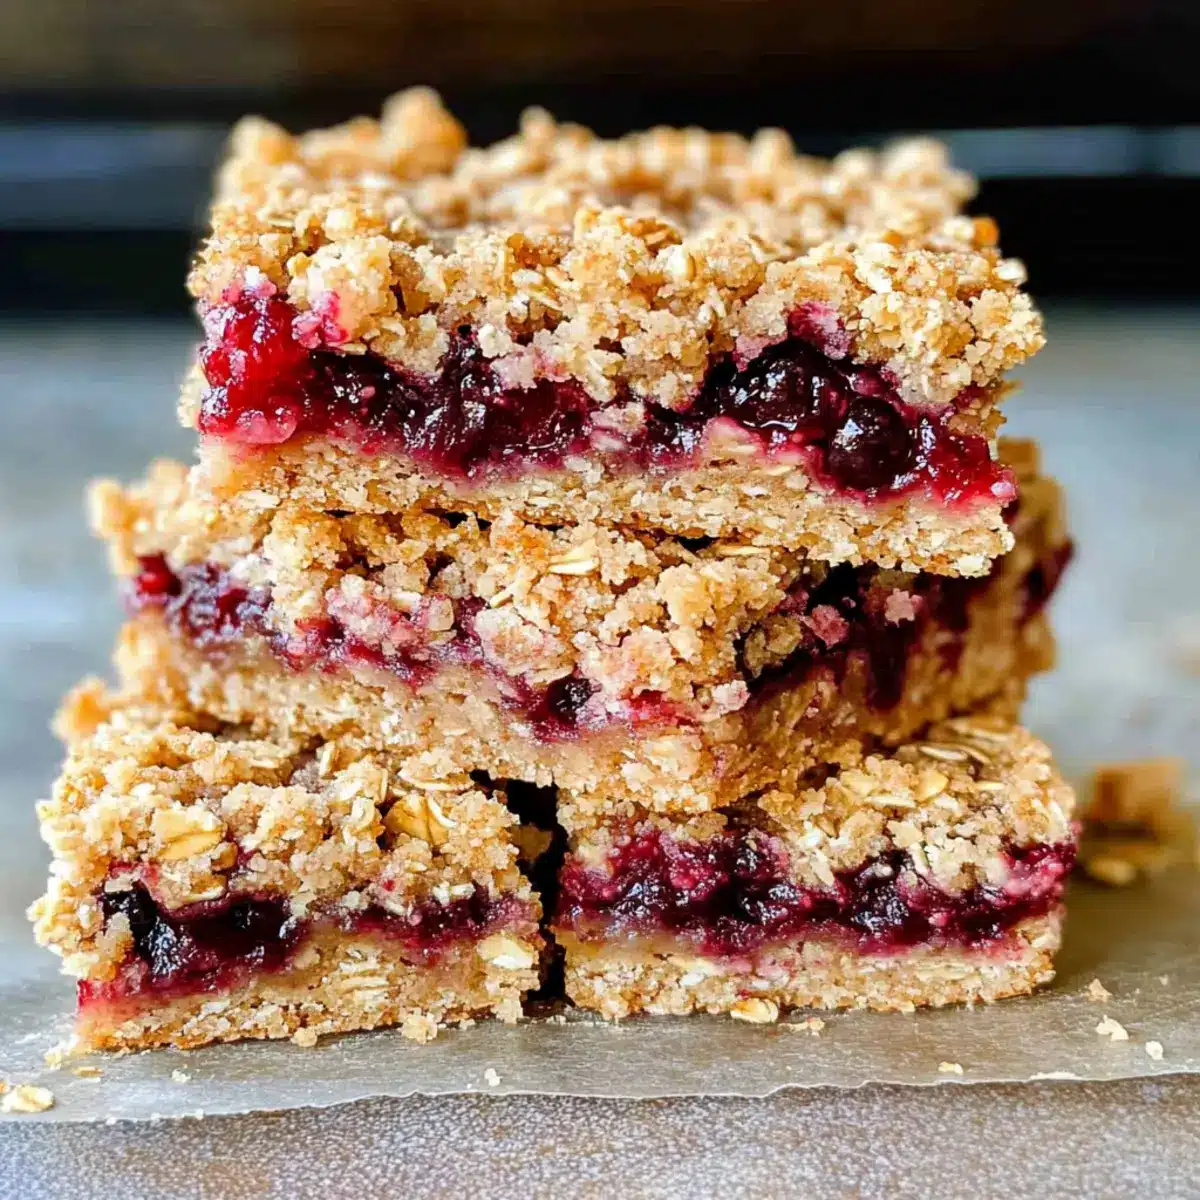
The satisfying aroma of fresh-baked goods wafts through the kitchen as I pull out a warm batch of Berry Oat Bars. These bars are not just another snack; they’re a wholesome delight, perfect for busy mornings or an afternoon pick-me-up. Sweetened naturally with maple syrup and coconut sugar, they’re free from refined sugar and provide a healthy, guilt-free treat for the entire family. Plus, with their chewy and crumbly texture, they satisfy both kids and adults alike. Whether you enjoy them as a quick breakfast on the go or a sweet addition to your dinner, these bars offer convenience and nourishment all in one bite. Curious about how to whip up these delicious treats? Let’s dive in!
Why are these Berry Oat Bars irresistible?
Health-Conscious eating doesn’t mean sacrificing taste! These Berry Oat Bars are naturally sweetened, making them a guilt-free indulgence. Quick to prepare, these bars are perfect for busy mornings or as an easy snack. Versatile in flavor, swap in your favorite fruits or nut butters for a unique twist each time. Plus, they’re made with wholesome ingredients like oats and coconut oil, ensuring a nutritious treat. Whether enjoyed warm or at room temperature, you’ll find them a delightful addition to your family’s routine. For more delightful ideas, check out our Cranberry Orange Custard and Cranberry Brie Stuffed recipes!
Berry Oat Bars Ingredients
• Discover the simple goodness of homemade goodness!
For the Base
- Coconut Oil – Acts as a fat source for moisture, but you can substitute it with butter or avocado oil for a different flavor.
- All-Purpose Flour – Provides structure; swap with a 1:1 gluten-free flour blend like King Arthur Measure for Measure for gluten-free Berry Oat Bars.
- Quick Oats – Adds essential texture and heartiness; rolled oats can also work if you’re in a pinch.
- Maple Syrup – This natural sweetener enhances flavor while keeping the glycemic impact low.
- Coconut Sugar – Infuses sweetness with a hint of caramel flavor; feel free to use granulated sugar if that’s your preference.
- Baking Powder – A leavening agent that contributes to the bar’s light texture.
- Salt – A small amount balances the overall flavor beautifully.
For the Filling
- Raspberry Preserves – Provides moisture and sweetness, though you can use any fruit preserves or fresh berries that tickle your fancy!
Get ready to bring the warmth and delightful flavors of these Berry Oat Bars into your kitchen!
Step‑by‑Step Instructions for Berry Oat Bars
Step 1: Preheat and Prepare
Begin by preheating your oven to 350°F (175°C) while you gather all your ingredients. Lightly grease an 8×8 inch baking pan with non-stick spray, ensuring it’s well coated to prevent sticking. This will create a perfect home for your Berry Oat Bars, guaranteeing an easy release once baked.
Step 2: Mix the Base Ingredients
In a large mixing bowl, combine coconut oil, all-purpose flour, quick oats, maple syrup, coconut sugar, baking powder, and salt. Mix thoroughly until all ingredients are well blended and form a crumbly dough. This mixture will create a hearty base for your Berry Oat Bars, so take your time to ensure it’s well combined.
Step 3: Form the Base Layer
Press about ⅔ of the dough mixture evenly into the bottom of your prepared baking pan. Use your hands or a spatula to ensure the mixture is packed tightly; this will help keep the bars from becoming too crumbly. Aim for an even layer, as this forms the sturdy foundation for your delicious Berry Oat Bars.
Step 4: Spread the Preserves
Gently spread the raspberry preserves over the pressed oat base, leaving approximately a ½-inch border around the edges. This prevents the preserves from burning during baking and ensures a delightful balance of flavors in each bite. Take your time to get an even layer for a consistent taste in every bar.
Step 5: Crumble and Press the Topping
Take the remaining ⅓ of the oat mixture and crumble it over the preserves, covering them generously. Lightly press this crumbled mixture into place to create the top of your Berry Oat Bars. This topping offers an appealing texture, adding just the right amount of chewiness to complement the sweet preserves underneath.
Step 6: Bake to Perfection
Place the pan in the center of your preheated oven and bake for 25-30 minutes. Keep an eye on the bars; they are ready when the top is lightly browned and fragrant. Your kitchen will fill with a delightful aroma, signaling that your Berry Oat Bars are nearly complete.
Step 7: Cool and Cut
Once baked, remove the pan from the oven and let it cool on a wire rack for at least 10-15 minutes. This cooling phase helps the bars set, making them easier to cut. Once cool, slice them into bars of your desired size and enjoy the wholesome goodness of your homemade Berry Oat Bars.

What to Serve with Berry Oat Bars?
These delightful treats can seamlessly enhance your meal or snack time experience, offering a touch of sweetness and nutrition.
- Fresh Fruit Salad: Bright, juicy fruits like berries and citrus are refreshing and complement the sweetness of the bars.
- Greek Yogurt Parfait: A dollop of creamy yogurt layered with granola creates a perfect balance of flavors and textures.
- Nut Butter Spread: Pair with almond or peanut butter for an extra protein boost, enhancing flavor while keeping you satiated.
- Herbal Tea: A comforting cup of chamomile or mint tea soothes the senses while balancing the sweetness of the bars.
- Dark Chocolate Drizzle: A touch of melted dark chocolate not only elevates the sweetness but adds a luxurious twist to your bars.
- Chia Seed Pudding: A light and nutritious option to add variety, packed with fiber yet delightfully creamy.
- Homemade Whipped Cream: Light and fluffy, a dollop of whipped cream offers a delightful contrast against the chewy bars.
- Iced Coffee: The smooth taste of iced coffee pairs beautifully with the berry flavors, creating an enjoyable wake-up treat.
- Granola: A sprinkle of crunchy granola adds texture and a touch of natural sweetness, perfect for breakfast or snacking.
Make Ahead Options
These Berry Oat Bars are perfect for busy home cooks who want to save time in the kitchen! You can prepare the base mixture up to 24 hours in advance by mixing all the dry ingredients and coconut oil, then storing it in an airtight container in the refrigerator. The filling can be prepped as well; simply have your raspberry preserves ready to go. When you’re ready to bake, just push the mixture into the pan, spread the preserves, and finish crumbling the topping before baking as directed. This approach not only streamlines your baking process but also ensures your bars come out just as delicious, ready to brighten your mornings or add a sweet touch to your day!
Expert Tips for Berry Oat Bars
-
Firmly Press Mixture: Be sure to press the oat mixture firmly into the pan. This prevents your bars from falling apart and ensures they hold their shape once baked.
-
Moisture Adjustments: If you’re adding nut butter (like peanut or almond) to the mix for added flavor, increase your maple syrup slightly to balance out the moisture and achieve the right consistency.
-
Check Oat Certification: For a gluten-free version, always check that your oats are certified gluten-free. This helps prevent cross-contamination and ensures everyone can enjoy your delicious Berry Oat Bars.
-
Taste as You Go: Don’t hesitate to taste the mixture before baking! Adjust sweetness with more maple syrup or coconut sugar if needed, tailoring the bars to your family’s preferences.
-
Experiment with Flavors: Don’t limit yourself to just raspberry preserves; try using different fruit jams or fresh berries. This opens up new flavor experiences with each batch of Berry Oat Bars!
Berry Oat Bars Variations & Substitutions
Feel free to explore these tasty variations that will make your Berry Oat Bars even more delightful!
-
Gluten-Free: Use a 1:1 gluten-free flour blend to ensure everyone can enjoy these bars without worry.
-
Nutty Flavor: Swap some coconut oil for your favorite nut butter like almond or peanut for an added richness.
-
Sweetness Boost: Add extra maple syrup or honey for those who love an even sweeter treat!
-
Seeds & Power: Stir in a tablespoon of chia seeds or flaxseed for an added nutritional punch and delightful crunch.
-
Mixed Berries: Try using blueberry or strawberry preserves instead of raspberry for a fruity twist that keeps things interesting.
-
Spice it Up: Sprinkle in some cinnamon or nutmeg to elevate the flavor profile and add a warm, cozy aroma.
-
Protein Packed: Add a scoop of protein powder to the base mixture for a bump in nutritious value, making these bars great for a post-workout snack.
-
Crispy Twist: For added texture, mix in chopped nuts, sunflower seeds, or coconut flakes into the base mixture.
These variations are a fantastic way to personalize your Berry Oat Bars! If you love exploring berry flavors, consider trying these recipes for Cranberry Turkey Stuffing or a sweet treat like Cranberry Orange Custard. Enjoy the creative process!
How to Store and Freeze Berry Oat Bars
Room Temperature: Store the bars in an airtight container at room temperature for up to 5 days to keep them chewy and delicious.
Fridge: For an extended freshness, keep Berry Oat Bars in the refrigerator for up to 8 days. Just be sure they’re in a sealed container to prevent them from drying out.
Freezer: For long-term storage, freeze the bars in a single layer on a parchment-lined baking sheet, then transfer to an airtight container or freezer bag for up to 3 months.
Reheating: When ready to enjoy, simply thaw at room temperature or reheat in the microwave for about 10-15 seconds for a warm treat that brings back that fresh-baked aroma!
Berry Oat Bars Recipe FAQs
What kind of oats should I use?
Absolutely! Quick oats work best for these Berry Oat Bars because they blend nicely into the mixture. However, if you only have rolled oats, you can use those as well; simply give them a light chop to maintain a finer texture.
How should I store my Berry Oat Bars?
Store your Berry Oat Bars in an airtight container at room temperature for up to 5 days, allowing them to maintain that chewy texture. If you want them to last a bit longer, you can refrigerate them for up to 8 days. Just make sure they’re sealed well to avoid drying out!
Can I freeze Berry Oat Bars?
Yes, you can! To freeze your Berry Oat Bars, place them in a single layer on a parchment-lined baking sheet to avoid sticking. After about 1-2 hours in the freezer, transfer them to an airtight container or a freezer bag. They should maintain their deliciousness for up to 3 months. When you’re ready to enjoy them, simply thaw them at room temperature or heat them briefly in the microwave.
What if my Berry Oat Bars are too crumbly?
No worries! If your bars come out crumbly, it might be due to not pressing the mixture firmly enough into the baking pan. Make sure to pack the base down evenly and firmly before adding the preserves. If you find the mixture was too dry, consider adding a touch more maple syrup for added moisture next time!
Are these Berry Oat Bars safe for allergies?
While these bars are free from refined sugar, they do contain coconut oil, so if you or anyone you’re serving has a coconut allergy, consider substituting with butter or a different oil. For gluten-free options, ensure that the oats you use are certified gluten-free to avoid cross-contamination. Always check ingredient labels for your specific dietary needs!
Savory-Sweet Berry Oat Bars for a Guilt-Free Treat
Ingredients
Equipment
Method
- Preheat your oven to 350°F (175°C) and lightly grease an 8x8 inch baking pan.
- In a large mixing bowl, combine coconut oil, all-purpose flour, quick oats, maple syrup, coconut sugar, baking powder, and salt. Mix until well blended.
- Press about ⅔ of the dough mixture evenly into the bottom of your prepared baking pan.
- Spread the raspberry preserves over the pressed oat base, leaving a ½-inch border.
- Crumble the remaining ⅓ of the oat mixture over the preserves and press lightly.
- Bake for 25-30 minutes until the top is lightly browned and fragrant.
- Cool on a wire rack for at least 10-15 minutes, then slice into bars.
Leave a Reply