
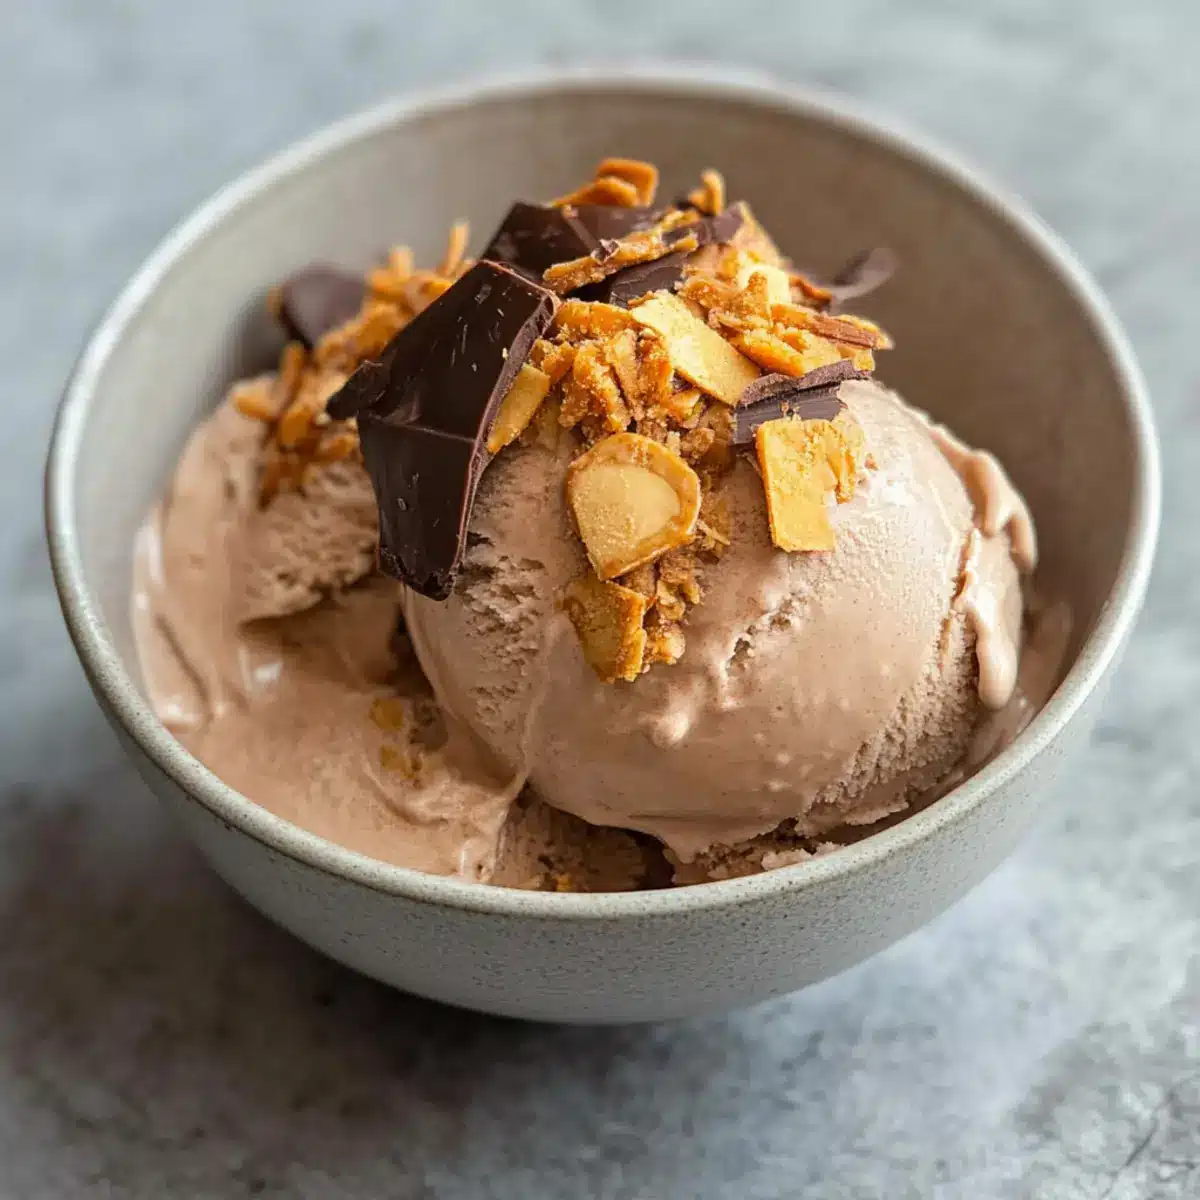
As summer sizzles, the craving for something cool and delicious becomes irresistible. Enter the Chocolate Peanut Butter Ninja Creami—a bowl of heavenly ice cream that’s smooth, creamy, and oh-so-satisfying. With just a handful of ingredients and minimal prep time, this dessert is perfect for those warm evenings when you want to whip up a sweet treat without the fuss. The real magic happens as it takes an overnight freeze to allow the rich chocolate and nutty peanut butter flavors to meld together perfectly, making it not only a crowd-pleaser but also freezer-friendly! Ready to beat the heat with this delightful homemade ice cream? Let’s dive into the recipe!
What Makes This Ice Cream Special?
Decadent Flavors: The combination of rich chocolate and creamy peanut butter offers a taste sensation that will have you dreaming of summer all year round.
Effortless Prep: With just a few simple ingredients and minimal prep time, you can indulge in this homemade ice cream without hassle.
Overnight Magic: Freezing overnight intensifies the flavors, resulting in a dessert that feels luxurious but is incredibly manageable to make.
Crowd-Pleasing Treat: Whether it’s for a family gathering or a friendly summer BBQ, this Chocolate Peanut Butter Ninja Creami is bound to impress.
Versatile Options: Customize your dessert with fun mix-ins like chopped Butterfingers, or keep it classic for a straightforward indulgence.
Healthier Indulgence: Enjoy the smooth and creamy texture without the high-fat content, so you can savor every scoop guilt-free! Perfect for those looking to escape the lure of fast food, this treat is a fantastic way to satisfy your sweet cravings at home.
Chocolate Peanut Butter Ninja Creami Ingredients
Let’s gather what you’ll need to create this dreamy summer treat!
For the Base
• Cream Cheese – Adds creaminess and richness to the ice cream. Substitution: Replace with 1/4 cup of actual peanut butter if peanut butter powder is not available.
• Sugar – Sweetens the dessert. Note: This recipe calls for 1/3 cup of sugar for balanced sweetness.
• Peanut Butter Powder – Provides a concentrated peanut flavor. Substitution: Use 1/4 cup of creamy or crunchy peanut butter instead.
• Cocoa Powder – Adds chocolate flavor. Use unsweetened cocoa powder for controlled sweetness.
• Vanilla Extract – Enhances flavor complexity. Substitution: Vanilla bean paste offers a richer aroma.
• Milk – Helps achieve a smooth consistency. Note: Whole or 2% milk works best for a creamy texture.
• Heavy Cream – Contributes to a rich, creamy texture. Substitution: Coconut cream is a great dairy-free option.
Now you’re all set to create your own Chocolate Peanut Butter Ninja Creami – the perfect summer indulgence awaits!
Step‑by‑Step Instructions for Chocolate Peanut Butter Ninja Creami
Step 1: Prepare Mixture
Begin by softening the cream cheese in the microwave for about 10 seconds until it’s slightly warm and pliable. In a mixing bowl, combine the softened cream cheese with sugar, cocoa powder, peanut butter powder, and vanilla extract. Using a hand mixer or a whisk, blend until the mixture is mostly smooth, with a few small lumps remaining.
Step 2: Add Liquids
Next, whisk in the milk and heavy cream until fully incorporated, creating a smooth, creamy batter. Look for a well-mixed consistency without any visible granules of dry ingredients. The mixture should have a rich chocolate hue; this is the base for your Chocolate Peanut Butter Ninja Creami.
Step 3: Freeze
Pour the creamy mixture into the Ninja Creami pint container, ensuring not to overfill. Place the container in your freezer and allow it to freeze for at least 24 hours. This waiting period is crucial for achieving that perfect, scoopable texture; you’ll know it’s ready when the mixture is solid throughout.
Step 4: Process Ice Cream
Once the mixture is thoroughly frozen, remove the container from the freezer. Insert it into the Ninja Creami, and select the ice cream setting to process. Keep an eye on it; if the consistency appears too thick, simply add a splash of milk and reprocess until you achieve the desired creaminess.
Step 5: Add Mix-ins (Optional)
For an extra layer of flavor in your Chocolate Peanut Butter Ninja Creami, create a hole in the center of the processed ice cream for mix-ins, such as chopped Butterfingers. Use the mix-in feature on the Ninja Creami to incorporate these delightful treats evenly throughout, enhancing your creamy dessert experience.
Step 6: Serve and Enjoy
Scoop the freshly made Chocolate Peanut Butter Ninja Creami into bowls or cones for a delightful summer treat. Consider garnishing with chocolate shavings or a drizzle of peanut butter for a little extra flair. Whether it’s a sunny day or a cozy evening, enjoy this indulgent dessert that’s sure to impress everyone!
Make Ahead Options
These Chocolate Peanut Butter Ninja Creami treats are perfect for meal prep! You can prepare the creamy mixture up to 24 hours in advance; simply follow the initial steps—softening cream cheese, mixing in the other ingredients, and whisking in the liquids. Once you pour the mixture into the Ninja Creami pint container, freeze it overnight for optimal flavor melding. To maintain quality, ensure it’s kept tightly sealed in the freezer to prevent ice crystals. When you’re ready to serve, just process it in the Ninja Creami, and optionally incorporate your favorite mix-ins for a delightful treat. Enjoy restaurant-quality ice cream at home with minimal effort!
Chocolate Peanut Butter Ninja Creami Variations
Feel free to play with flavors and textures to create your perfect Chocolate Peanut Butter Ninja Creami experience!
-
Nut-Free: Replace peanut butter powder with sunflower seed butter powder for a creamy texture without nuts.
-
Dairy-Free: Swap cream cheese and heavy cream for coconut cream; the dairy-free option delivers a luxurious, rich flavor.
-
Sweet Swaps: Use honey or maple syrup instead of sugar for a natural sweetening option that’s just as delightful.
-
Flavor Boost: Try adding a splash of coffee or espresso to enhance the chocolate flavor beautifully; it brings out richness.
-
Chocolate Lovers: Fold in chocolate chips before processing for an extra chocolatey treat that adds delightful pockets of gooeyness.
-
Mix-In Magic: Stir in crushed Oreos or sprinkles for a fun, festive twist that transforms your ice cream into a special occasion dessert.
-
Extra Creamy: For an even richer texture, use half and half instead of milk; this will elevate your dessert to indulgent levels.
As you explore these variations, consider garnishing your creations with a drizzle of chocolate syrup or serving alongside classic desserts, like an Apple Butter Pie with Cinnamon. Your customized Chocolate Peanut Butter Ninja Creami will tantalize your taste buds all summer long!
How to Store and Freeze Chocolate Peanut Butter Ninja Creami
Fridge: Store uneaten Chocolate Peanut Butter Ninja Creami in an airtight container for up to 3 days. Keep it sealed to prevent ice crystals from forming.
Freezer: For longer storage, keep it in the freezer for up to 2 weeks. Ensure it’s in an airtight container to avoid freezer burn and preserve creaminess.
Reheating: If it becomes too hard, let it sit at room temperature for about 5-10 minutes before serving to soften slightly. Stir to regain a creamy texture, if needed.
Serving Tip: Enjoy straight from the freezer for a firm scoop or allow to soften a bit for a smoother, decadent experience!
What to Serve with Chocolate Peanut Butter Ninja Creami?
As the sun shines bright, a delightful array of sides can elevate your Chocolate Peanut Butter Ninja Creami into a complete summer feast.
-
Fresh Berries: Juicy strawberries or tart raspberries add a refreshing contrast to the creamy ice cream, balancing sweetness with acidity.
-
Chocolate Drizzle: A warm drizzle of chocolate sauce enhances the decadent flavors of your dessert, turning an already indulgent treat into an extravagant experience.
-
Peanut Butter Cookies: The crunch and nuttiness of freshly baked peanut butter cookies create a delightful pairing, offering both texture and flavor harmony.
-
Coconut Macarons: These chewy coconut delights provide a tropical twist that complements the chocolate and peanut butter, adding a fun chewy bite to the mix.
-
Minty Fruit Salad: A light, zesty fruit salad with mint offers a refreshing touch that cleanses the palate and keeps the indulgence feeling light and airy.
-
Iced Coffee: A cold brew with a splash of vanilla pairs wonderfully, providing a caffeine kick that complements the rich flavors of the ice cream.
-
Chocolate-Covered Pretzels: The salty, crunchy texture of chocolate-covered pretzels offers a fantastic contrast to the smooth creaminess, making for a delightful sweet-and-salty treat.
-
Almond Affogato: Pouring espresso over vanilla ice cream provides a deliciously bold and energizing dessert option, perfect for a sophisticated twist on your summer treat.
-
Chocolate Chip Pancakes: Serve these fluffy delights stacked high, perhaps with a scoop of your ice cream on top, for a fun breakfast-for-dessert option that will please the whole family.
Expert Tips for Chocolate Peanut Butter Ninja Creami
- Softening Cream Cheese: Ensure cream cheese is softened properly. If not, you’ll end up with lumps in your mixture that won’t blend well.
- Overnight Freeze: Don’t rush the freezing process! Allowing it to freeze overnight enhances flavor and achieve the perfect creamy texture for your Chocolate Peanut Butter Ninja Creami.
- Adjusting Thickness: If your ice cream is too thick after processing, just add a splash of milk and reprocess to achieve the ideal creamy consistency.
- Mix-ins Strategy: When adding mix-ins like Butterfingers, create a hole in the ice cream to maintain the structure and ensure even distribution.
- Controlled Sweetness: Modify the recipe’s sweetness by adjusting sugar levels. Using unsweetened cocoa powder gives you more control over the overall flavor profile.
- Quality Ingredients: Using high-quality cocoa powder and pure vanilla extract makes a significant difference in flavor, enhancing your homemade ice cream experience.
Chocolate Peanut Butter Ninja Creami Recipe FAQs
What kind of cream cheese should I use?
For the best texture and flavor, I recommend using full-fat cream cheese. It adds richness and creaminess to your Chocolate Peanut Butter Ninja Creami. If you’re watching your fat intake, you can opt for reduced-fat cream cheese, though it may slightly change the mouthfeel of the ice cream.
How can I store leftover Ninja Creami?
Store any uneaten Chocolate Peanut Butter Ninja Creami in an airtight container in the fridge for up to 3 days. For longer storage, keep it in the freezer for up to 2 weeks. Make sure the container is tightly sealed to prevent freezer burn and maintain its creamy texture.
Can I freeze Chocolate Peanut Butter Ninja Creami?
Absolutely! Once made, let your Chocolate Peanut Butter Ninja Creami freeze for at least 24 hours for optimal results. If you have leftovers, you can freeze them for up to 2 weeks. To enjoy, let it sit at room temperature for 5-10 minutes to soften, if it’s too hard.
What if my ice cream comes out too hard?
If your Chocolate Peanut Butter Ninja Creami is too solid after freezing, it might have needed a bit more liquid during processing. In such cases, let it sit at room temperature for 5-10 minutes. Then, stir it with a fork or mash it gently to break up the ice structure, allowing for better scoopability.
Are there any allergy considerations?
Yes, if you’re making this dessert for someone with peanut allergies, you can substitute peanut butter powder with sunflower seed butter powder. For lactose intolerance, use coconut cream instead of heavy cream, and ensure your cream cheese is lactose-free.
How can I make this recipe vegan?
To create a vegan version of Chocolate Peanut Butter Ninja Creami, switch out the cream cheese for a vegan alternative, use plant-based milk, and replace heavy cream with coconut cream. Additionally, make sure the sugar you use is vegan-friendly, as some sugars are processed with bone char.
Chocolate Peanut Butter Ninja Creami: Your Dream Summer Treat
Ingredients
Equipment
Method
- Begin by softening the cream cheese in the microwave for about 10 seconds until it’s slightly warm and pliable. In a mixing bowl, combine the softened cream cheese with sugar, cocoa powder, peanut butter powder, and vanilla extract.
- Using a hand mixer or a whisk, blend until the mixture is mostly smooth, with a few small lumps remaining.
- Next, whisk in the milk and heavy cream until fully incorporated, creating a smooth, creamy batter.
- Pour the creamy mixture into the Ninja Creami pint container, ensuring not to overfill. Place the container in your freezer and allow it to freeze for at least 24 hours.
- Once the mixture is thoroughly frozen, remove the container from the freezer. Insert it into the Ninja Creami, and select the ice cream setting to process.
- For an extra layer of flavor in your Chocolate Peanut Butter Ninja Creami, create a hole in the center of the processed ice cream for mix-ins, such as chopped Butterfingers.
- Scoop the freshly made Chocolate Peanut Butter Ninja Creami into bowls or cones for a delightful summer treat.
Leave a Reply