
There’s a moment in every kitchen when the scent of something delicious hits you like a warm hug. That’s exactly what happens when you whip up these Cheesy Garlic Cruffins. As you roll out the dough and layer in savory garlic and melted cheese, your heart races with excitement. These irresistible treats are not only a savory delight, but they also require minimal effort and can easily transform into a perfect snack or lunchtime companion. Imagine biting into a golden, flaky cruffin, with strings of gooey cheese pulling away as you take your first heavenly bite. Are you ready to elevate your cooking game and treat yourself to this fun and delicious dish? Let’s dive in!

Why will you crave Cheesy Garlic Cruffins?
Irresistible Flavor: Each bite bursts with savory garlic and melted cheese, creating a taste that’s hard to resist!
Quick & Easy: With a few basic ingredients, you’ll whip these delicious snacks up in no time, perfect for busy days.
Golden Perfection: Enjoy the delightful combo of flaky pastry and a gooey center, making them ideal for any craving.
Versatile Treat: These cruffins aren’t just for snacks; pair them with a fresh salad for a hearty lunch, or serve them warm as a side.
Crowd-Pleaser: Whether for family gatherings or casual get-togethers, these cruffins are sure to wow your guests, just like our Garlic Parmesan Chicken or the delightful Cheesy Mashed Potato.
Cheesy Garlic Cruffin Ingredients
For the Dough
- All-Purpose Flour – Provides structure to the dough; substitute with bread flour for a chewier texture.
- Granulated Sugar – Adds a touch of sweetness to balance flavors; can be omitted for a less sweet dough.
- Salt – Enhances flavor; essential for taste—do not omit.
- Instant Yeast – Leavening agent that helps the dough rise; can use active dry yeast, dissolving it in warm milk first.
- Warm Milk – Hydrates the dough and activates the yeast; ensure it’s warm, not hot, to avoid killing the yeast.
- Unsalted Butter (melted) – Adds richness and moisture; can be replaced with olive oil for a dairy-free option.
- Warm Water – Helps hydrate and activate the yeast.
- Large Egg – Binds the ingredients for a cohesive dough; no substitute recommended for vegan options.
For the Filling
- Parmesan Cheese – Provides salty, nutty flavor that enhances richness; Pecorino Romano can be used as a substitute.
- Shredded Mozzarella Cheese – Adds that gooey texture when melted; cheddar or gouda could work as delicious alternatives.
- Minced Garlic – Delivers strong aroma and flavor; adjust the quantity based on your garlic preference.
- Unsalted Butter (softened) – Enhances the richness of the filling; use vegan butter for a plant-based version.
- Fresh Parsley (chopped) – Adds a hint of freshness; can be substituted with chives or omitted.
These Cheesy Garlic Cruffin ingredients will have you well on your way to creating an unforgettable, savory snack that your family will love! Happy baking!
Step‑by‑Step Instructions for Cheesy Garlic Cruffin
Step 1: Prepare the Dough
In a large mixing bowl, combine 3 cups of all-purpose flour, 2 tablespoons of granulated sugar, 1 teaspoon of salt, and 2 teaspoons of instant yeast. Using a whisk, mix thoroughly to evenly distribute the ingredients. Then, create a well in the center and pour in 1 cup of warm milk and 4 tablespoons of melted unsalted butter. Add in 1/4 cup of warm water, ensuring it feels comfortable to the touch to activate the yeast effectively.
Step 2: Mix and Knead
Crack in 1 large egg, and mix the ingredients together using a wooden spoon or your hands until the mixture forms a rough dough. Transfer the dough onto a floured surface, and knead for about 8-10 minutes, incorporating flour as necessary, until the dough is smooth and elastic. This is crucial for your Cheesy Garlic Cruffin, as it allows for those beautiful flaky layers to develop!
Step 3: Let the Dough Rise
Place the kneaded dough into a greased bowl, cover it with a clean kitchen towel, and let it rise in a warm area for approximately 1 hour. You’ll know it’s ready when it has doubled in size and feels soft and airy. This crucial step ensures your Cheesy Garlic Cruffin will be light and fluffy.
Step 4: Prepare the Garlic Butter Filling
While the dough is rising, prepare your flavor-packed garlic butter mixture. In a small bowl, combine 4 tablespoons of softened unsalted butter, 3 cloves of minced garlic, and 2 tablespoons of chopped fresh parsley. Mix until combined and set aside. This mixture will provide that delicious, aromatic filling.
Step 5: Preheat the Oven and Prepare the Muffin Tin
Preheat your oven to 375°F (190°C) and grease a standard muffin tin with cooking spray or butter. This will prevent sticking and allow your Cheesy Garlic Cruffins to rise beautifully in their molds. Setting everything up ensures you’re ready for the next steps as the dough finishes rising.
Step 6: Roll Out the Dough
After the dough has risen, punch it down gently to release the air. Roll it out on a floured surface into a rectangle, approximately 12 by 18 inches. Spread the prepared garlic butter evenly across the surface of the dough, leaving a small border around the edges to prevent it from spilling out when you roll it up.
Step 7: Add the Cheeses
Sprinkle a generous mix of shredded mozzarella and grated Parmesan cheese over the garlic butter. Ensure the cheeses are evenly distributed to guarantee every bite of your Cheesy Garlic Cruffin is packed with melty goodness. Feel free to add more cheese if your heart desires for extra richness!
Step 8: Roll and Slice the Dough
Starting from one of the long edges, tightly roll the dough into a log shape, ensuring the filling stays well-distributed. Once rolled, slice the log into 8-10 equal pieces using a sharp knife or dough cutter. Each piece should be about 1.5-2 inches wide to create that lovely layered appearance.
Step 9: Arrange in Muffin Cups
Place each sliced piece upright into the greased muffin cups, ensuring they are close but not touching. This arrangement allows them to rise beautifully, creating those fluffy, layered textures. Cover the muffin tin with a towel, and let the cruffins rest for about 20 minutes to allow for slight rising.
Step 10: Bake to Golden Perfection
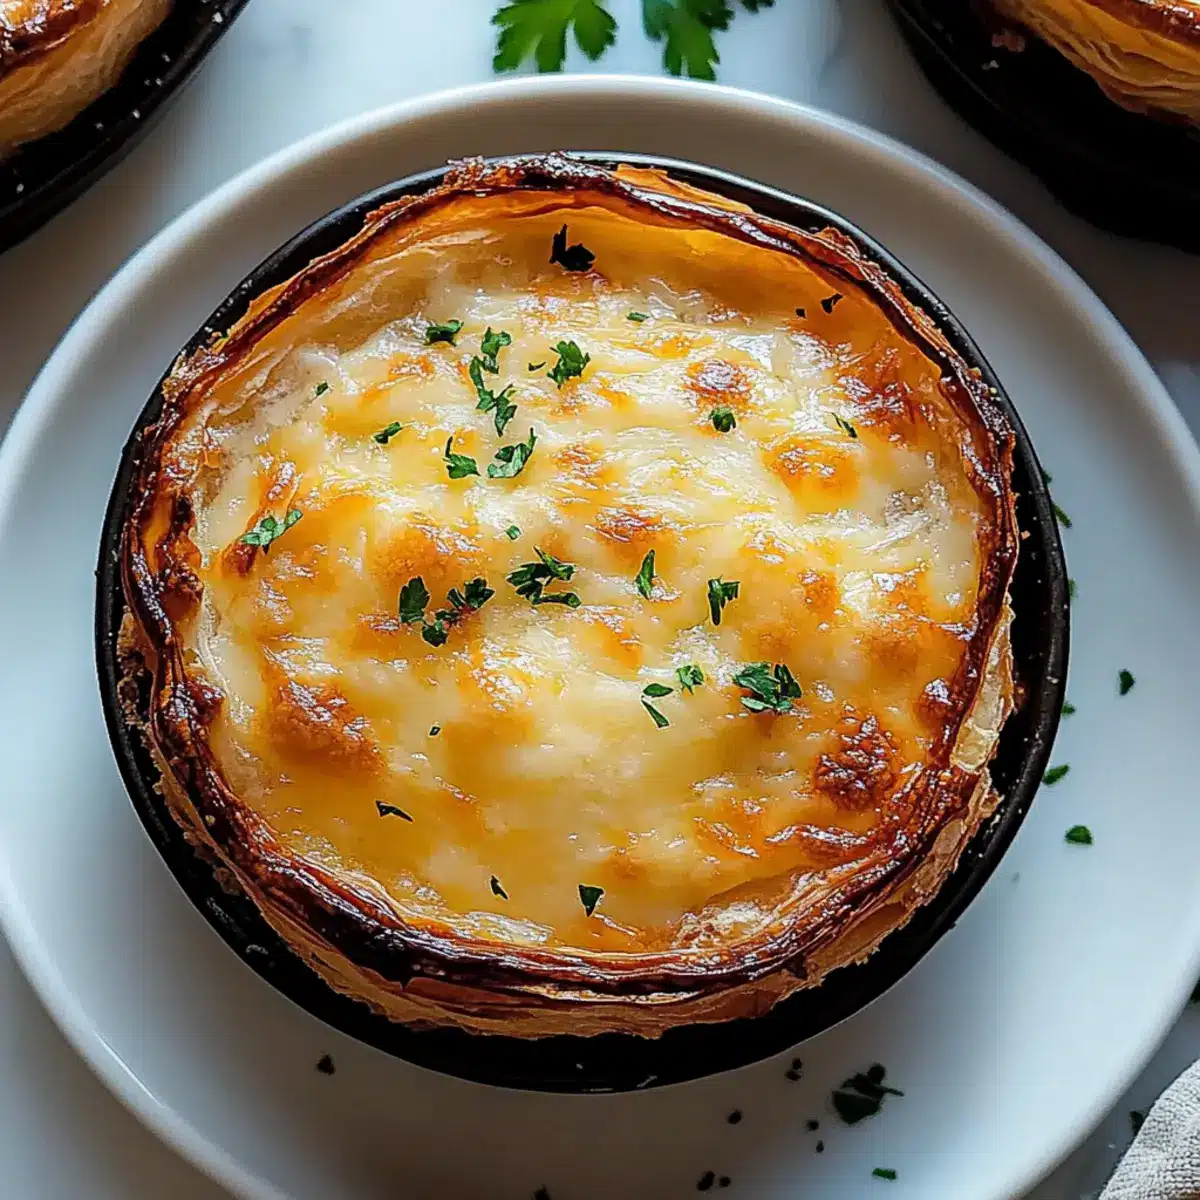
Once rested, place your muffin tin in the preheated oven and bake for 20-25 minutes or until the tops are golden brown and have a delightful flaky appearance. The savory aroma of the Cheesy Garlic Cruffin will fill your kitchen, making it hard to wait for them to cool!
Step 11: Cool and Serve
After baking, remove the Cheesy Garlic Cruffins from the oven and allow them to cool in the muffin tin for about 5 minutes. Gently remove them and let cool on a wire rack. Serve warm to enjoy their gooey, cheesy goodness that is sure to impress everyone!
Cheesy Garlic Cruffin Variations
Feel free to get creative and make these Cheesy Garlic Cruffins your own with delightful twists and substitutions!
-
Gluten-Free: Use a gluten-free all-purpose flour blend to make this recipe suitable for gluten-sensitive diets without sacrificing flavor.
-
Dairy-Free: Substitute melted butter with coconut oil and swap cheese for vegan alternatives like cashew cheese to keep it creamy and delicious.
-
Herb-Infused: Add fresh herbs such as rosemary or thyme to the garlic butter for an enticing aromatic twist that elevates the flavor profile.
-
Spicy Kick: Mix in a dash of red pepper flakes or minced jalapeños into the filling to awaken your taste buds with heat and flavor!
-
Meat Lovers: Incorporate cooked, crumbled sausage or pepperoni within the filling for an added protein boost that is sure to satisfy hearty appetites.
-
Vegetable Medley: Sauté and add chopped spinach or bell peppers mixed with the garlic butter for a vibrant explosion of color and nutrition.
-
Extra Cheesy: Layer in different cheeses like gouda, fontina, or a spicy pepper jack for unique flavor combinations that make each bite a delightful surprise.
-
Savory Spin: Swap out traditional cheese for savory ingredients, like sun-dried tomatoes or olives, to create a Mediterranean-inspired cruffin that pairs splendidly with a fresh salad.
No matter how you decide to customize, these cruffins are sure to become a beloved staple in your home, just like our mouth-watering Sticky Garlic Chicken or scrumptious Garlic Sauce Potatoes. Enjoy the creative journey in your kitchen!
What to Serve with Cheesy Garlic Cruffin
Enhance your dining experience by exploring delightful pairings that elevate these golden, savory treats into a full meal.
-
Fresh Garden Salad: Crisp greens with tomatoes and cucumbers provide a refreshing contrast to the rich flavors of the cruffin.
-
Creamy Tomato Soup: The smooth, tangy goodness of tomato soup complements the cheesy interior, creating a comforting duo for lunch.
-
Roasted Vegetables: A medley of seasonal veggies adds crunch and vibrant colors, rounding out your plate beautifully.
-
Classic Chicken Caesar Salad: The savory flavors from the chicken and tangy dressing harmonize wonderfully with the garlicky goodness of the cruffins.
-
Herbed Potato Wedges: The crispy exterior and fluffy interior of seasoned potato wedges create the perfect texture balance alongside your cruffins.
-
Sparkling Lemonade: A bubbly, citrusy drink refreshes the palate and adds a lively touch to your snacking experience.
-
Chocolate Fondue: For a sweet ending, dip strawberries or marshmallows in chocolate for a decadent dessert that contrasts with the savory cruffin.
-
Chardonnay Wine: A chilled glass of this crisp white wine enhances the flavors of the cheese and garlic in your cruffin. Enjoy!
Storage Tips for Cheesy Garlic Cruffin
Room Temperature: Store cooled cruffins in an airtight container at room temperature for up to 2 days to maintain their flaky texture.
Refrigeration: If you need to keep them longer, place the cruffins in the fridge for up to 3 days; just be aware they may lose some flakiness.
Freezer: For longer storage, wrap cruffins individually in plastic wrap and freeze. They’ll stay fresh for up to 3 months.
Reheating: To enjoy your Cheesy Garlic Cruffin at its best, reheat in the oven at 350°F (175°C) for about 10-15 minutes, ensuring they become warm and the cheese gooey again.
Make Ahead Options
These Cheesy Garlic Cruffins are perfect for meal prep and can save you precious time during busy weeknights! You can prepare the unbaked cruffins up to 24 hours in advance by assembling them in the muffin tin, covering, and refrigerating. Just remember to let them sit at room temperature for about 30 minutes before baking to ensure proper rising. Alternatively, the dough can be made and stored in the refrigerator for up to 3 days; just keep it in an airtight container. For the best quality, avoid baking them while still cold. When you’re ready to enjoy these delicious snacks, bake them as directed, and you’ll be rewarded with warm, cheesy perfection with minimal effort!
Expert Tips for Cheesy Garlic Cruffins
-
Use Fresh Yeast: Make sure your instant yeast is fresh. Old yeast may not activate properly, leading to dense cruffins instead of the desired fluffy texture.
-
Temperature Matters: Ensure the warm milk and water are just above body temperature, not hot, as too high a temperature can kill the yeast, preventing the dough from rising.
-
Flour Variations: For a chewier texture, try substituting all-purpose flour with bread flour. This will enhance the layers and create that delightful pull apart.
-
Customize the Filling: Experiment with different cheeses! Cheddar or gouda can add unique flavors to your Cheesy Garlic Cruffin filling, pleasing diverse palates.
-
Perfect Storage: Once cooled, store your cruffins in an airtight container. For long-term storage, wrap in plastic and freeze, then reheat in the oven for optimal fluffiness.

Cheesy Garlic Cruffin Recipe FAQs
What is the best way to select ripe ingredients for my Cheesy Garlic Cruffins?
Absolutely! For the best results, make sure your garlic is firm with no dark spots or sprouts. Choose cheeses that are fresh and high-quality for optimal flavor; look for mozzarella that’s creamy and melty. As for flour, ensure it’s stored properly and doesn’t have a stale smell, which can affect your dough’s rise.
How should I store leftover Cheesy Garlic Cruffins?
To maintain the delightful texture, store cooled cruffins in an airtight container at room temperature for up to 2 days. For longer-lasting freshness, refrigerate them for up to 3 days, though they may lose some flakiness. Alternatively, freeze them individually wrapped in plastic wrap for up to 3 months.
Can I freeze Cheesy Garlic Cruffins? If so, how?
Yes, you can definitely freeze them! After cooling completely, wrap each cruffin tightly in plastic wrap or aluminum foil, then place them in a freezer bag. They will stay fresh for up to 3 months. To reheat, simply bake them in a preheated oven at 350°F (175°C) for about 10-15 minutes, allowing that gooey cheese to melt perfectly again.
What should I do if my dough doesn’t rise properly?
Very! If your dough isn’t rising, check that your yeast is fresh, as expired yeast can lead to dense cruffins. Ensure the liquids are warm (not hot!) when added to the yeast mixture; temperatures over 120°F can kill the yeast. If everything seems correct, try letting the dough rise in a warm, draft-free place for about an hour, ensuring it’s covered to retain warmth.
Are Cheesy Garlic Cruffins safe for people with dietary restrictions?
Absolutely! For those with dairy preferences, use vegan butter and substitute the cheeses with plant-based options to make these cruffins dairy-free. If you have gluten sensitivities, you can experiment with a gluten-free all-purpose flour blend, though the results may vary. Additionally, be diligent about checking all packaging for allergens, especially with ready-made products.

Cheesy Garlic Cruffin: Your New Favorite Savory Snack
Ingredients
Equipment
Method
- In a large mixing bowl, combine 3 cups of all-purpose flour, 2 tablespoons of granulated sugar, 1 teaspoon of salt, and 2 teaspoons of instant yeast. Using a whisk, mix thoroughly to evenly distribute the ingredients.
- Create a well in the center and pour in 1 cup of warm milk and 4 tablespoons of melted unsalted butter. Add in 1/4 cup of warm water.
- Crack in 1 large egg, and mix the ingredients together using a wooden spoon or your hands until the mixture forms a rough dough.
- Transfer the dough onto a floured surface, and knead for about 8-10 minutes until smooth and elastic.
- Place the kneaded dough into a greased bowl, cover it with a clean kitchen towel, and let it rise in a warm area for approximately 1 hour.
- In a small bowl, combine 4 tablespoons of softened unsalted butter, 3 cloves of minced garlic, and 2 tablespoons of chopped fresh parsley. Mix until combined.
- Preheat your oven to 375°F (190°C) and grease a standard muffin tin.
- Roll out the risen dough into a rectangle, spread the garlic butter evenly, and sprinkle the cheeses over the top.
- Starting from one of the long edges, tightly roll the dough into a log shape and slice into 8-10 equal pieces.
- Place each sliced piece upright into the greased muffin cups and let them rest for about 20 minutes.
- Bake in the preheated oven for 20-25 minutes or until golden brown.
- Allow cooling in the muffin tin for about 5 minutes before transferring to a wire rack.
Leave a Reply