
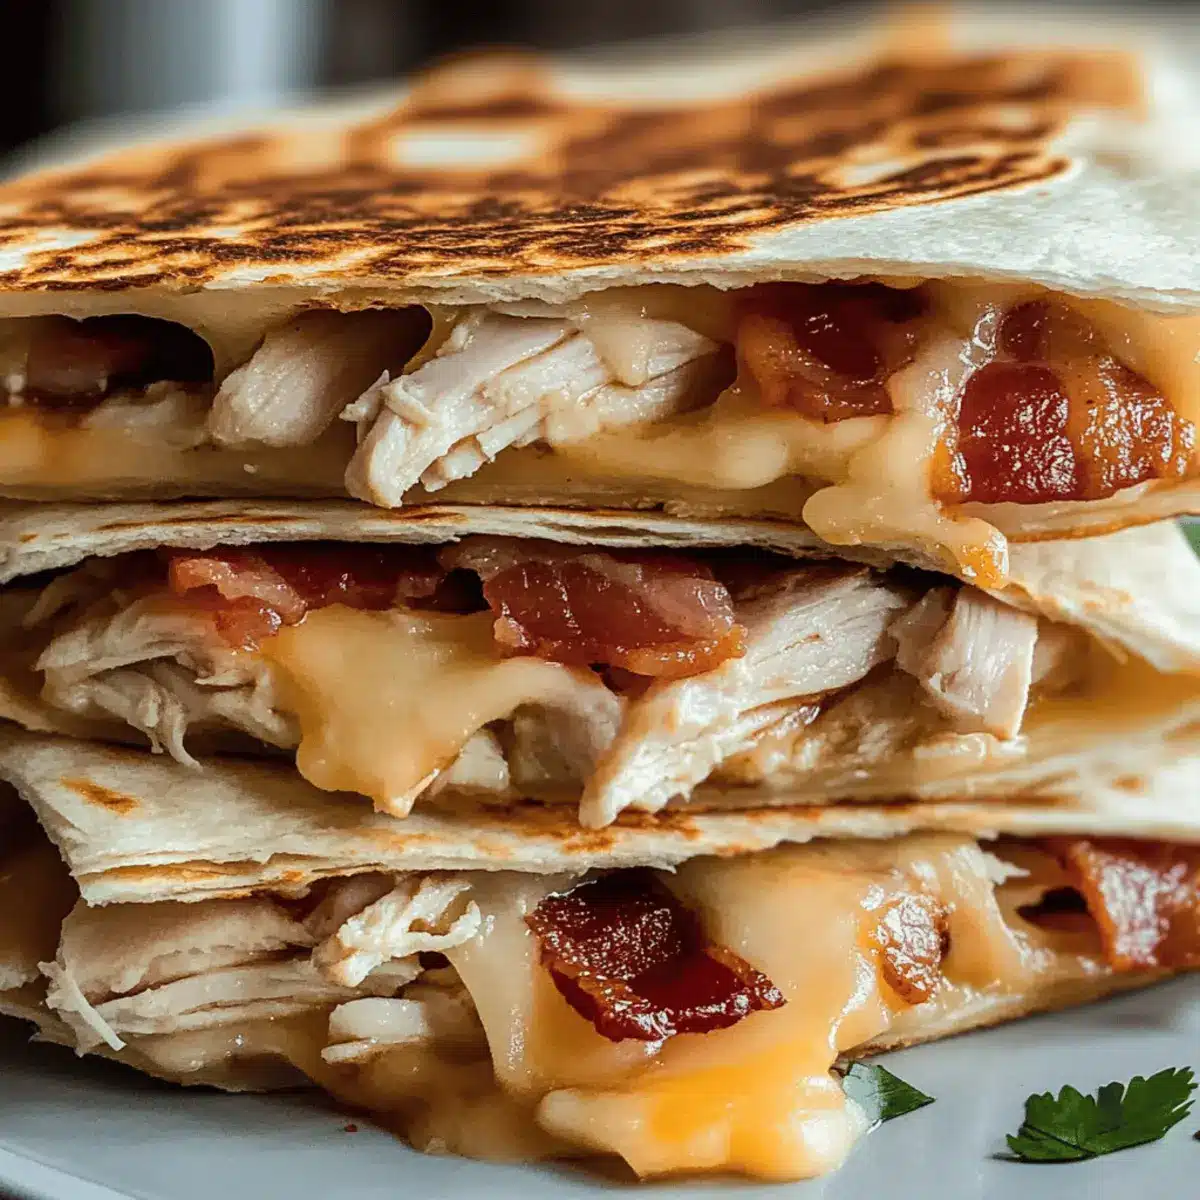
“After a long day, the timer in my kitchen silently ticks, and then the aroma of sizzling bacon fills the air—there’s something magical about it. This is the joy of whipping up a Chicken Bacon Ranch Quesadilla: a quick and easy comfort food classic that has become a go-to in my home. With just a handful of ingredients and a mere 20 minutes, you can create a melty, cheesy masterpiece that’ll have your family gathering around the table in delight. The playful combination of tender shredded chicken, crispy bacon, and creamy ranch dressing, all tucked into a perfectly crisp tortilla, transforms any weeknight dinner into a fiesta. Are you ready to discover the secret to a meal everyone will ask for again and again?”
Why is this quesadilla a family favorite?
Quick and Easy: In just 20 minutes, you can have a delicious meal ready for your family, perfect for busy weeknights.
Irresistible Flavor: The combination of smoky bacon and creamy ranch creates a taste that everyone loves!
Customizable: Feel free to mix in your favorite ingredients, like jalapeños or avocados, to make it truly yours.
Crowd-Pleaser: Whether it’s a casual dinner or a gathering, this Chicken Bacon Ranch Quesadilla is sure to impress even the pickiest eaters.
Perfect Pairing: Serve it with sides like salsa, sour cream, or guacamole for an extra kick. This recipe is a great introduction to other comforting dishes like Chicken Pot Pie or Crack Chicken Soup!
Chicken Bacon Ranch Quesadilla Ingredients
• Dive into the deliciousness with these must-have ingredients!
For the Quesadilla
- Flour Tortillas – The base for this scrumptious creation; substitute with corn tortillas for a gluten-free option.
- Cooked Chicken (Shredded) – Adds protein and heartiness; use rotisserie chicken for an easy shortcut.
- Bacon – Delivers an irresistible smoky flavor; swap for turkey bacon for a lighter twist.
- Mexican Cheese Blend (Shredded) – Contributes melty richness; try cheddar or Monterey Jack for a different taste.
- Ranch Dressing – Infuses creamy goodness and distinct flavor; homemade ranch elevates freshness or opt for a yogurt-based version for lightness.
- Tomatoes (Diced) – Offers a pop of freshness and color; bell peppers can work as a tasty alternative.
- Red Onion (Finely Chopped) – Adds a sharp bite; substitute green onions for a milder flavor profile.
- Fresh Cilantro (Chopped) – Enhances the dish with a burst of freshness; feel free to omit if you prefer a non-herb option.
- Butter – Used to achieve a crispy exterior; for a healthier choice, olive oil does the trick.
Optional Toppings
- Salsa – A zesty addition to complement the quesadilla.
- Sour Cream – Adds creaminess and balances out flavors.
- Guacamole – For a fresh, rich topping that enhances the overall experience.
Step‑by‑Step Instructions for Chicken Bacon Ranch Quesadilla
Step 1: Prepare the Chicken Mixture
In a bowl, combine the shredded chicken with ranch dressing until everything is well-coated and creamy. This should take about 2 minutes. The mixture should have a uniform consistency, making it easier to spread later. Setting this aside will allow the flavors to meld together while you prepare the other ingredients.
Step 2: Add Fresh Ingredients
Mix in the crumbled bacon, diced tomatoes, finely chopped red onion, and fresh cilantro to the chicken mixture. Stir gently for about 1 minute until all the ingredients are evenly distributed. The colors should pop, and the aroma will be mouthwatering. This combination adds a lovely crunch and zest to your Chicken Bacon Ranch Quesadilla.
Step 3: Assemble the Quesadilla
Take a flour tortilla and generously sprinkle one side with a layer of shredded Mexican cheese blend, about ¼ cup. On top of the cheese, spread a portion of the chicken mixture, then add another layer of cheese, about ¼ cup more. This creates a gooey, cheesy filling that binds everything together deliciously, making your quesadilla irresistible.
Step 4: Fold It Up
Carefully fold the tortilla in half, pressing down slightly to seal the filling inside. This step is crucial to ensure that the delicious chicken and bacon mixture stays put during cooking. The tortilla should hold its shape nicely while maintaining that fluffy feel.
Step 5: Heat the Skillet
In a skillet, melt about 1 tablespoon of butter over medium heat, allowing it to sizzle for 30 seconds. The butter will create a golden, crispy exterior when you cook the quesadilla. If you prefer a lighter option, substitute with olive oil and bring it to a gentle simmer.
Step 6: Cook the Quesadilla
Place the folded quesadilla in the hot skillet and cook for 2-3 minutes on each side. You’ll know it’s ready to flip when the bottom is golden brown and crispy. Use a spatula to gently press down, ensuring the cheese melts evenly, and the filling gets hot throughout.
Step 7: Rest and Slice
Once both sides are beautifully golden brown, transfer the quesadilla to a cutting board and let it rest for about 1 minute. This resting period allows the cheese to firm up slightly, making cutting easier. Use a sharp knife or pizza cutter to slice it into wedges with clean edges, ready for serving.
Make Ahead Options
These Chicken Bacon Ranch Quesadillas are a lifesaver for busy weeknights! You can prepare the chicken mixture—shredded chicken, ranch dressing, crumbled bacon, diced tomatoes, red onion, and cilantro—up to 24 hours in advance. Simply store it in an airtight container in the refrigerator to keep everything fresh and flavorful. When you’re ready to enjoy, take out the mixture, assemble your quesadillas, and cook them for 2-3 minutes on each side. This method ensures that your quesadillas are just as delicious and perfectly melted when served. By prepping ahead, you save time, allowing for a comforting meal with minimal stress!
Tips for the Best Chicken Bacon Ranch Quesadilla
- Don’t Overstuff: Avoid cheese leakage by not overstuffing the quesadilla; keep the filling generous but within the tortilla’s capacity.
- Perfect Heat: Cook on medium heat to ensure a golden crust without burning the tortilla, allowing cheese to melt smoothly.
- Rest Before Slicing: Let the quesadilla rest for a minute after cooking; this helps keep the filling intact while slicing for easier handling.
- Variety of Cheeses: Feel free to experiment with different cheeses for the filling; using pepper jack can add an exciting flavor twist to your Chicken Bacon Ranch Quesadilla.
- Fresh Ingredients Matter: Using fresh vegetables like cilantro and tomatoes enhances the overall flavor, making your quesadilla more vibrant and tasty.
How to Store and Freeze Chicken Bacon Ranch Quesadilla
Fridge: Store leftover quesadilla in an airtight container for up to 2 days. Reheat on a skillet for a crispy finish.
Freezer: Wrap individual quesadilla tightly in foil or plastic wrap before placing in a freezer bag. They can be frozen for up to 3 months.
Reheating: When ready to eat, thaw in the fridge overnight, then reheat in a skillet until heated through, approximately 5-7 minutes.
Room Temperature: Ideally, consume the quesadilla within 2 hours of cooking if left out at room temperature to ensure freshness and safety.
What to Serve with Chicken Bacon Ranch Quesadilla
A delightful meal isn’t quite complete without the right accompaniments to enhance your favorite dish and round out your dining experience.
- Creamy Guacamole: Rich and buttery, guacamole adds a refreshing twist and perfectly balances the savory flavors of the quesadilla.
- Zesty Salsa: A tangy salsa complements the richness of the quesadilla, providing that extra kick that brightens each bite.
- Crispy Tortilla Chips: Pair with your favorite dip for an added crunch; they bring a delightful texture to your meal.
- Fresh Garden Salad: A light salad tossed with seasonal vegetables and a vinaigrette adds freshness, cutting through the savory richness of the quesadilla.
- Roasted Vegetables: Seasoned and roasted to perfection, veggies like zucchini and bell peppers make a colorful, nutritious side that complements the dish.
- Cold Drink: Try a tangy lemonade or a refreshing iced tea; both are wonderful options to wash down the tasty flavors of the quesadilla.
Chicken Bacon Ranch Quesadilla Variations
Embrace your culinary creativity and explore delightful twists to make this delicious dish uniquely yours!
-
Dairy-Free: Replace cheese with a dairy-free alternative like cashew cheese or nutritional yeast for a deliciously creamy experience.
-
Spicy Kick: Add sliced jalapeños or a sprinkling of red pepper flakes for an extra layer of heat that will make your taste buds dance!
-
Avocado Delight: Incorporate diced avocado for a creamy texture and fresh flavor that pairs perfectly with the savory filling.
-
Smoky Chipotle: Swap out ranch dressing for a smoky chipotle sauce to give your quesadilla a spicy, rich depth that elevates the dish.
-
Veggie-Full: Add bell peppers and spinach for a burst of color and nutrients; this makes the quesadilla feel even more wholesome.
-
Protein Boost: Incorporate black beans or pinto beans into the filling for added protein and a delightful texture twist, making it heartier.
-
Cheese Variety: Use pepper jack cheese instead of a Mexican blend for a sharper, more flavorful cheese experience that everyone will love.
For serving suggestions, why not pair your quesadilla with a refreshing salsa or creamy guacamole? If you’re craving comfort food inspiration, check out my Chicken Pot Pie or Chicken and Stuffing Casserole!
Chicken Bacon Ranch Quesadilla Recipe FAQs
What type of tortillas are best for Chicken Bacon Ranch Quesadilla?
Absolutely! Flour tortillas provide a soft base, but if you’re looking for a gluten-free option, corn tortillas work just as well. They each offer a different texture, with flour being more pliable and corn adding a delightful chewiness.
How long can I store leftover Chicken Bacon Ranch Quesadilla in the fridge?
Leftovers can be stored in an airtight container in the fridge for up to 2 days. When reheating, I recommend using a skillet rather than the microwave to keep that delightful crispy texture intact—just heat for about 3-4 minutes on each side until warmed through.
Can I freeze Chicken Bacon Ranch Quesadilla, and if so, how?
Yes! To freeze, wrap each quesadilla tightly in foil or plastic wrap, then place them in a freezer bag. They can be stored for up to 3 months. When you’re ready to enjoy them, simply thaw them in the fridge overnight, and reheat them in a skillet for about 5-7 minutes until warmed thoroughly.
What should I do if my quesadilla is burning on the outside but the cheese isn’t melting inside?
Very! If you encounter this, try lowering the heat. Cooking on medium heat allows the cheese to melt without burning the tortilla. Additionally, you can cook it longer on the first side before flipping—keeping a close eye on it will help ensure it browns evenly without burning.
Are there any dietary considerations I should keep in mind with this recipe?
Absolutely! If you’re making this for someone with dietary restrictions, consider using turkey bacon for a lower fat option. For those avoiding dairy, you can substitute the cheese and ranch dressing with plant-based alternatives. Always check ingredient labels, as some brands may have allergens like nuts or gluten.
Can my pets eat any of the ingredients in Chicken Bacon Ranch Quesadilla?
While some ingredients like cooked chicken can be safe for pets in moderation, you should avoid giving them anything with ranch dressing, onions, or bacon, as they can be harmful to pets. Always confer with your vet if you’re unsure about specific ingredients.
Delicious Chicken Bacon Ranch Quesadilla for Quick Comfort
Ingredients
Equipment
Method
- In a bowl, combine the shredded chicken with ranch dressing until well-coated.
- Mix in crumbled bacon, diced tomatoes, finely chopped red onion, and fresh cilantro.
- Take a flour tortilla, sprinkle one side with shredded cheese, spread chicken mixture, and add more cheese.
- Fold the tortilla in half, pressing down slightly to seal the filling inside.
- In a skillet, melt butter over medium heat for a crispy exterior.
- Cook the folded quesadilla for 2-3 minutes on each side until golden brown and crispy.
- Let the quesadilla rest for about 1 minute before slicing it into wedges.
Leave a Reply