
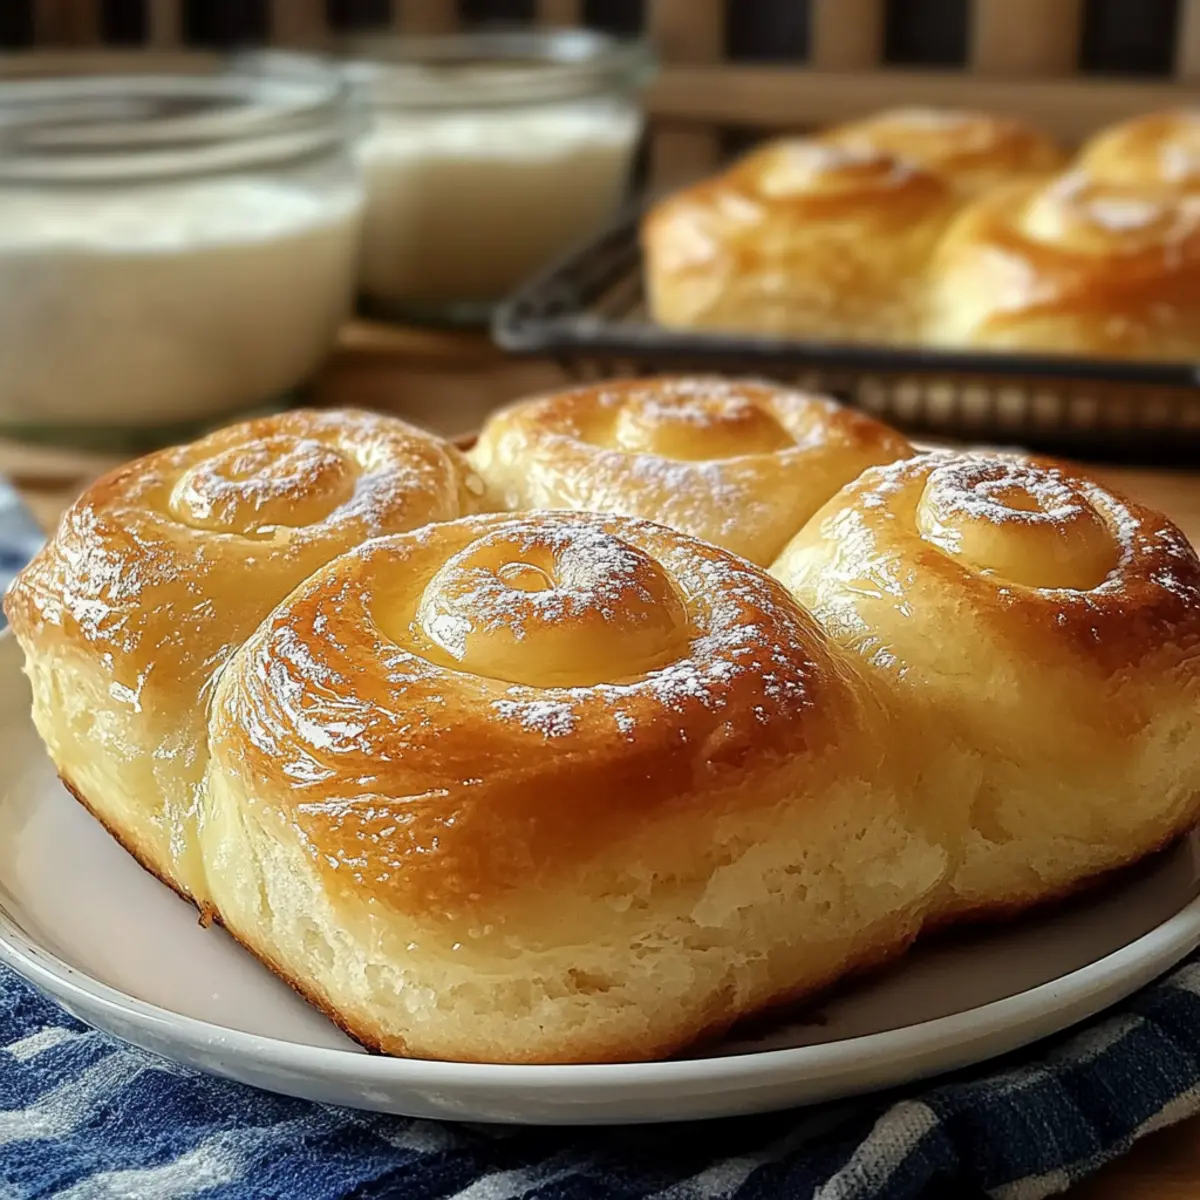
The moment the sweet aroma of Classic Ensaymada Bread fills the air, it feels like a warm embrace from home. This fluffy Filipino pastry, rich in tradition and flavor, is more than just a delightful breakfast or snack; it’s a canvas for creativity and customization. Whether you’re topping it with gooey cheese or a sprinkle of sugar, every bite promises a comforting melt-in-your-mouth experience. One of the best aspects of this recipe is how quickly it comes together—perfect for cozy mornings or impromptu gatherings. Plus, with endless variations to explore, you can easily make it your own, whether you fancy a Coconut Ensaymada or a rich Chocolate Ensaymada. Ready to bake something extraordinary?
Why is Ensaymada Bread so special?
Versatile and Customizable: This Classic Ensaymada Bread is a blank canvas for your culinary creativity. Delightful Flavor: Each bite is a heavenly balance of sweetness and creaminess, enhanced by its buttery richness. Quick to Make: Preparation is a breeze, fitting perfectly into any busy schedule. Crowd-Pleaser: Ideal for gatherings, it never fails to impress guests. Whether you choose to serve it straight from the oven, or add a personal twist with a variation like Coconut Ensaymada or Chocolate Ensaymada, this recipe will quickly become a beloved staple in your home!
Classic Ensaymada Bread Ingredients
For the Dough
• All-purpose flour – Provides the structure for the bread; substitute with whole wheat flour for a heartier texture.
• Granulated sugar – Adds sweetness and encourages browning; can cut back for a less sweet option.
• Salt – Enhances the overall flavor; crucial for balancing the sweetness in the Classic Ensaymada Bread.
• Instant yeast – Vital leavening agent that allows the dough to rise; do not replace with active dry yeast without adjustments.
• Milk, warmed – Activates the yeast and adds moisture; use plant-based milk for a dairy-free alternative.
• Unsalted butter, softened – Imparts richness to the dough; can be switched for margarine or coconut oil for dairy-free versions.
• Eggs – Contributes to the structure and moisture; swap with flaxseed meal mixed with water for a vegan choice.
• Vanilla extract – Enhances flavor; opt for pure vanilla for the best results.
For the Toppings
• Melted butter (for brushing) – Used during shaping and adds delightful flavor; optional for a lighter version.
• Grated cheese – A traditional topping that adds depth and texture; choose cheddar, queso de bolsa, or experiment with mozzarella.
• Sugar (for dusting) – Sweetens the topping; can be omitted if you prefer a less sweet touch.
This Classic Ensaymada Bread recipe is not only easy to make, but it also opens up a world of delicious variations to try!
Step‑by‑Step Instructions for Classic Ensaymada Bread
Step 1: Prepare Ingredients
Begin by gathering all your ingredients for the Classic Ensaymada Bread. Organize your workspace to ensure easy access to all items: flour, sugar, salt, instant yeast, warmed milk, softened butter, eggs, and vanilla extract. This preparation helps to streamline your baking process, making it a delightful and stress-free experience.
Step 2: Activate Yeast
In a small bowl, combine the warmed milk, instant yeast, and one tablespoon of granulated sugar. Stir gently and let it sit for about 5 to 10 minutes until it becomes frothy and bubbles form on the surface. This activation step is crucial for the dough’s rise, ensuring your Classic Ensaymada Bread will be light and fluffy.
Step 3: Mix Dry Ingredients
In a large mixing bowl, whisk together the all-purpose flour, salt, and the remaining sugar until well combined. This mixture forms the base for your dough, providing structure and flavor. Make sure to aerate the flour by whisking, which adds to the overall lightness of the ensaymada.
Step 4: Combine Wet Ingredients
In a separate bowl, beat the eggs, softened butter, and vanilla extract together until smooth and creamy. This mixture will enrich your dough, contributing to the decadent taste and texture of the Classic Ensaymada Bread. Ensure your butter is at room temperature for easier blending.
Step 5: Combine Mixtures
Add the frothy yeast mixture and the wet ingredient blend to the bowl with the flour mixture. Gently mix until a soft dough forms. You are aiming for the dough to be slightly sticky but manageable. If it feels too wet, sprinkle in a little more flour as needed to maintain the right consistency.
Step 6: Knead Dough
Transfer the dough onto a lightly floured surface. Knead it for about 8 to 10 minutes until the dough is smooth and elastic. This step is essential for developing gluten, which contributes to the fluffy texture of your Classic Ensaymada Bread. A properly kneaded dough will bounce back when gently poked.
Step 7: First Rise
Place the kneaded dough into a greased bowl, covering it with a damp cloth or plastic wrap. Let it rise in a warm area for about 1 hour or until it has doubled in size. Keep an eye on it; the dough should be puffy and airy, signaling that the yeast has worked its magic.
Step 8: Shape Dough
Once the dough has risen, punch it down gently to release trapped air. Divide it into 12 equal pieces, rolling each into a circle. Brush the top with melted butter, which adds flavor and helps create a lovely golden crust during baking. This process sets the stage for shaping the Classic Ensaymada Bread.
Step 9: Roll and Shape
Take each butter-brushed circle and fold it in half, then carefully roll it into a spiral shape. This unique folding technique is what gives ensaymada its signature look and fluffy texture. Place the rolled dough into greased molds, ensuring they have space to rise again.
Step 10: Second Rise
Cover the shaped dough with a cloth and allow it to rise for an additional 30 to 45 minutes in a warm environment. You’ll know it’s ready when the pieces appear puffy and have expanded, setting the foundation for the tender Classic Ensaymada Bread you’re about to bake.
Step 11: Preheat Oven
While the dough is rising, preheat your oven to 350°F (175°C). This ensures the oven is at the right temperature when your Classic Ensaymada Bread is ready to be baked, which helps achieve that perfect golden-brown color on the outside.
Step 12: Bake
Carefully place the risen ensaymada in the oven and bake for 20 to 25 minutes, or until they turn golden brown and are fully cooked. Keep a close watch to avoid over-baking. The delicious aroma wafting through your kitchen will let you know they are nearly ready!
Step 13: Cool the Bread
Once baked, remove the Classic Ensaymada Bread from the oven and let them cool in the molds for about 10 minutes. After cooling, gently transfer them to a wire rack to avoid a soggy bottom and to allow them to cool completely.
Step 14: Final Touches
While still warm, brush the tops with melted butter and generously sprinkle with grated cheese and sugar. This adds a delightful finishing touch, enhancing both flavor and presentation. Your Classic Ensaymada Bread is now ready to be enjoyed by family and friends, creating lasting memories!
How to Store and Freeze Classic Ensaymada Bread
Room Temperature: Store the Classic Ensaymada Bread in an airtight container at room temperature for up to 3 days. This will help maintain its soft texture and delightful flavor.
Fridge: If you prefer to keep it longer, you can refrigerate the ensaymada. Wrap it tightly in plastic wrap or place it in a sealed container to prevent it from drying out. It can last for about a week but may lose some moisture.
Freezer: For extended storage, freeze the Classic Ensaymada Bread for up to 2 months. Slice or wrap individual pieces in plastic wrap, followed by aluminum foil. This dual wrapping helps prevent freezer burn.
Reheating: Thaw at room temperature before reheating. For best results, warm the bread in the oven at 350°F (175°C) for about 10 minutes. This will revive its fluffy texture and rich flavor.
What to Serve with Classic Ensaymada Bread
Serve up a delightful experience that complements the fluffy richness of ensaymada, making every bite a sensational treat.
-
Fresh Fruit Salad: A colorful assortment of seasonal fruits adds a refreshing balance, cutting through the richness of the pastry.
-
Creamy Mashed Potatoes: Pair with buttery mashed potatoes for an unexpected twist that wonderfully contrasts the soft texture of the ensaymada.
-
Rich Hot Chocolate: A warm, velvety hot chocolate enhances the sweetness of the ensaymada, making for a cozy afternoon snack or breakfast.
-
Savory Cheese Platter: Offer a selection of cheeses such as cheddar or brie; there’s magic in the combination of sweet ensaymada and savory cheese.
-
Coconut Jam: The tropical flavors of coconut jam bring an added richness that pairs perfectly with the buttery sweetness of the ensaymada.
-
Herbal Tea: A cup of calming herbal tea, like chamomile or mint, can serve as a soothing accompaniment, enhancing the comforting experience of the bread.
-
Brown Sugar Coconut Crumble: Top with a sprinkle of this sweet mix for a delightful crunch that enhances the overall flavor profile.
-
Flavored Butter: Spread some cinnamon or honey butter across the warm ensaymada for an additional layer of sweetness and creaminess to enjoy.
Make Ahead Options
These Classic Ensaymada Bread are perfect for meal prep enthusiasts! You can prepare the dough up to 24 hours in advance; simply follow the instructions up to the first rise, then cover and refrigerate the dough instead. This helps develop flavor while keeping the dough fresh. To maintain quality, be sure to bring the dough back to room temperature before shaping and performing the second rise. Alternatively, you can shape and freeze the formed ensaymada; let them thaw overnight in the refrigerator before proceeding with the second rise and baking. With these make-ahead tips, you’ll enjoy fresh, warm ensaymada with minimal last-minute effort, making busy mornings or gatherings a breeze!
Classic Ensaymada Bread Variations
Feel free to explore your culinary creativity with these delightful twists that make the Classic Ensaymada Bread even more special!
- Coconut Ensaymada: Mix shredded coconut into the dough or use it as a topping for a tropical touch. The nutty flavor enhances the sweetness beautifully.
- Ube Ensaymada: Incorporate ube extract or powder to achieve a stunning purple hue and a sweet, nutty flavor. It’s a feast for both the eyes and the taste buds!
- Chocolate Ensaymada: Blend cocoa powder into the dough and top with chocolate frosting for a rich and decadent treat. Perfect for chocolate lovers!
- Nutty Ensaymada: Add your favorite chopped nuts, such as almonds or walnuts, to the dough for a crunchy surprise. The contrast of soft bread and crunchy nuts is simply delightful.
- Spiced Ensaymada: Sprinkle in some ground cinnamon or nutmeg for a warm, aromatic twist. This variation is perfect for cozy gatherings or chilly mornings.
- Cheesy Jalapeño Ensaymada: Incorporate diced jalapeños and shredded cheese into the dough for a spicy, savory flavor. It’s a fantastic appetizer for gatherings!
- Fruit-Infused Ensaymada: Add dried fruits like raisins or cranberries to the dough for a little burst of sweetness in each bite. This turns the bread into a wholesome treat!
As you dive into these variations, don’t forget to try serving your Classic Ensaymada Bread with a warm Gingerbread Hot Chocolate or sipping on a delightful Gingerbread White Russian. Each variation adds a unique twist to your baking adventure, inviting even more warmth and joy into your home!
Expert Tips for Classic Ensaymada Bread
- Fresh Yeast: Ensure your instant yeast is fresh; expired yeast can lead to dense bread and prevent it from rising properly.
- Knead Enough: Don’t rush the kneading process; aim for 8-10 minutes to develop gluten, ensuring a soft and fluffy texture in your Classic Ensaymada Bread.
- Room Temperature Ingredients: Using room temperature ingredients helps create a smooth dough and enhances the overall rise of the bread.
- Watch the Oven: Keep an eye on your ensaymada as it bakes; oven temperatures can vary, so check for a golden brown color to avoid over-baking.
- Wrap and Store: For best freshness, store leftover Classic Ensaymada Bread in an airtight container at room temperature for up to three days.

Classic Ensaymada Bread Recipe FAQs
How do I choose the right ingredients for Classic Ensaymada Bread?
Absolutely! For the best results, ensure your all-purpose flour is fresh and your instant yeast is not expired; this will make a significant difference in the texture and rise of your bread. When selecting milk, I recommend warming it slightly as it activates the yeast faster. Always choose unsalted butter for the dough to maintain control over salt levels.
How should I store Classic Ensaymada Bread?
Store your Classic Ensaymada Bread in an airtight container at room temperature for about 3 days. This helps keep the bread soft and flavorful. If you want it to last longer, wrap it tightly in plastic wrap and refrigerate it for up to a week, although it may lose some moisture.
Can I freeze Classic Ensaymada Bread?
Very! Freezing is an excellent way to preserve your Classic Ensaymada Bread. Wrap each piece individually in plastic wrap followed by aluminum foil to prevent freezer burn. You can freeze it for up to 2 months. When you’re ready to enjoy it, thaw at room temperature and reheat in the oven at 350°F (175°C) for about 10 minutes to bring back that fresh-baked flavor.
What common troubleshooting tips should I know about while making Classic Ensaymada Bread?
If your dough isn’t rising, check to make sure your yeast is fresh and the liquids are warm, not hot. If your bread turns out dense, it might be that it wasn’t kneaded enough. Aim for a smooth, elastic dough that’s slightly sticky. Always keep an eye on the baking time to avoid over-baking; a golden brown color should signal it’s done!
Are there any dietary considerations I should be aware of?
Certainly! If you or someone you’re serving has dairy allergies, use plant-based milk and coconut oil instead of butter. For egg allergies, you can substitute eggs with flaxseed meal mixed with water (1 tablespoon of flaxseed meal + 2.5 tablespoons of water = 1 egg). Always double-check labels for any potential allergens in the toppings, as different cheeses may contain various ingredients.
How can I customize my Classic Ensaymada Bread to create different flavors?
The more the merrier! You can easily customize your Classic Ensaymada Bread. For example, add shredded coconut to the mixture for a delightful Coconut Ensaymada, or incorporate cocoa powder into the dough for a rich Chocolate Ensaymada. Experimenting with different types of cheese, like mozzarella or a dairy-free option, can also give a unique twist to your creation!
Classic Ensaymada Bread: Your Softest Filipino Breakfast Delight
Ingredients
Equipment
Method
- Prepare Ingredients: Gather all ingredients and organize your workspace.
- Activate Yeast: Combine warmed milk, instant yeast, and one tablespoon of sugar. Let sit for about 5 to 10 minutes until frothy.
- Mix Dry Ingredients: In a bowl, whisk together flour, salt, and remaining sugar until combined.
- Combine Wet Ingredients: Beat eggs, softened butter, and vanilla until creamy.
- Combine Mixtures: Add yeast mixture and wet ingredients to flour mixture. Mix until a soft dough forms.
- Knead Dough: Knead dough on a floured surface for about 8-10 minutes until smooth and elastic.
- First Rise: Place dough in a greased bowl, cover, and let rise for 1 hour.
- Shape Dough: Punch down dough, divide into 12 pieces, and roll each into a circle. Brush with melted butter.
- Roll and Shape: Fold each circle in half and roll into a spiral shape. Place into greased molds.
- Second Rise: Cover and let rise for 30-45 minutes in a warm area.
- Preheat Oven: Preheat oven to 350°F (175°C).
- Bake: Bake for 20-25 minutes until golden brown.
- Cool the Bread: Let cool in molds for 10 minutes before transferring to a wire rack.
- Final Touches: Brush tops with melted butter and sprinkle with cheese and sugar while warm.
Leave a Reply