
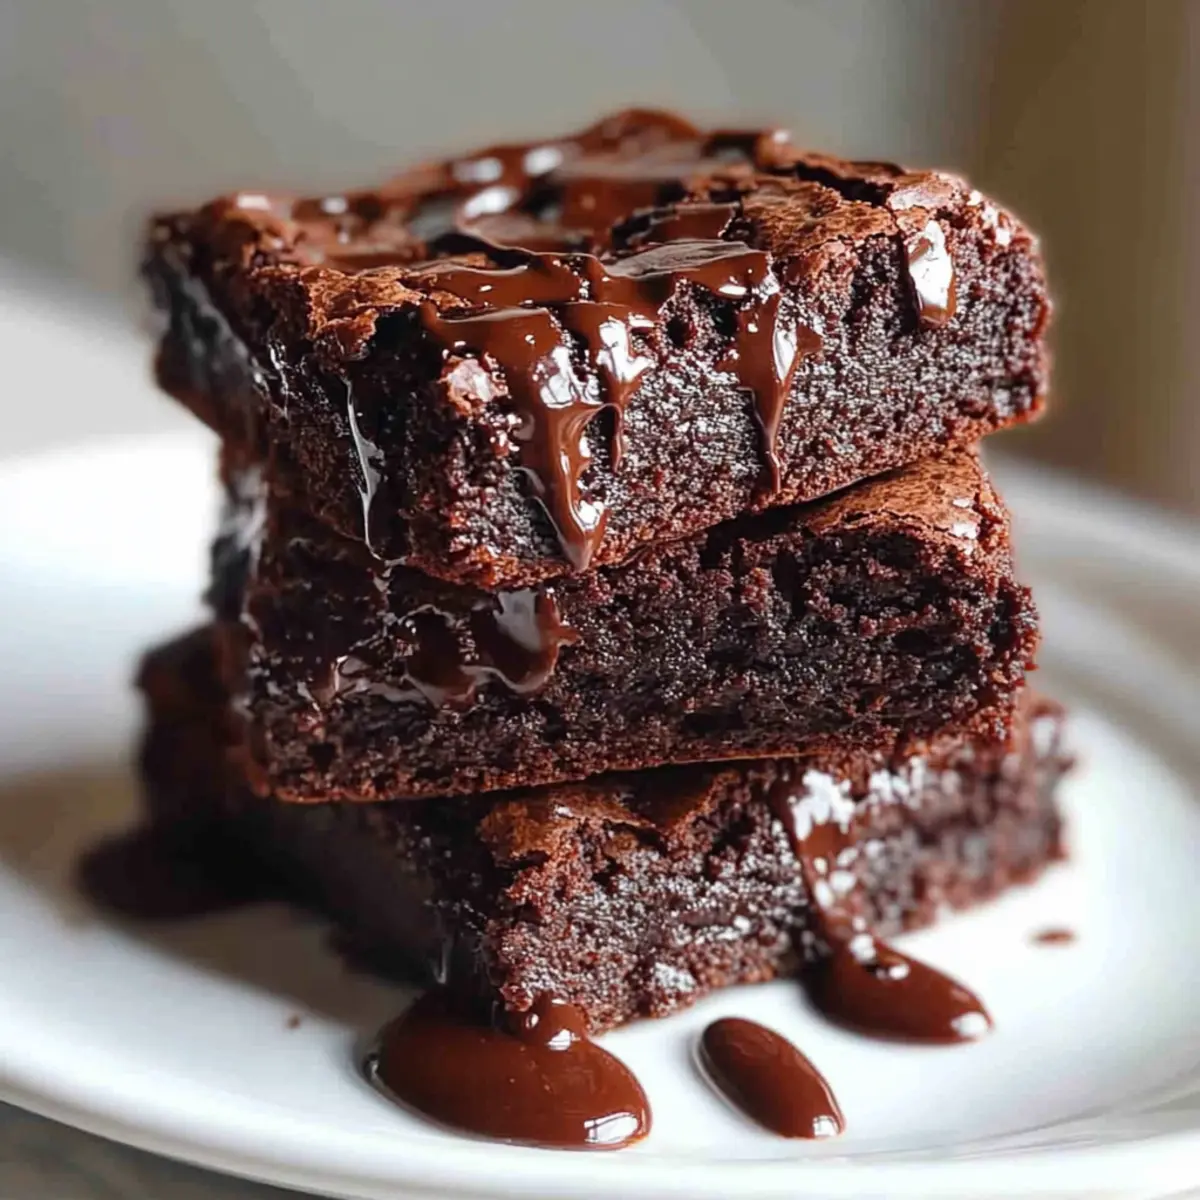
As I sat in my kitchen, the aroma of melting chocolate mixed with a hint of vanilla filled the air, taking me back to my childhood. These Greek Yogurt Brownies are not just any desserts; they redefine what it means to indulge guilt-free. With each fudgy bite, you’ll discover a soft richness that satisfies your sweet cravings while keeping calories under 100. This recipe is a delightful win-win for those of us seeking healthier options without sacrificing flavor. Plus, the high protein content and versatility make them perfect for a post-workout energizer or a wholesome treat for the kids. Curious to see how easy it is to whip up this healthier version of a classic dessert? Let’s get baking!
Why are Greek Yogurt Brownies a must-try?
Healthier Indulgence: You can savor these brownies guilt-free knowing they’re under 100 calories, making them a smart choice for sweet cravings.
Protein-Packed: Thanks to the Greek yogurt, you’re not just munching on dessert; you’re fueling your body with protein.
Versatile Options: From mocha to peanut butter swirl, you can personalize your batch to please everyone at your table.
Quick and Easy: With straightforward steps, you’ll have these delicious treats ready in no time—perfect for busy days!
Crowd-Pleasing Delight: These brownies appeal to both health-conscious eaters and chocolate lovers alike, ensuring smiles all around.
Don’t forget to try them with a drizzle of almond butter for an extra flavor kick!
Greek Yogurt Brownies Ingredients
For the Base
- Plain Greek Yogurt – Adds creaminess and a protein boost; opt for thick yogurt to enhance texture.
- Eggs – Provide essential structure and moisture; substitute with flax eggs for a vegan option (1 tbsp flaxseed meal + 3 tbsp water per egg).
- Maple Syrup – Acts as a natural sweetener; consider using honey or a sugar-free alternative like monk fruit or stevia if desired.
- Vanilla Extract – Elevates the entire flavor profile, adding warmth to each bite.
- Unsweetened Cocoa Powder – Offers decadent chocolate flavor without the sugar; choose high-quality cocoa for best results.
For the Dry Mix
- Almond Flour or Oat Flour – Creates a gluten-free foundation, with almond flour providing a denser crumb and oat flour adding lightness.
- Salt – Balances sweetness and enhances the rich chocolate flavor; don’t skip it for a well-rounded taste.
Optional Add-ins
- Dark Chocolate Chips – Fold in for extra richness and indulgence; they melt beautifully into the batter.
- Chopped Nuts – Sprinkle in for a delightful crunch and added nutrients; walnuts or pecans work great!
- Flaky Sea Salt – A finishing touch that elevates the sweetness and gives a gourmet flair to your Greek Yogurt Brownies.
- Chocolate Glaze – Drizzle over the top for extra chocolatey goodness if you’re in the mood for a treat!
Embrace the deliciousness of these Greek Yogurt Brownies and explore the variations that make them truly your own!
Step‑by‑Step Instructions for Greek Yogurt Brownies
Step 1: Preheat the Oven
Begin by preheating your oven to 175°C (350°F) to ensure even baking. While the oven heats up, line an 8″x8″ baking pan with parchment paper, letting some overhang for easy removal later. This preparation step is essential for your Greek Yogurt Brownies to cook evenly and come out perfectly fudgy.
Step 2: Combine Wet Ingredients
In a medium mixing bowl, whisk together 1 cup of plain Greek yogurt, 2 large eggs, 1/2 cup of maple syrup, and 1 teaspoon of vanilla extract. Mix until the ingredients are well blended and smooth, which should take about 1–2 minutes. This rich, creamy base adds moisture and a protein boost to your brownies.
Step 3: Mix Dry Ingredients
In a separate bowl, sift together 1/2 cup of unsweetened cocoa powder, 1/2 cup of almond flour (or oat flour), and a pinch of salt. Stir the dry ingredients thoroughly to prevent any clumps. This step ensures that your Greek Yogurt Brownies have a rich chocolate flavor without any graininess.
Step 4: Combine Wet and Dry Ingredients
Gently fold the dry mixture into the wet ingredients using a spatula. Mix until just combined, being careful not to overmix to maintain that fudgy texture. This process should take about 1 minute, and you’ll know it’s ready when there are no dry streaks, yet the batter remains thick and rich.
Step 5: Prepare for Baking
Pour the batter into your prepared baking pan, using a spatula to smooth the top evenly. Make sure to spread it out to each corner to ensure uniform baking. The glossy surface of the batter indicates that it’s ready for the oven and will turn into those delightful Greek Yogurt Brownies.
Step 6: Bake the Brownies
Place the pan in the preheated oven and bake for 20–25 minutes. Keep an eye on them, as the center should be set but slightly moist. You can check for doneness by inserting a toothpick; it should come out with a few moist crumbs attached, indicating the perfect fudgy texture.
Step 7: Cool and Refrigerate
Once baked, remove the brownies from the oven and allow them to cool completely in the pan on a wire rack. This cooling step usually takes about 10–15 minutes. For enhanced fudginess, refrigerate the brownies for at least 1 hour before slicing them into squares—this makes them even denser and more satisfying.
Step 8: Slice and Serve
After chilling, use the parchment overhang to lift the brownies out of the pan. Slice them into squares and serve. The glossy, fudgy texture of your Greek Yogurt Brownies will be irresistible, making them perfect for a guilt-free treat anytime you need a sweet pick-me-up.
How to Store and Freeze Greek Yogurt Brownies
Fridge: Store your Greek Yogurt Brownies in an airtight container for up to 5 days. This helps retain their moist and fudgy texture, making them perfect for a quick snack.
Freezer: For longer storage, individually wrap brownies in plastic wrap and freeze for up to 3 months. This retains their delicious taste and allows you to enjoy them whenever a sweet craving hits.
Reheating: To enjoy your frozen brownies, simply thaw in the fridge overnight or microwave for 10-15 seconds until warmed. This brings back their fudgy goodness!
Make-Ahead: You can mix the brownie batter ahead of time and store it in the fridge for up to 24 hours before baking. This is a great time-saver for busy days!
What to Serve with Greek Yogurt Brownies
Elevate your dessert experience with delightful pairings that balance flavors and textures to complement your rich, fudgy brownies.
-
Fresh Berries: Their natural sweetness and tartness create a perfect contrast, enhancing the chocolate flavor while adding a refreshing touch.
-
Almond Butter Drizzle: A silky finish that enriches each bite, providing a nutty depth that melds beautifully with the brownies.
-
Whipped Coconut Cream: Light and airy, it adds a tropical flair, transforming your brownies into an indulgent yet guilt-free dessert.
-
Vanilla Ice Cream: The creamy coldness melts against the warm brownies, offering a classic and comforting treat that never disappoints.
-
Chopped Nuts: Add a crunchy element—walnuts or pecans not only create a delightful texture but also give a flavor boost and extra nutrition.
-
Coffee or Espresso: The deep, rich coffee notes enhance the chocolate notes of the brownies, creating a perfect harmony for a cozy afternoon treat.
Indulge your senses and enjoy mixing and matching these delightful accompaniments to turn simple brownies into a multi-sensory delight!
Make Ahead Options
These Greek Yogurt Brownies are perfect for busy home cooks looking to save time! You can prepare the brownie batter up to 24 hours in advance by mixing all the wet and dry ingredients and storing it in an airtight container in the refrigerator. This will keep the flavors fresh while also enhancing the fudgy texture. When you’re ready to bake, simply pour the chilled batter into the prepared pan and bake as directed. For an even quicker option, you can bake the brownies and store them in the fridge for up to 3 days in an airtight container. Just remember to let them cool completely before refrigerating to maintain their moistness. Enjoy the convenience of having a delicious, guilt-free treat ready to enjoy anytime!
Expert Tips for Greek Yogurt Brownies
- Use Thick Yogurt: Opt for full-fat or Greek yogurt for maximum creaminess; thinner yogurt may yield a drier brownie.
- Check Temperature: Ensure yogurt and eggs are at room temperature for smoother batter and even baking.
- Avoid Overmixing: Gently fold the wet and dry ingredients together; overmixing can result in tough brownies instead of fudgy ones.
- Cool Before Cutting: Let the brownies cool completely and refrigerate for at least an hour to enhance fudginess and make slicing easier.
- Customize Wisely: When adding extras like chocolate chips or nuts, be cautious not to overwhelm the batter; balance is key for the best flavor.
Greek Yogurt Brownies: Fun Variations Await
Embrace your inner chef and personalize these delightful brownies with unique twists that will tantalize your taste buds!
- Mocha Brownies: Stir in 1 teaspoon of instant espresso powder for a rich coffee flavor that enhances the chocolate. Perfect for your morning coffee break!
- Peppermint Brownies: Mix in ½ teaspoon of peppermint extract, and top with crushed sugar-free mints for a refreshing holiday treat. The invigorating aroma is simply irresistible!
- Peanut Butter Swirl: Add dollops of natural peanut butter to the batter and gently swirl before baking. This nutty flavor adds a creamy richness that’s purely divine.
- Berry Boost: Fold in a cup of fresh or frozen berries for an additional burst of fruity goodness. Strawberries and raspberries are particularly delightful, bringing a vibrant color and taste.
- Protein Brownies: For a post-workout boost, mix in a scoop of your favorite protein powder. This hearty twist transforms treats into a nourishing snack!
- Nutty Delight: Toss in some chopped walnuts or pecans for a crunchy texture and added nutrients. The combination of chocolate and nuts creates a satisfying chew.
- Coconut Infusion: Blend in shredded unsweetened coconut for a tropical flair. The chewy texture complements the fudginess perfectly, making these brownies even more enjoyable!
- Gluten-Free Swap: Use almond flour instead of oat flour to create a denser brownie while keeping it gluten-free. This twist caters to various dietary needs without compromising on flavor.
Feel free to indulge and get creative with your own variations, and don’t forget to serve these lovely brownies with a scoop of Greek yogurt or a drizzle of almond butter for an unforgettable treat!
Greek Yogurt Brownies Recipe FAQs
What type of Greek yogurt should I use?
Absolutely! For the best results, opt for thick, full-fat Greek yogurt. It adds creaminess and moisture to the brownies, ensuring they are rich and fudgy. Low-fat varieties can be used, but they might yield a slightly different texture.
How should I store my Greek Yogurt Brownies?
Store your Greek Yogurt Brownies in an airtight container in the refrigerator, where they’ll stay fresh for up to 5 days. This storage method helps maintain their moist and fudgy texture, allowing you to enjoy them as a quick snack or guilt-free dessert!
Can I freeze Greek Yogurt Brownies?
Yes, you can! For longer storage, wrap each brownie individually in plastic wrap and freeze them for up to 3 months. When you’re ready to enjoy, simply thaw them in the fridge overnight or microwave them for about 10-15 seconds for a warm and comforting treat.
How can I troubleshoot if my brownies turn out dry?
If your Greek Yogurt Brownies come out dry, you may have overbaked them. Check for doneness around the 20-minute mark. For the perfect fudgy texture, the toothpick should come out with moist crumbs, not completely clean. Also, ensure you’re using thick yogurt and measuring your dry ingredients accurately!
Are these brownies suitable for people with certain dietary restrictions?
Definitely! These Greek Yogurt Brownies can easily be made gluten-free by using almond flour or oat flour. If you need them to be dairy-free, substitute the Greek yogurt with a plant-based yogurt. Additionally, you can replace eggs with flax eggs (1 tbsp flaxseed meal + 3 tbsp water = 1 egg) for a vegan option—simple and effective!
What are some delicious variations I can try with these brownies?
Very! You can customize your Greek Yogurt Brownies beautifully. Try adding 1 tsp of espresso powder for mocha brownies, or fold in fresh berries for a berry boost. Swirling in peanut butter before baking gives them a nutty twist, while a sprinkle of crushed sugar-free mints creates a refreshing peppermint flavor. The more the merrier when it comes to experimenting!
Greek Yogurt Brownies: Guilt-Free Fudgy Bliss Awaits
Ingredients
Equipment
Method
- Preheat your oven to 175°C (350°F) and line an 8"x8" baking pan with parchment paper.
- In a medium bowl, whisk together Greek yogurt, eggs, maple syrup, and vanilla extract until smooth.
- In a separate bowl, sift together cocoa powder, almond flour, and salt.
- Fold the dry ingredients into the wet ingredients until just combined.
- Pour the batter into the lined pan and smooth the top.
- Bake for 20–25 minutes until the center is set but slightly moist.
- Allow the brownies to cool completely in the pan before slicing.
- Slice into squares and serve.
Leave a Reply