
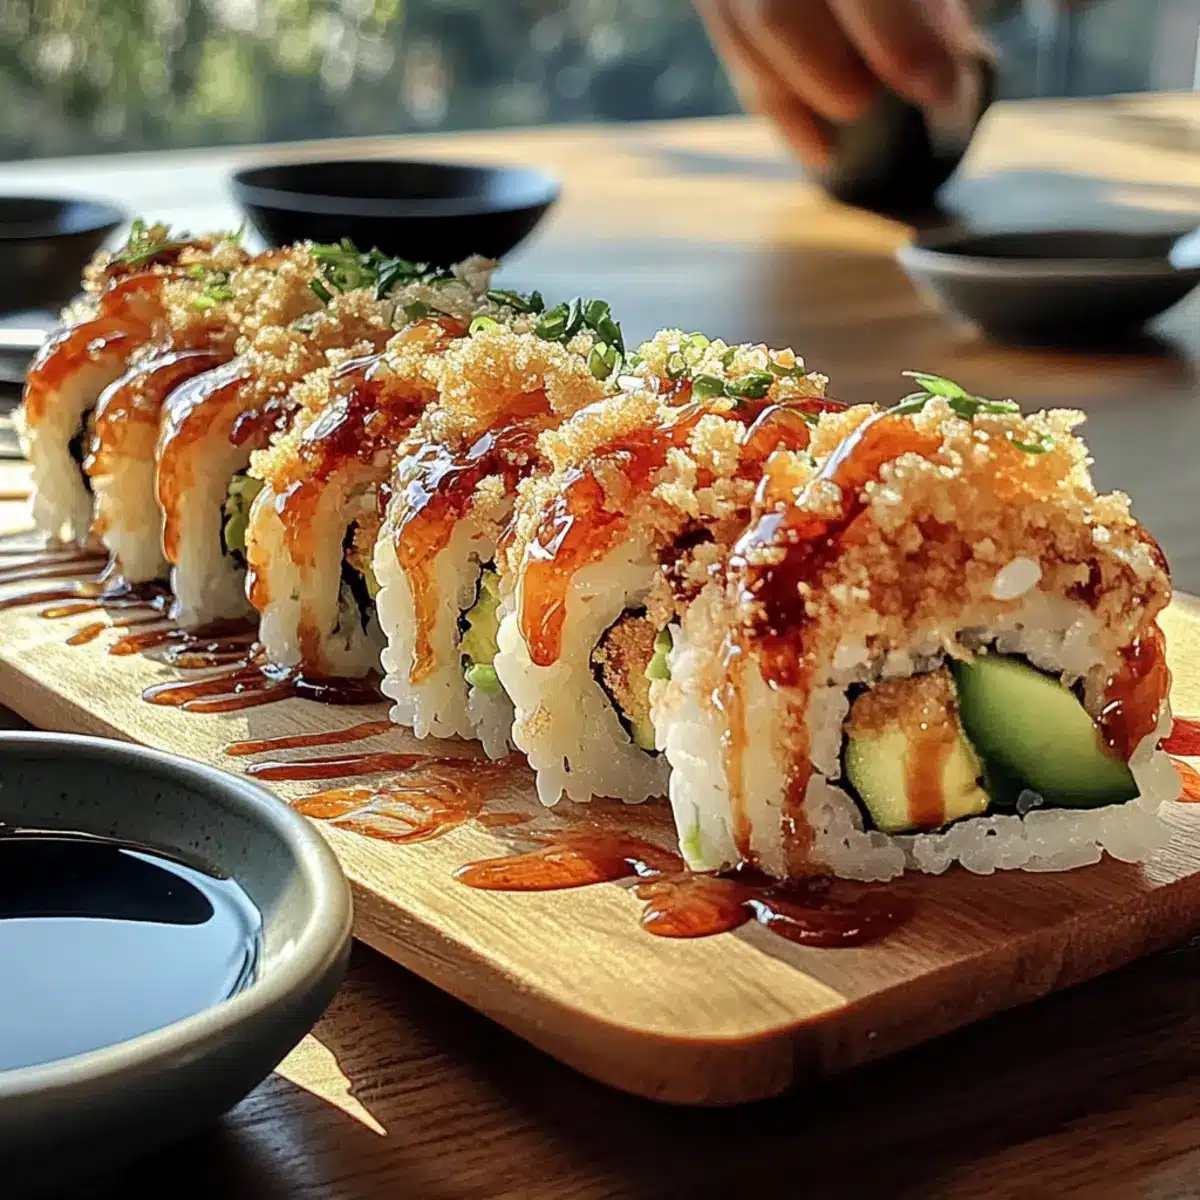
On a sunny Saturday afternoon, I found myself craving a sushi fix but wasn’t up for the takeout scene. That’s when the idea of crafting my very own Homemade California Crunch Roll Sushi struck me! This playful twist on the classic California roll features a satisfying crunch from its crispy toppings, creamy avocado, and refreshing cucumber. It’s not just a feast for the eyes, but a delightful experience for every bite, making it beginner-friendly and totally customizable. Whether you’re gluten-free or looking for a low-carb option with cauliflower rice, this recipe can adapt to your preferences. Imagine gathering friends and family for a fun sushi-making session right in your kitchen! Are you ready to roll up some delicious memories?
Why Make California Crunch Roll Sushi?
Crowd-Pleasing: This sushi roll captivates both sushi lovers and newcomers alike, ensuring everyone leaves satisfied.
Beginner-Friendly: The step-by-step process makes sushi-making accessible, turning kitchen novices into sushi stars!
Customizable: Feel free to experiment with fillings or toppings, like adding cream cheese or using hearts of palm for a vegan twist.
Healthy Options: With possibilities for gluten-free and low-carb choices, you can enjoy guilt-free indulgence.
Interactive Fun: Gather family or friends for a delightful sushi-making experience that sparks laughter and creativity in the kitchen.
Homemade California Crunch Roll Sushi Ingredients
For the Sushi Roll
• Sushi Rice – Essential for structure, sticky sushi rice holds everything in place; brown sushi rice is a great alternative with slight cooking adjustments.
• Roasted Nori Sheets – The wrapping for your roll; make sure they’re sushi-grade for the best taste and texture.
For the Fillings
• Imitation Crab or Real Crab Meat – This adds a sweet seafood flavor and protein; for a vegan option, swap in marinated tofu or hearts of palm.
• Ripe Avocado – Brings creaminess and richness; select a ripe avocado for easier slicing.
• Cucumber – Offers a refreshing, crisp contrast; you can also use bell peppers for a different crunch.
For the Sauces
• Spicy Mayo – This creamy, zesty addition is made with mayo and sriracha at a 2:1 ratio; it amps up the flavor.
• Eel Sauce – A sweet-salty delight that enhances the overall taste, though it’s optional if you’re looking for something lighter.
For the Crunchy Topping
• Crunchy Topping Options – Choose from French fried onions, toasted panko breadcrumbs, or tempura flakes to give your roll that fantastic crunch; mixing different toppings can create a unique twist.
Dive into the world of Homemade California Crunch Roll Sushi, and let your culinary creativity flourish!
Step‑by‑Step Instructions for Homemade California Crunch Roll Sushi
Step 1: Prepare the Sushi Rice
Rinse 1 cup of short-grain sushi rice under cold water until the water runs clear, then combine it with 1¼ cups of water in a rice cooker or saucepan. Cook the rice according to the manufacturer’s instructions, usually about 15-20 minutes, until tender and sticky. Once cooked, mix 2 tablespoons of rice vinegar, 1 tablespoon of sugar, and ½ teaspoon of salt in a small saucepan over low heat until dissolved, then gently fold it into the warm rice and allow it to cool to room temperature.
Step 2: Set Up Rolling Station
Prepare your rolling station by wrapping a bamboo sushi mat in plastic wrap to prevent sticking. Next, fill a small bowl with water and add a splash of rice vinegar; this will help keep your hands moist while working with the sticky rice. Make sure all your ingredients for the Homemade California Crunch Roll Sushi are at hand, and that you have a clean workspace to begin assembling your rolls.
Step 3: Assemble the Roll
Place a roasted nori sheet, shiny side down, on the sushi mat, with its edge closest to you. Spread an even layer of cooled sushi rice over the nori, leaving a ½-inch gap at the top to seal the roll later. Carefully flip the nori so the rice is facing down, then layer in imitation crab or crab meat, slices of ripe avocado, cucumber, and any optional fillings you desire, ensuring a colorful array of ingredients.
Step 4: Roll the Sushi
Begin rolling the sushi by lifting the edge of the mat closest to you with your thumbs, gently holding the filling in place with your fingers. Roll the nori away from you tightly into a cylinder shape, pressing gently as you go to maintain a compact roll. Make sure to roll all the way to the end of the nori, using the mat to help shape and guide the roll, ensuring it seals well.
Step 5: Add the Crunch
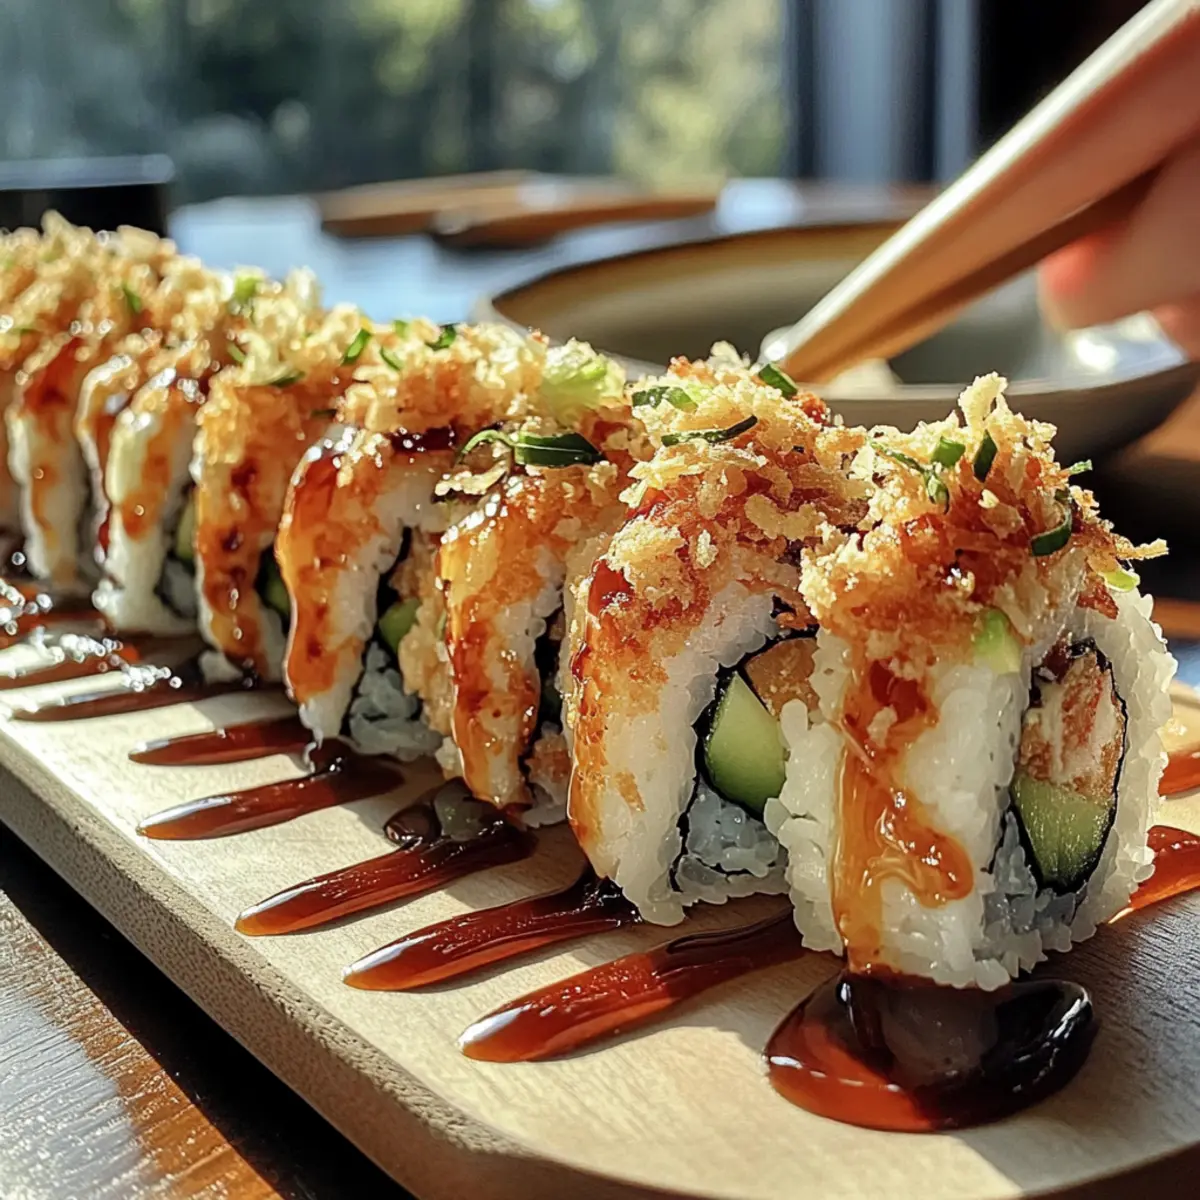
Once your roll is securely formed, place it seam side down on the cutting board. Brush the top with a layer of spicy mayo or eel sauce to add an extra flavor boost. Generously sprinkle your choice of crunchy topping—like French fried onions, toasted panko breadcrumbs, or tempura flakes—over the sauce, and lightly press to ensure that the toppings adhere to the roll, making your Homemade California Crunch Roll Sushi that much more delightful.
Step 6: Slice and Serve
Using a sharp knife, wet it with a little water to prevent sticking, and slice the sushi roll into 8 equal pieces. Use a gentle sawing motion for clean edges, ensuring the ingredients remain intact. Arrange the pieces on a serving platter and drizzle with extra spicy mayo or eel sauce if desired. Serve alongside soy sauce, pickled ginger, and wasabi for a complete sushi experience!
How to Store and Freeze Homemade California Crunch Roll Sushi
- Room Temperature: Sushi is best enjoyed fresh. Avoid leaving it at room temperature for more than 2 hours to prevent spoilage.
- Fridge: Store any leftover rolls in an airtight container in the fridge for up to 24 hours. This helps preserve flavor and texture but may alter the crunchiness.
- Freezer: Freezing sushi is not recommended, as it can compromise the texture and taste of the ingredients. Enjoy your Homemade California Crunch Roll Sushi freshly made!
- Reheating: If you’ve stored leftover sushi, it’s best served cold, straight from the fridge rather than reheated, to maintain flavor integrity.
Expert Tips for Homemade California Crunch Roll Sushi
-
Don’t Overfill: The key to a perfect roll is not to overload it with fillings. Keep it balanced to prevent bursting when rolling.
-
Wet Hands and Tools: Dampen your hands and knives with water mixed with rice vinegar to avoid sticking. This helps in smooth handling and slicing.
-
Control Your Rice: Use slightly warm rice for rolling. Cold rice may not stick well, while overly hot rice can make the nori soggy—aim for room temperature.
-
Cut with Care: Use a sharp, wet knife and employ a gentle sawing motion when slicing the roll. This helps achieve clean edges for your Homemade California Crunch Roll Sushi.
-
Experiment with Toppings: The crunchy topping makes a big difference! Mix and match different toppings for a unique crunch that suits your taste.
-
Enjoy Fresh: Homemade sushi is best enjoyed fresh! If you need to store it, keep it in an airtight container in the fridge and consume within 24 hours for the best taste.
Homemade California Crunch Roll Sushi Variations
Feel free to explore these delightful twists on your homemade sushi creation, adding your personal touch to every bite!
- Gluten-Free: Substitute traditional sushi rice with cauliflower rice for a low-carb option that stays deliciously satisfying.
- Vegan Delight: Swap out imitation crab for marinated tofu or hearts of palm, creating a fresh and plant-based roll.
- Creamy Addition: Mix in a layer of cream cheese for an extra luscious texture that complements the crunch.
- Heat Element: Add thinly sliced jalapeños for a kick of spice that elevates the flavor profile.
- Flavor Variations: Experiment with different sauces like teriyaki or sesame for a unique twist on traditional flavors.
- Veggie Crunch: Replace cucumber with bell peppers for a vibrant pop of color and crispy texture that surprises your palate.
- Herb Infusion: Incorporate fresh cilantro or green onions into your filling for a burst of freshness in every bite.
- Crunchy Duo: Combine French fried onions and toasted panko breadcrumbs for an unforgettable crunchy topping.
As you treat your taste buds to this culinary craft, why not round out your meal with a refreshing Pineapple Cucumber Salad or indulge in a sweet Cherry Cream Cheese Danish for dessert? Enjoy creating and savoring your very own California Crunch Roll!
What to Serve with Homemade California Crunch Roll Sushi?
Indulge in a lively meal experience that beautifully complements the delightful textures and flavors of your homemade sushi rolls.
-
Pineapple Cucumber Salad: A refreshing mix that balances the richness of the roll with its sweet and tangy notes. Crisp cucumbers and juicy pineapple can be a vibrant side that awakens the palate.
-
Miso Soup: Comforting and warm, this classic Japanese soup pairs perfectly, enhancing the sushi experience with umami flavors while providing a cozy contrast.
-
Edamame: These tender, steamed soybeans offer a light and healthy snack, adding a touch of simplicity that lets your sushi shine. They’re also an excellent source of protein!
-
Cherry Cream Cheese Danish: For dessert, this sweet treat contrasts the savory sushi. Creamy and fruity, it promises a delightful finish to your meal, making every bite memorable.
-
Green Tea: A soothing beverage that complements the sushi. Its earthy notes cleanse the palate, enhancing the flavors of your California Crunch Roll without overpowering them.
-
Sake: For an authentic touch, serve chilled sake, which enhances the overall dining experience. Its delicate flavors and smooth finish harmonize with the textures in your sushi!
Make Ahead Options
Preparing your Homemade California Crunch Roll Sushi in advance is a fantastic way to save time, making it perfect for busy weeknights or gatherings! You can cook the sushi rice and refrigerate it for up to 24 hours before assembling the rolls; just ensure it cools to room temperature before storing. Additionally, you can slice the avocado and cucumber up to 3 days in advance, keeping them in an airtight container with a bit of lemon juice to maintain their freshness. When you’re ready to roll, simply spread the cooled rice on the nori, layer your prepped fillings, and roll tightly. This way, you’ll enjoy delicious, freshly made sushi with minimal effort when it’s time to serve!
Homemade California Crunch Roll Sushi Recipe FAQs
What is the best way to select ripe avocados for this sushi?
Absolutely! When choosing avocados, look for ones that are slightly soft to the touch but not mushy. A ripe avocado will yield gently when pressed, and the skin should be dark green to black, indicating ripeness. Avoid ones with dark spots all over, as these can indicate overripeness or spoilage.
How should I store leftover California Crunch Roll Sushi?
If you find yourself with leftover sushi, place it in an airtight container in the fridge. It’s best consumed within 24 hours for optimal flavor and texture. Just remember that the crunchiness may diminish, but the delicious taste will still be there!
Can I freeze my Homemade California Crunch Roll Sushi?
While it’s tempting to save sushi for later, freezing is not recommended for this dish. The ingredients, particularly the rice and avocado, don’t hold up well in the freezer, leading to a mushy texture upon thawing. It’s best to enjoy your Homemade California Crunch Roll Sushi fresh!
What should I do if my rolls keep falling apart when slicing?
Very frustrating! If your rolls are falling apart, a few tweaks can help. First, ensure you’re using slightly warm sushi rice for better sticking. Also, avoid overfilling your rolls; too many ingredients can make them harder to keep together. Additionally, use a sharp knife and a gentle sawing motion for slicing to maintain the integrity of the roll.
Are there any dietary considerations I should be aware of when making this sushi?
Yes! For gluten-free options, ensure your sauces are gluten-free and avoid soy sauce if needed. If you’re focusing on vegan diets, swapping imitation crab for options like marinated tofu or hearts of palm will work beautifully! Always check for potential allergens and adjust ingredients to suit your dietary needs.
How do I prepare sushi rice correctly?
Of course! Preparing sushi rice is key. Start by rinsing 1 cup of short-grain sushi rice under cold water until it runs clear. Combine it with 1¼ cups of water in a pot or rice cooker. Cook according to manufacturer instructions—typically about 15-20 minutes. Once tender, mix in a blend of 2 tablespoons rice vinegar, 1 tablespoon sugar, and ½ teaspoon salt (gently warmed until dissolved). Fold this into the rice after it’s cooked, then let it cool to room temperature before using. This ensures a sticky, perfectly seasoned rice for your rolls!
Homemade California Crunch Roll Sushi for a Fun Family Feast
Ingredients
Equipment
Method
- Rinse the sushi rice under cold water, combine with water and cook according to instructions.
- Prepare your rolling station with a bamboo mat wrapped in plastic and a bowl of water with rice vinegar.
- Spread sushi rice on nori, flip and layer with fillings.
- Roll the sushi tightly using the mat, pressing gently to seal.
- Brush with spicy mayo or eel sauce and add your crunchy topping.
- Slice the rolls into 8 pieces using a wet knife, and serve.
Leave a Reply