
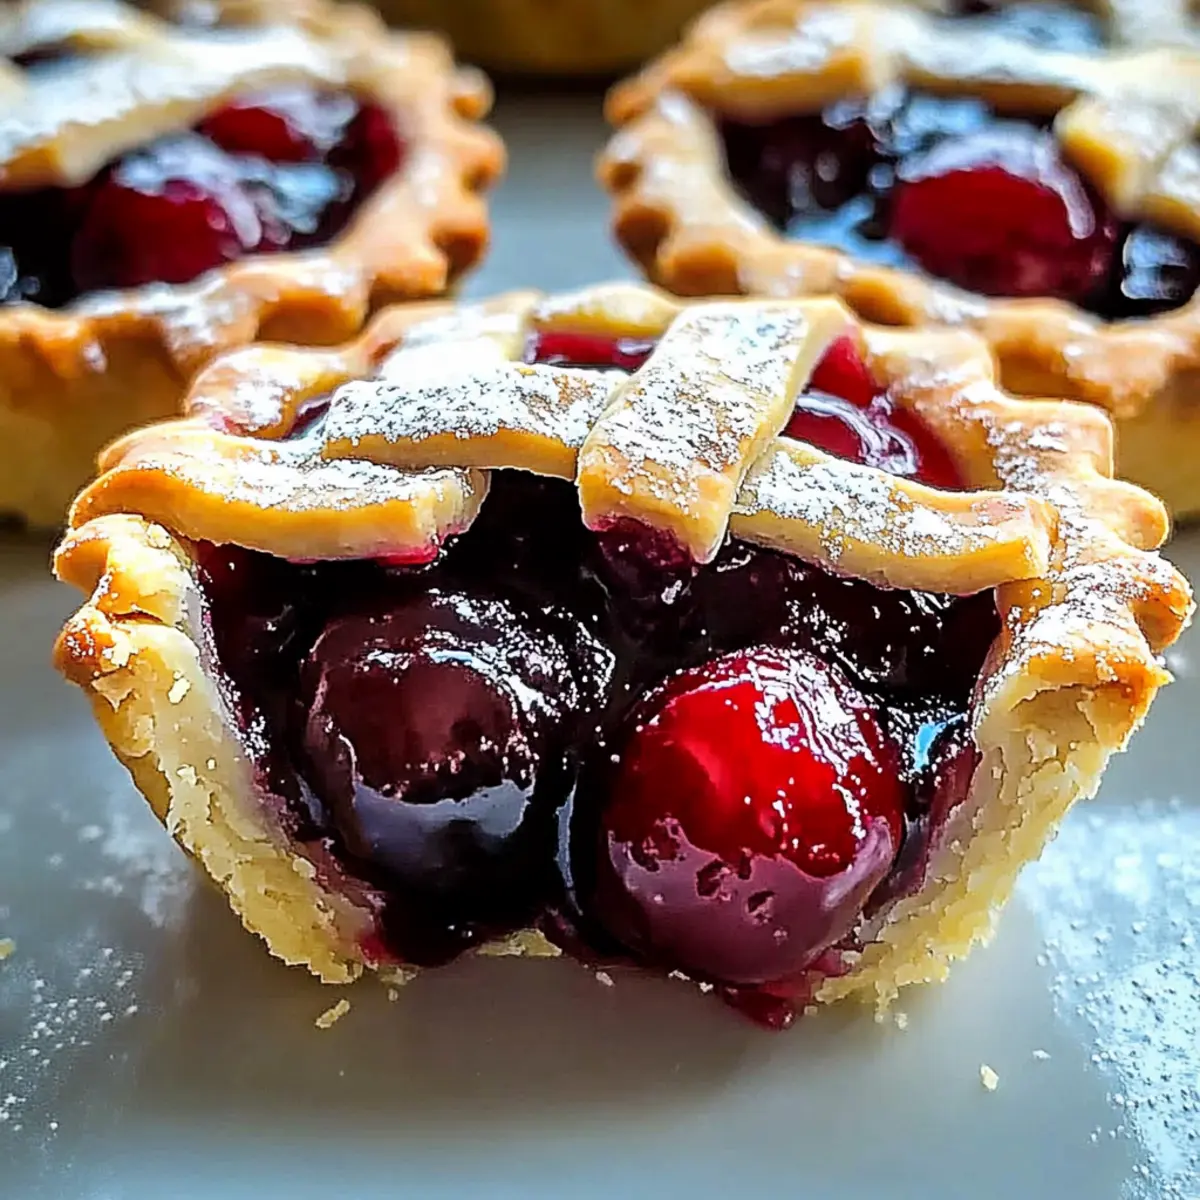
A fragrant aroma of sweet cherries wafts through my kitchen as I pull out the golden-brown Mini Cherry Pies from the oven. These delightful treats are not only visually appealing but also incredibly simple to make—perfect for those spontaneous cravings or when you want to impress at a gathering. With just four ingredients and minimal prep time, these bite-sized desserts serve up joy without the fuss. Imagine strolling through a park on a sunny day, savoring a warm mini pie, bursting with that luscious cherry filling—the ultimate portable indulgence! You can even switch up the fruit filling to suit your taste, making these pies versatile for any season. Ready to dive into this easy baking adventure? Let’s explore how to bring these fruity delights to life!

Why are Mini Cherry Pies so amazing?
Mini Cherry Pies are the perfect blend of simplicity and indulgence. With just four ingredients, they’re incredibly easy to whip up, even for beginner bakers. Versatile options allow you to switch fillings effortlessly—try it with blueberry or peach for a delightful change! Crowd-pleasers at any function, these bite-sized pies invite smiles and compliments. Plus, their portable nature means you can enjoy them anywhere—from picnics to cozy evenings at home. Looking for more sweet options? Don’t miss the tantalizing Apple Cinnamon Mini or the festive Christmas Cherry Fizz for a delightful treat!
Mini Cherry Pie Ingredients
• Discover the simplicity behind these delicious handheld treats!
For the Crust
- Store-bought pie crust – Ideal for a quick and easy base, though homemade dough can add extra flavor.
For the Filling
- Cherry pie filling – Sweet and vibrant; feel free to swap with blueberry or peach for a fresh twist.
For the Glaze
- Egg white – Brushing the tops promotes a shiny, golden finish.
For the Topping
- Sugar – A sprinkle on top adds a delightful sparkle and a hint of extra sweetness.
Step‑by‑Step Instructions for Mini Cherry Pies
Step 1: Prepare Oven & Muffin Tin
Preheat your oven to 350°F (175°C) to create the perfect baking environment for the Mini Cherry Pies. While the oven heats, lightly grease a muffin tin with cooking spray or butter to ensure your mini pies release easily after baking.
Step 2: Cut Pie Crust
Roll out the store-bought pie crust on a floured surface and use a round cutter to cut out circles about 3 ½–4 inches in diameter. This size will fit perfectly in the muffin cups, creating the ideal base for your mini pies.
Step 3: Shape Crusts
Gently press each dough circle into the greased muffin cups, pressing the dough against the sides and bottom to form little crusts. Be mindful not to stretch the dough too much, ensuring it retains its flaky texture once baked.
Step 4: Add Filling
Spoon the cherry pie filling into each crust, filling them about two-thirds full. This leaves enough room for the filling to bubble as it cooks. The vibrant filling should peek above the crust, adding visual allure to your mini cherry pies.
Step 5: Create Lattice Topping (Optional)
For a beautifully crafted finish, roll out any leftover dough and slice it into thin strips. Weave the strips together to form a lattice pattern and carefully place it over the filling in each muffin cup for added decoration.
Step 6: Brush & Sprinkle
Beat an egg white in a small bowl and brush it gently over the top of each mini pie. This will help create a golden, glossy finish while baking. Sprinkle a bit of sugar on top for that delightful sparkle and extra sweetness.
Step 7: Bake
Carefully place your muffin tin in the preheated oven and bake for 25–30 minutes. Watch for the crust to turn golden brown and the filling to bubble happily—this is your cue that the Mini Cherry Pies are perfectly baked.
Step 8: Cool & Remove
Once baked, let the pies cool in the muffin tin for about 15–20 minutes. This allows them to set a bit before you gently remove them from the tin. Use a small spatula to coax them out and enjoy your delightful creations!

Mini Cherry Pie Variations
Feel free to let your creativity shine with these delightful twists on the classic mini cherry pie!
- Blueberry Bliss: Swap cherry filling for blueberry filling for a sweet and tangy flavor that’s simply irresistible.
- Peachy Keen: Use peach filling and sprinkle in some cinnamon for a delightful summer treat that transports you right to the orchard.
- Chocolate-Cherry Combo: Add a handful of chocolate chips to the cherry filling for an indulgent twist that will satisfy any chocoholic.
- Nutty Crunch: Incorporate chopped nuts like pecans or walnuts into the filling for added texture and flavor that brings a delightful surprise.
- Honey Drizzle: Sweeten the cherry filling with a drizzle of honey instead of sugar for a natural, floral sweetness that elevates each bite.
- Coconut Lime: Mix in some shredded coconut and a splash of lime juice for a tropical flair that’ll have you dreaming of sandy beaches.
- Mincemeat Marvel: Use mincemeat filling for a festive twist, especially around the holidays—the warm spices will fill your kitchen with comforting aromas.
- Savory Style: Try filling with a mixture of cream cheese and herbs for an unexpected savory delight that pairs wonderfully with plum chutney.
These variations open up a world of flavor possibilities! If you want to explore more sweet ideas, check out the delicious Roasted Autumn Pies for another twist on comfort food indulgence.
What to Serve with Mini Cherry Pies
Enhance your dessert experience and create a delightful spread alongside these charming treats.
- Creamy Vanilla Ice Cream: The cool, creamy sweetness perfectly balances the tart cherry filling, creating a dreamy mouthful.
- Whipped Cream Clouds: Light and airy, a dollop of fresh whipped cream adds richness without overpowering the mini pies. Perfect for those who enjoy a classic dessert combination!
- Fresh Berries Medley: A mix of raspberries, blueberries, and strawberries offers a burst of freshness, enhancing the fruity flavors of the pies. This combination brings color and vibrancy to your dessert table.
- Chocolate Drizzle Delight: A drizzle of melted chocolate over your pies adds a touch of decadence, making each bite absolutely irresistible. Try dark chocolate for a contrasting depth.
- Minty Fresh Garnish: Sprigs of fresh mint not only brighten the presentation but also invite a refreshing contrast to the sweet pie; a simple touch can elevate your dessert!
- Sparkling Lemonade: A glass of sparkling lemonade’s citrus zing cuts through the sweetness, making it a refreshing pairing for your mini cherry pies during sunny gatherings.
- Coffee or Espresso: A warm cup of coffee or espresso provides a comforting pathway to savor the sweet and tart flavors in each mini pie, enhancing the overall experience.
- Chocolate-Covered Strawberries: Enjoy a touch of elegance with chocolate-covered strawberries; their richness pairs wonderfully with the mini pies’ fruity notes, creating a delightful contrast.
- Nutty Biscotti: Crunchy almond or hazelnut biscotti offers texture and a nutty flavor enhancement, making every bite an adventure in taste!
Expert Tips for Mini Cherry Pies
- Chill the Dough: Keep your pie crust cold while working to prevent it from becoming sticky. This ensures a flakier texture in your Mini Cherry Pies.
- Avoid Soggy Bottoms: Sprinkle a bit of flour or sugar in the crust before filling with cherry pie filling. This will help absorb any excess moisture and keep your crust crisp.
- Lattice Perfection: For stunning lattice tops, use a ruler to cut evenly sized strips from chilled dough. This will give your lattice a uniform look and elevate the presentation.
- Doneness Indicator: Look for a golden-brown crust and bubbling filling when baking. If the crust browns too quickly, cover the edges with foil to prevent burning.
- Experiment with Fillings: Don’t hesitate to get creative! Swap out cherry filling for blueberry or peach to make Mini Cherry Pies that suit your taste or the season.
Make Ahead Options
These Mini Cherry Pies are fantastic for meal prep, saving you time on busy days! You can prepare the pie crusts and fill them with cherry pie filling up to 24 hours in advance; simply refrigerate them until you’re ready to bake. To maintain their delicious quality, cover the muffin tin with plastic wrap to prevent the crust from drying out. When you’re ready to serve, just brush the tops with egg white and sprinkle with sugar before baking. Bake them directly from the fridge for 25–30 minutes or until golden brown and bubbling. This way, you’ll have delightful mini pies with minimal effort, perfect for indulging whenever the craving strikes!
How to Store and Freeze Mini Cherry Pies
Fridge: Store leftover Mini Cherry Pies in an airtight container for up to 3 days. This keeps them fresh while maintaining that delightful flaky crust.
Freezer: Baked mini pies can be frozen for up to 1 month. Allow them to cool completely before wrapping each individual pie in plastic wrap and placing them in a freezer-safe bag.
Thawing: To enjoy, thaw overnight in the fridge. For a fresh-baked taste, reheat in a preheated oven at 350°F (175°C) for about 10 minutes until warmed through.
Room Temperature: If serving immediately, these treats can sit at room temperature for up to 2 hours. Just be sure to enjoy them before they become too soft!

Mini Cherry Pies Recipe FAQs
What type of cherries should I use for the filling?
Absolutely! Fresh, pitted sweet cherries are delightful in these pies, but for convenience, a good-quality cherry pie filling works wonders. Look for fillings that are free from artificial colorings or additives for a more natural taste.
How should I store leftover Mini Cherry Pies?
You can store your leftover Mini Cherry Pies in an airtight container in the fridge for up to 3 days. This helps maintain their delightful flaky texture while keeping the filling fresh and tasty.
Can I freeze Mini Cherry Pies?
Very! To freeze your baked mini pies, let them cool completely first. Next, wrap each pie tightly in plastic wrap and place them in a freezer-safe bag. They can be frozen for up to 1 month. When you’re ready to enjoy them, just thaw in the fridge overnight and reheat them in a preheated oven at 350°F (175°C) for about 10 minutes until warmed through.
What can I do if my crust is getting too sticky?
If you find your dough is becoming too sticky while handling, don’t worry! Just chill it in the refrigerator for about 15–20 minutes. This will help firm it up and make it easier to work with, ensuring a flakier crust in your Mini Cherry Pies.
Are there any dietary considerations for Mini Cherry Pies?
Certainly! If you’re making these pies for someone with allergies, keep in mind that the store-bought pie crust often contains gluten. For a gluten-free option, look for gluten-free pie crusts available in most grocery stores. Additionally, make sure to check the filling for any allergens, especially if using canned fillings.
How long should I let the pies cool before removing them from the muffin tin?
Let your Mini Cherry Pies cool in the muffin tin for about 15–20 minutes. This cooling period helps set the filling and makes it easier to remove them without breaking, resulting in beautifully intact pies that are ready to enjoy!
Mini Cherry Pies: Effortless Sweet Bites for Any Occasion
Ingredients
Equipment
Method
- Preheat your oven to 350°F (175°C) and grease a muffin tin.
- Roll out the pie crust and cut out circles about 3 ½–4 inches in diameter.
- Press each dough circle into the greased muffin cups to form little crusts.
- Spoon cherry pie filling into each crust, filling about two-thirds full.
- Optional: Create a lattice topping with leftover dough strips and place over the filling.
- Brush the tops with beaten egg white and sprinkle sugar on top.
- Bake for 25–30 minutes until golden brown and filling bubbles.
- Cool in the muffin tin for 15–20 minutes before removing.
Leave a Reply