
Have you ever found yourself craving warm, fresh bread but dreaded the hassle of preheating the oven? Well, this No-Oven Turkish Bread is here to save the day! With just a few simple ingredients and a skillet, you can whip up a fluffy, golden-brown flatbread that’s perfect for dipping into your favorite hummus or pairing with soups. This easy bread recipe not only allows you to enjoy homemade goodness in record time, but it also keeps your kitchen cool on those warm days when the last thing you want is to crank up the oven. Imagine the delightful aroma wafting through your home as you cook these delicious rounds of goodness! Are you ready to learn how to make the perfect bread without any baking?
Why make No-Oven Turkish Bread?
Simplicity at Its Best: No complicated techniques mean anyone can master this delightful bread!
Fluffy Texture: Each bite is light and airy, perfect for tearing apart and enjoying.
Quick Cooking: Your skillet does all the work in just a few minutes—no waiting for dough to rise in an oven!
Versatile Pairing: Enjoy it warm with a side of hummus, tzatziki, or even as a wrap for grilled veggies or meats.
Crowd Pleaser: This flatbread is sure to impress friends and family, turning any meal into a special occasion.
Customizable Options: Elevate your bread by adding herbs, spices, or even cheese to suit your taste preferences!
No-Oven Turkish Bread Ingredients
For the Dough
- All-purpose flour – Provides the structure; for a denser bread, try whole wheat flour.
- Salt – Enhances flavor, making your bread taste delicious.
- Sugar – Aids in browning and adds a slight sweetness to the No-Oven Turkish Bread.
- Instant yeast – Helps the bread rise quickly; you can use active dry yeast if needed—just activate it by dissolving in warm water with sugar until foamy.
- Warm milk – Adds moisture and richness to the dough for a lovely texture.
- Warm water – Hydrates the flour and activates the yeast effectively.
- Olive oil or melted butter – Adds flavor and tenderness, making the bread irresistible.
Optional Toppings
- Melted butter – Brush on top for added flavor and a lovely sheen.
- Minced garlic – For garlic lovers, this enhances the taste deliciously.
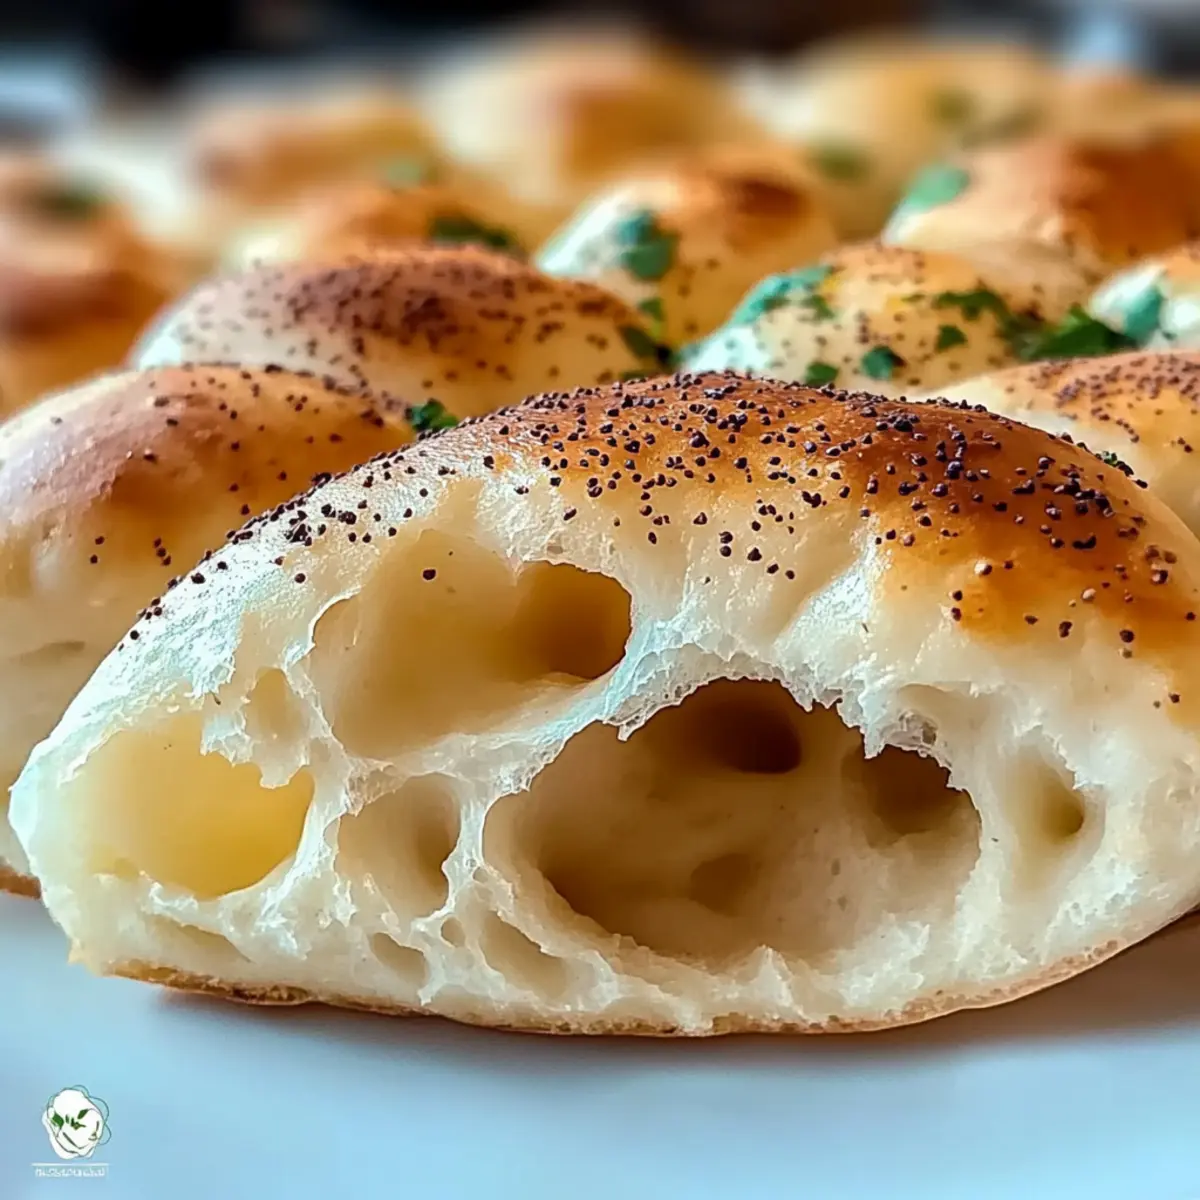
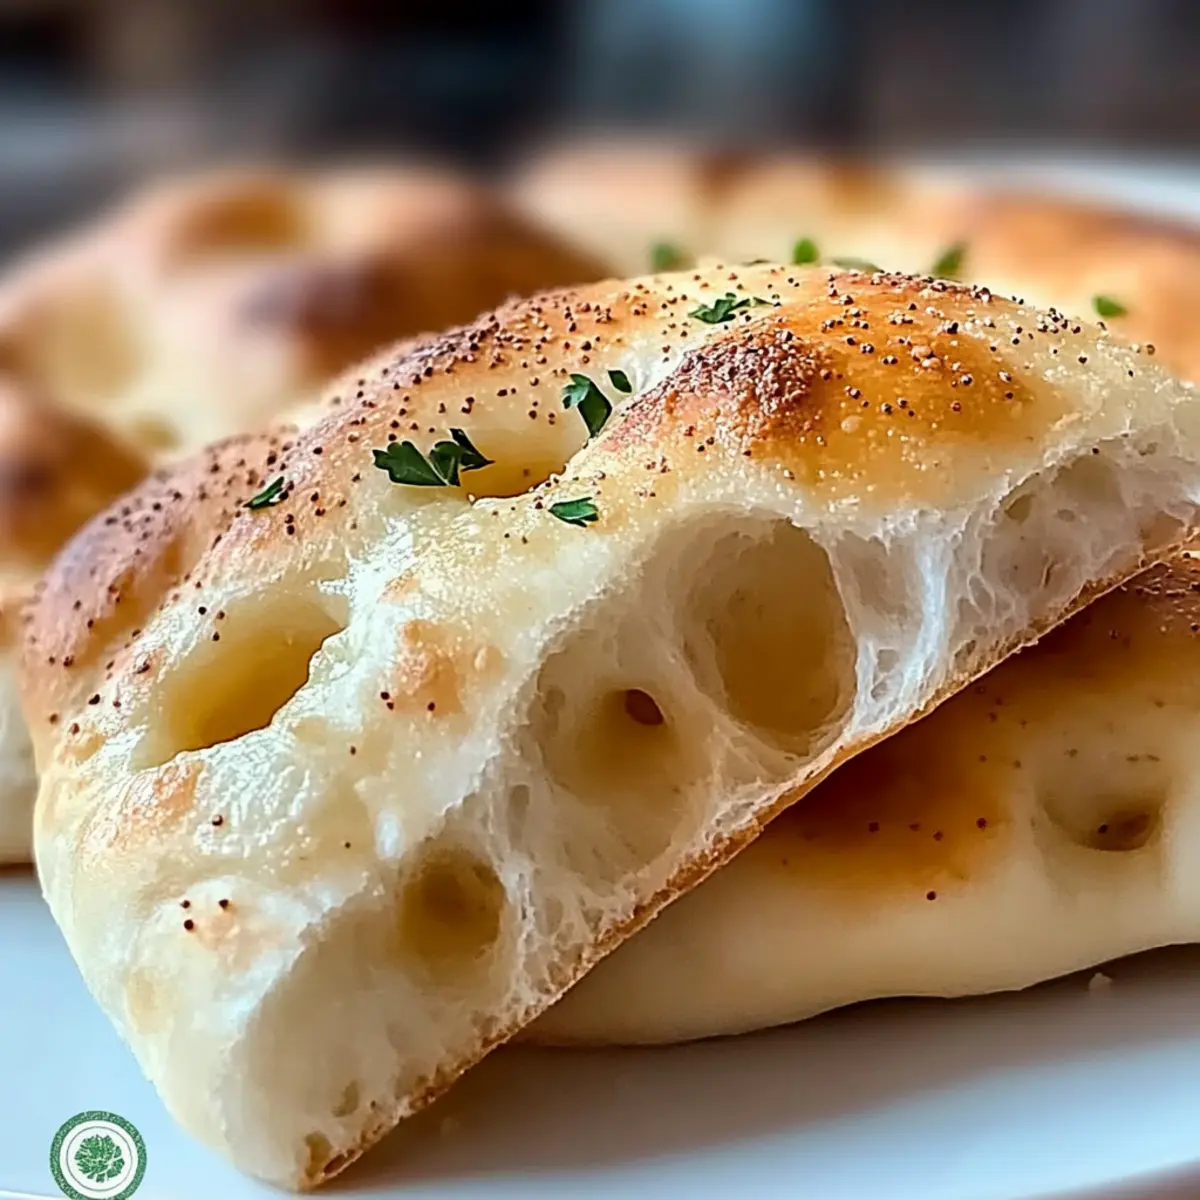
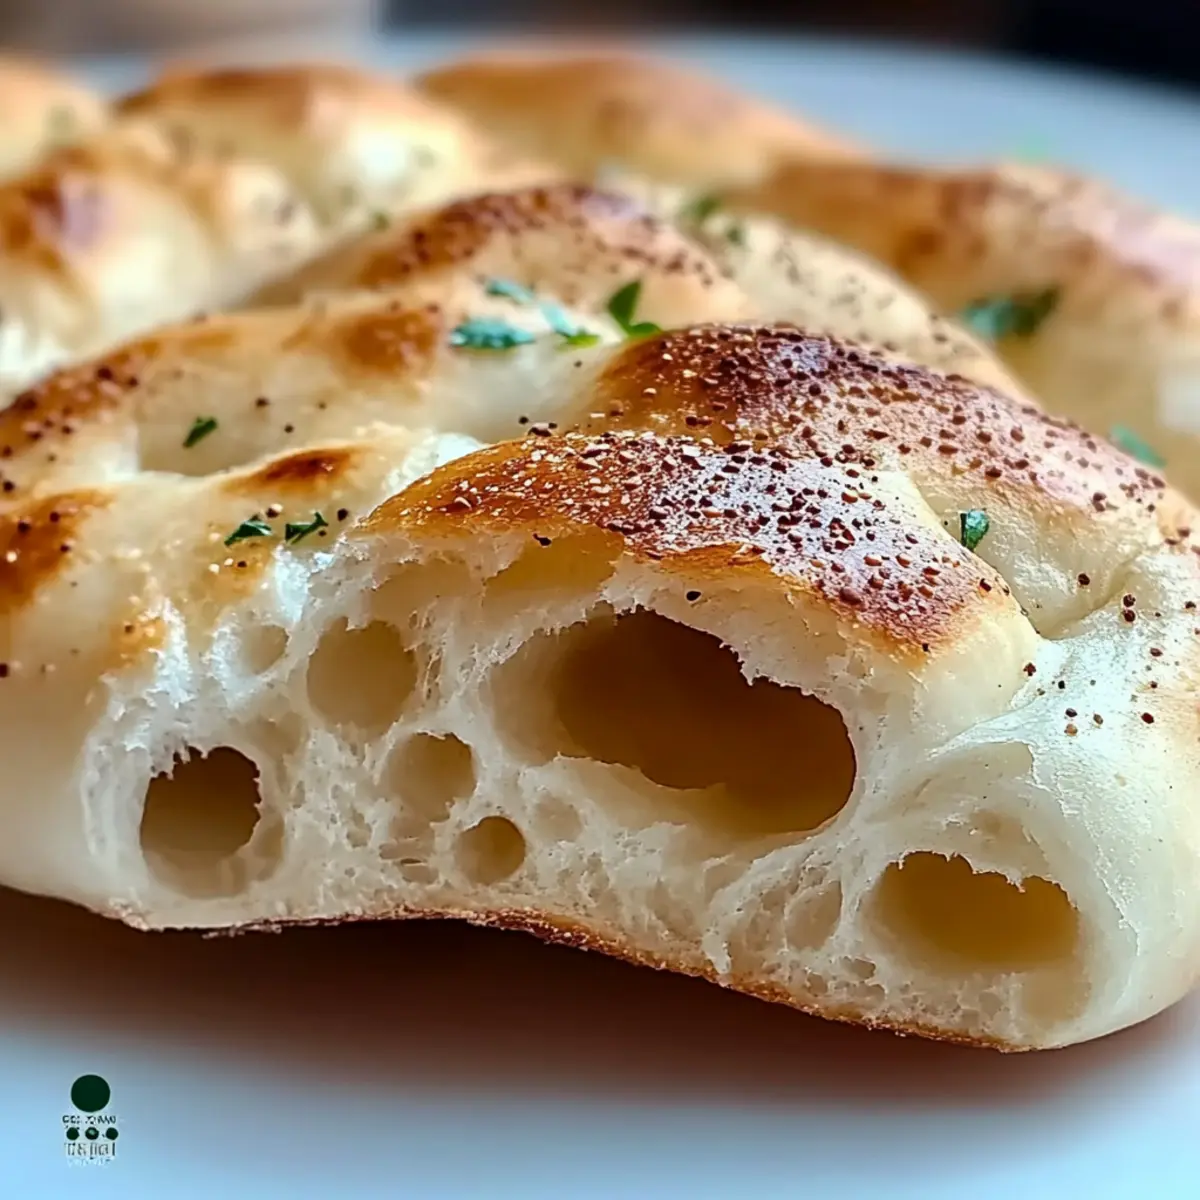
- Sesame seeds – Adds crunch and visual appeal, making your bread extra special.
- Chopped fresh parsley or cilantro – Introduces freshness and vibrant color, perfect for presentation.
Step‑by‑Step Instructions for No-Oven Turkish Bread
Step 1: Combine Dry Ingredients
In a large mixing bowl, whisk together 3 cups of all-purpose flour, 1 teaspoon of salt, 1 tablespoon of sugar, and 2 teaspoons of instant yeast until well blended. This mixture will form the base of your No-Oven Turkish Bread, providing structure and flavor. Make sure to set aside the bowl as you prepare the wet ingredients, ensuring a smooth transition to the next step.
Step 2: Mix in Wet Ingredients
In a separate bowl, combine 1 cup of warm milk and 1 cup of warm water. Gradually pour this liquid mixture into the dry ingredients while stirring with a wooden spoon or your hands until a rough dough forms. The warmth from the liquids helps activate the yeast, so you should notice it becoming slightly bubbly as you mix. Aim for a shaggy consistency before advancing to the kneading stage.
Step 3: Knead the Dough
Transfer the dough onto a floured surface and add 2 tablespoons of olive oil or melted butter. Knead for about 8-10 minutes, until the dough becomes smooth and elastic. You’ll know it’s ready when it’s slightly tacky but no longer sticky and can slowly spring back when pressed. This kneading process is crucial for achieving the fluffy texture characteristic of No-Oven Turkish Bread.
Step 4: Let the Dough Rise
Place the kneaded dough in a lightly greased bowl and cover it with a clean kitchen towel. Allow it to rise in a warm, draft-free area for about 1 hour, or until it doubles in size. During this time, the yeast will work its magic, and you’ll notice the dough becoming beautifully puffy and airy. Keep an eye on the dough, as it should be visibly larger and soft to the touch.
Step 5: Portion the Dough
Once risen, gently punch down the dough to release any excess air. Divide the dough into 8 equal portions and shape each piece into a round or oval ball. Lightly flour your work surface to prevent sticking during the shaping process. As you form each piece, envision fluffy No-Oven Turkish Bread that will be perfect for dipping into your favorite sauces—how rewarding!
Step 6: Cook in a Skillet
Heat a large skillet over medium heat. Carefully place one dough piece into the skillet and cook for about 2-3 minutes on one side. You’ll know it’s ready to flip when the bread puffs up slightly and turns golden brown underneath. Repeat with the remaining pieces, adjusting the skillet’s temperature as needed to ensure even cooking and prevent burning.
Step 7: Add Finishing Touches
After cooking, brush each bread round with melted butter immediately for extra flavor and shine. If desired, sprinkle with minced garlic, sesame seeds, or chopped herbs for an aromatic finish. This step adds a lovely touch to your No-Oven Turkish Bread, enhancing both its taste and visual appeal just before serving to family or friends.

Expert Tips for No-Oven Turkish Bread
Kneading Essentials: Ensure to knead the dough thoroughly for 8-10 minutes to develop gluten, which is vital for achieving that fluffy texture.
Avoiding Stickiness: Keep your work surface well-floured while shaping the dough to prevent it from sticking, ensuring beautifully formed bread.
Watch the Heat: Monitor the skillet temperature carefully; too hot can burn the bread, while too low may result in uneven cooking.
Yeast Activation: If using active dry yeast, remember to activate it with warm water and sugar first, waiting until it’s bubbly to guarantee a good rise.
Topping Flexibility: Feel free to get creative with toppings—try adding herbs or spices for a unique twist on your No-Oven Turkish Bread!
No-Oven Turkish Bread Variations
Customize your bread experience with these delightful twists that will elevate your No-Oven Turkish Bread into something truly special!
- Whole Wheat: Swap half the all-purpose flour with whole wheat flour for a heartier, more nutritious loaf.
- Cheesy Delight: Incorporate shredded cheese into the dough for a gooey, cheesy version that’s irresistible.
- Herb Infusion: Mix in your favorite fresh herbs, like rosemary or thyme, for an aromatic flavor boost.
- Spicy Kick: Add a pinch of red pepper flakes or minced jalapeños to the dough for a zesty touch.
- Sweet Twist: Consider adding cinnamon or nutmeg along with sugar for a subtly sweet bread, perfect for breakfast!
- Garlic Lovers: Mix minced garlic into the dough before rising for a fragrant, savory treat that pairs beautifully with dips.
- Nutty Texture: Sprinkle chopped nuts, like walnuts or pistachios, into the dough for added crunch and flavor.
- Pita Style: Roll the dough thinner to make tiny, soft pitas perfect for loading up with favorite fillings or dipping into Gingerbread Hot Chocolate for a comforting treat.
Feel free to get inspired and create your own unique version, just as you would with a wonderful side of Gingerbread White Russian!
What to Serve with No-Oven Turkish Bread?
Elevate your meal with vibrant flavors and delightful textures that perfectly complement this fluffy, homemade flatbread.
- Creamy Hummus: The richness of hummus pairs beautifully with the warm, fluffy bread, making each dip a delightful experience.
- Tzatziki Sauce: This refreshing yogurt-based sauce cools and balances the bread’s warmth, offering a burst of flavor with every bite.
- Grilled Vegetables: Charred veggies add a smoky touch, enhancing the rustic charm of the No-Oven Turkish Bread while providing a wholesome crunch.
- Savory Soups: Serve alongside a bowl of hearty lentil or tomato soup—each chewy piece soaks up the flavors to perfection!
- Olive Oil Dip: A simple blend of olive oil with herbs makes for an elegant starter; dip pieces of bread for a rich, aromatic flavor.
- Roasted Garlic Butter: Spread warm, creamy garlic butter on the bread, turning it into a savory treat that enhances every meal.
- Feta Cheese Crumbles: Top with crumbled feta for a salty kick; the bread’s mildness lets the cheese shine in taste and texture.
- Fresh Salad: Accompany with a vibrant cucumber and tomato salad that adds a refreshing crunch—perfect for balancing the warm, soft bread.
- Red Wine: Enjoy with a glass of light red wine to enrich the experience, complementing the flavors without overwhelming the dish.
- Baklava: For dessert, serve with sweet baklava, where the flaky pastry echoes the bread’s softness, perfect for a delightful finish!
How to Store and Freeze No-Oven Turkish Bread
Room Temperature: Store the bread at room temperature in an airtight container for up to 2 days for optimal freshness. This keeps the bread soft and delicious.
Fridge: If you want to extend freshness, wrap the bread tightly in plastic wrap and store it in the fridge for up to a week. Just be aware it may lose some softness.
Freezer: For longer storage, freeze the No-Oven Turkish Bread in a zip-top bag for up to 3 months. Place parchment paper between slices to prevent sticking.
Reheating: To enjoy, simply reheat the thawed or frozen bread in a skillet or microwave for a few seconds until warm. This revives its fluffy texture!
Make Ahead Options
These No-Oven Turkish Bread are perfect for busy weeknights when you want fresh, homemade flavor without the hassle! You can prepare the dough up to 24 hours in advance by following the first four steps, then refrigerating it in a greased bowl covered with plastic wrap to prevent drying out. When you’re ready to cook, simply let the dough rest at room temperature for about 30 minutes before portioning and cooking as instructed. Alternatively, you can fully cook the bread and store it in an airtight container at room temperature for up to 2 days; just reheat in a skillet for that delightful, fresh-out-of-the-pan taste. Enjoy the convenience of meal prep while keeping your No-Oven Turkish Bread just as fluffy and delicious!
No-Oven Turkish Bread Recipe FAQs
What type of flour should I use for No-Oven Turkish Bread?
I recommend all-purpose flour for the best texture, but you can also try whole wheat flour if you’re looking for a denser bread. Just keep in mind that whole wheat may alter the fluffiness!
How should I store my No-Oven Turkish Bread once it’s made?
Store the bread at room temperature in an airtight container for up to 2 days. If you’d like to keep it fresh longer, consider wrapping it tightly in plastic wrap and refrigerating it for up to a week.
Can I freeze No-Oven Turkish Bread?
Absolutely! To freeze, place your No-Oven Turkish Bread in a zip-top bag, ensuring it’s sealed well. You can freeze it for up to 3 months. Lay parchment paper between slices to stop them from sticking together.
What if my dough doesn’t rise?
If your dough isn’t rising, it might be due to inactive yeast. Ensure your yeast is fresh and properly activated by mixing it with warm water and a touch of sugar. If it doesn’t foam after 5-10 minutes, it’s best to use a new packet.
Can I add other ingredients to the dough?
Very! You can customize your No-Oven Turkish Bread by incorporating shredded cheese, herbs, or spices directly into the dough before kneading. This adds additional flavor and makes it uniquely yours!
Is this bread safe for pets or allergies?
The basic ingredients in No-Oven Turkish Bread (flour, yeast, water, milk) are generally safe for humans but can pose risks for pets. Additionally, if anyone has allergies to dairy or gluten, consider using alternatives such as non-dairy milk and gluten-free flour blends.
Fluffy No-Oven Turkish Bread – Simple Skillet Delight
Ingredients
Equipment
Method
- In a large mixing bowl, whisk together 3 cups of all-purpose flour, 1 teaspoon of salt, 1 tablespoon of sugar, and 2 teaspoons of instant yeast until well blended.
- In a separate bowl, combine 1 cup of warm milk and 1 cup of warm water. Gradually pour this into the dry ingredients while stirring until a rough dough forms.
- Transfer the dough onto a floured surface and knead for about 8-10 minutes until the dough is smooth and elastic.
- Place the kneaded dough in a greased bowl and cover. Let it rise in a warm area for about 1 hour until it doubles in size.
- Gently punch down the dough, divide it into 8 portions, and shape each into a ball.
- Heat a large skillet over medium heat. Cook each dough piece for 2-3 minutes until golden brown.
- Brush each cooked round with melted butter and sprinkle with optional toppings.
Leave a Reply