
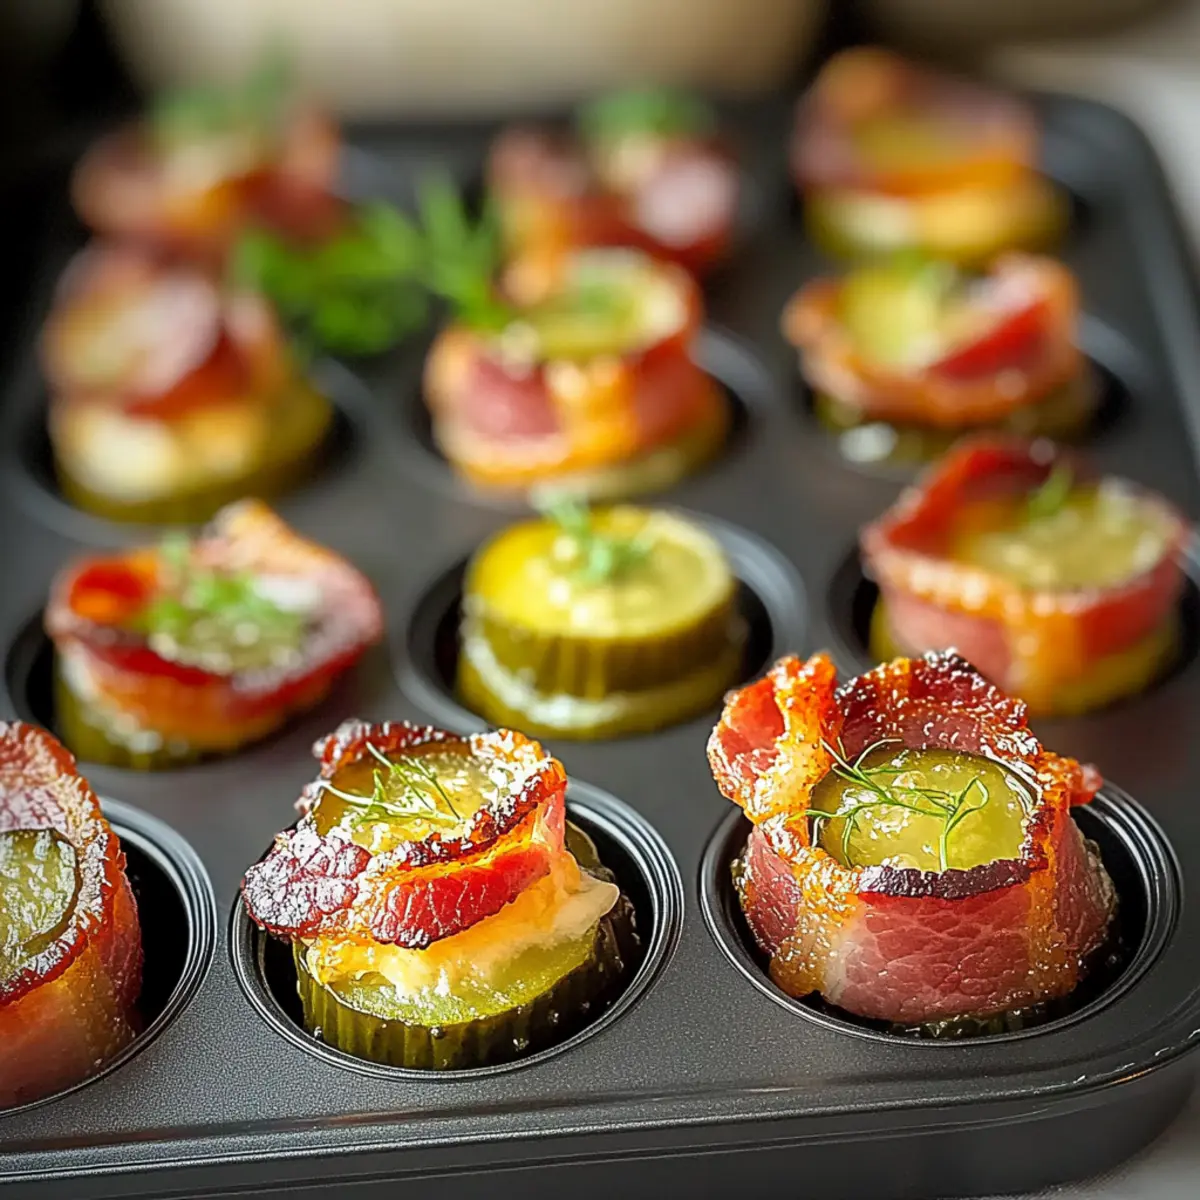
As I pulled open the fridge for a last-minute game day snack, I was hit with a craving that called for something exciting and utterly delicious. Enter the showstopper: Tasty Cheese Dill Pickle Bacon Shots! This irresistible appetizer combines the savory crunch of bacon with a creamy filling that perfectly balances the tanginess of pickles. They’re not only a fun twist on traditional party snacks, but they also come together in a flash—ideal for those who want to impress without spending hours in the kitchen. Your guests will be drawn in by their bold flavors, making them the ultimate crowd-pleaser, whether you’re throwing a big game watch or a casual get-together. Ready to discover how these delicious bites come to life? Let’s get cooking!
Why are Dill Pickle Bacon Shots irresistible?
Bold flavors: These Tasty Cheese Dill Pickle Bacon Shots are packed with a mouthwatering combination of savory bacon and creamy cheese that makes every bite a delight. Quick to prepare: You’ll appreciate how easily they come together, making them a perfect choice for last-minute gatherings. Versatile option: Serve them as a fun game day snack or at elegant parties, ensuring they fit any occasion. Crowd-pleasing appeal: Everyone loves a dish that invites conversation, and these funky shots are a surefire conversation starter! Looking for more fabulous appetizers? Check out our delicious Bacon Ranch Quesadilla or the comforting Baked Mac Cheese.
Tasty Cheese Dill Pickle Bacon Shots Ingredients
• These flavorful bites are a must-try for any party or game day!
-
For the Filling
-
Cream Cheese – Provides a creamy base; ensure it’s softened to achieve a smooth mixture.
-
Sour Cream – Adds tanginess and enhances the creaminess of the filling.
-
Diced Pickles – Introduces crunch and tang; drain well to avoid excess moisture.
-
Shredded Cheddar Cheese – Enhances flavor and richness; gives these Tasty Cheese Dill Pickle Bacon Shots their cheesy goodness.
-
Garlic Powder – Adds savory depth for a well-rounded flavor.
-
Pickle Juice – Amplifies the pickle flavor and contributes moisture.
-
Fresh Dill – Offers a fresh herby note; feel free to swap with parsley for a milder taste.
-
For the Bacon Wrapping
-
Bacon – Use center-cut for even cooking and a perfect crisp. Avoid thick cuts for the best results.
-
Toothpicks (optional) – Handy for securing the bacon roll-ups.
Get ready to gather your ingredients and create these delicious shots that will elevate any gathering!
Step‑by‑Step Instructions for Tasty Cheese Dill Pickle Bacon Shots
Step 1: Preheat and Prepare
Begin by preheating your oven to 375°F (190°C) and greasing a mini muffin tin lightly with cooking spray or oil. This will help the bacon cups crisp up nicely. Ensure your tin is ready as you’ll place the bacon-wrapped creations in it later, giving them the perfect shape.
Step 2: Make the Filling
In a mixing bowl, combine softened cream cheese and sour cream. Use a hand mixer or fork to beat them until light and fluffy, taking about 2-3 minutes. Gradually mix in diced pickles, shredded cheddar cheese, garlic powder, pickle juice, and fresh dill. Blend until the mixture is smooth and well combined; this creamy filling is the heart of your Tasty Cheese Dill Pickle Bacon Shots.
Step 3: Prepare the Bacon
Carefully cut each bacon strip in half lengthwise to yield 24 strips. This will allow you to wrap the bacon around your filling perfectly. The bacon needs to be thin enough to crisp properly in the oven, so center-cut strips work best for achieving that delightful texture throughout your dish.
Step 4: Assemble the Shots
Take approximately 1 tablespoon of the creamy filling and place it at one end of each bacon strip. Roll the bacon strip tightly around the filling and tuck in the edges; if needed, secure them with a toothpick to keep everything in place. This rolling step is essential, as it helps create that delicious burst of flavors in each bite!
Step 5: Bake the Bacon Shots
Place each bacon roll-up into the greased mini muffin tin, ensuring they fit snugly. Bake in the preheated oven for 40-45 minutes, keeping an eye on them. When the bacon is crispy and golden, it’s time to take them out. The delightful smell wafting through your kitchen is a sure sign that these Tasty Cheese Dill Pickle Bacon Shots are almost ready.
Step 6: Cool and Serve
Once baked, allow the bacon shots to cool in the tin for about 3-5 minutes. This resting time will let them firm up slightly, making them easier to remove and ensuring that the filling doesn’t ooze out. For an added touch, you can garnish with fresh dill or a slice of pickle on top before serving, which enhances the presentation beautifully.
Helpful Tricks for Tasty Cheese Dill Pickle Bacon Shots
-
Bacon Selection: Choose center-cut bacon for even cooking; it strikes the perfect balance between flavor and crispiness, enhancing your Tasty Cheese Dill Pickle Bacon Shots.
-
Cream Cheese Tip: Always use softened cream cheese to avoid lumps in the filling. This ensures a smooth, creamy texture that makes each shot irresistible.
-
Pickle Preparation: Don’t skip draining your diced pickles thoroughly; excess moisture can lead to soggy bacon cups. A dry filling keeps the bites firm and packed with flavor.
-
Wrapping Technique: When you roll the bacon around the filling, make sure to tuck in the edges securely. This leverages a burst of flavor with each bite while keeping everything intact!
-
Baking Insight: Keep an eye on the bacon while it bakes. If it’s not crispy enough after 40-45 minutes, give it a few extra minutes in the oven, but check regularly to avoid burning.
How to Store and Freeze Tasty Cheese Dill Pickle Bacon Shots
Fridge: Store leftovers in an airtight container for up to 3 days. While they may lose some of their crispy texture, they’ll still be packed with flavor for your next snack attack.
Freezer: For longer storage, freeze the bacon shots in a single layer on a baking sheet until firm, then transfer to a freezer bag. They can last up to 2 months, making them a convenient option when cravings strike!
Reheating: To enjoy your Tasty Cheese Dill Pickle Bacon Shots again, reheat in the oven at 350°F (175°C) for around 10-15 minutes, ensuring they regain their crispy glory before serving.
Make-Ahead Tip: The creamy filling can be prepared up to 2 days in advance and stored in the fridge, making it easier to whip up these delightful shots when you’re ready to bake!
Tasty Cheese Dill Pickle Bacon Shots Variations
Feel free to mix and match to create your perfect version of these delightful bacon shots!
-
Turkey Bacon: Swap regular bacon for turkey bacon for a lighter option. Just keep in mind it might not get as crispy.
-
Spicy Kick: Add a dash of hot sauce or seasoning to the cheese filling for a delightful spice that gives these shots an exciting twist. Spicy lovers will adore this variation!
-
Cheesy Twist: Use flavored cream cheese, like chive or jalapeño, for a unique flavor twist that enhances the cheesy aspect deliciously.
-
Herb Swap: Replace fresh dill with parsley or chives for a milder flavor profile; it can bring a lovely freshness while changing the dynamic entirely.
-
Sweet and Savory: Try adding a tablespoon of honey or maple syrup to the filling. The sweetness pairs beautifully with the saltiness of the bacon.
-
Pickle Variety: Explore different types of pickles—such as bread and butter or spicy garlic pickles—to discover a new flavor adventure. Your taste buds will thank you!
-
Creaminess Boost: Mix in a little crumbled feta or blue cheese with the cheddar for a robust flavor that brings a gourmet touch to your Tasty Cheese Dill Pickle Bacon Shots.
Explore these variations and find the perfect combination to suit your taste. For more flavor inspiration, don’t forget to check out our delicious Broccoli Potato Cheese or the fun Sugar Cookie Shots. Happy cooking!
What to Serve with Tasty Cheese Dill Pickle Bacon Shots
Nothing elevates your gathering quite like a thoughtfully curated spread to accompany these delightful bites.
-
Crispy Chicken Wings: The savory crunch of wings pairs perfectly with the creamy richness of the bacon shots. They’re both crowd favorites that complement each other beautifully.
-
Classic Deviled Eggs: These add a simple elegance to your buffet while delivering a tangy kick that balances the flavors of the bacon shots.
-
Fresh Veggie Platter: A medley of colorful, crunchy vegetables offers a refreshing contrast to the savory bites, cleansing your palate between flavors.
-
Warm Pretzel Bites: Soft, warm pretzel bites provide a delightful chewiness that makes them the ideal dipper for accompanying mustard or cheese sauce.
-
Spicy Jalapeño Poppers: For those who crave a little heat, these zesty bites match perfectly with the creamy goodness of the bacon shots, creating a flavorful explosion.
-
Craft Beers or Cocktails: A chilled craft beer or a refreshing cocktail enhances the taste experience, pairing wonderfully with the richness of your Tasty Cheese Dill Pickle Bacon Shots.
Make Ahead Options
These Tasty Cheese Dill Pickle Bacon Shots are a fantastic choice for meal prep, saving time on those busy weeknights or party prep days! You can prepare the creamy filling (cream cheese, sour cream, pickles, cheddar, garlic powder, pickle juice, and dill) up to 2 days in advance, storing it in an airtight container in the fridge to maintain its smooth texture. To prevent the bacon from becoming soggy, wait to wrap and bake the bacon shots until just before serving. When you’re ready to impress your guests, wrap the filling in bacon, pop them in the oven (at 375°F for 40-45 minutes), and enjoy the same delicious flavor as if they were made fresh!
Tasty Cheese Dill Pickle Bacon Shots Recipe FAQs
What type of bacon is best for Tasty Cheese Dill Pickle Bacon Shots?
Absolutely, I recommend using center-cut bacon! It’s leaner, cooks evenly, and provides the perfect balance of flavor and crispiness. Avoid thick-cut bacon, as it may not crisp up well and could overpower the delicate filling.
How do I store leftovers of Tasty Cheese Dill Pickle Bacon Shots?
Store any leftovers in an airtight container and keep them in the fridge for up to 3 days. While they might lose some of their crispy texture, they retain their delicious flavor, making for a perfect snack on the go!
Can I freeze Tasty Cheese Dill Pickle Bacon Shots?
Yes, you can! For the best freezing results, arrange the bacon shots in a single layer on a baking sheet and freeze them until solid. Next, transfer them to a freezer bag, where they can be stored for up to 2 months. When you’re ready to enjoy them, just follow the reheating instructions to regain their crispy goodness.
What should I do if my bacon shots are soggy?
If you find your bacon shots are soggy, a couple of things might have happened. Make sure to drain your diced pickles thoroughly; excess moisture is a common culprit. Also, pat the bacon strips dry with paper towels before wrapping to absorb any extra moisture. If they are already cooked, try placing them back in the oven at a low temperature to help evaporate some moisture.
Can I make Tasty Cheese Dill Pickle Bacon Shots ahead of time?
Absolutely! You can prepare the creamy filling and store it in the fridge for up to 2 days before you roll and bake. This makes assembly a breeze, ideal for those last-minute gatherings! Just be sure to keep your bacon and filling separate until you’re ready to bake.
Irresistible Tasty Cheese Dill Pickle Bacon Shots You’ll Love
Ingredients
Equipment
Method
- Preheat your oven to 375°F (190°C) and grease a mini muffin tin lightly with cooking spray or oil.
- In a mixing bowl, combine softened cream cheese and sour cream. Beat until light and fluffy, about 2-3 minutes.
- Gradually mix in diced pickles, shredded cheddar cheese, garlic powder, pickle juice, and fresh dill. Blend until smooth.
- Cut each bacon strip in half lengthwise to yield 24 strips for wrapping.
- Take approximately 1 tablespoon of the filling and place it at one end of each bacon strip. Roll tightly and tuck in the edges.
- Place each bacon roll-up into the greased mini muffin tin and bake for 40-45 minutes until crispy and golden.
- Allow the bacon shots to cool in the tin for about 3-5 minutes before serving.
Leave a Reply